
Spin Turntable System
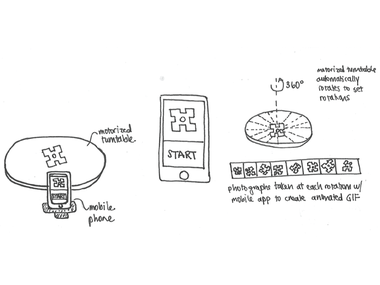
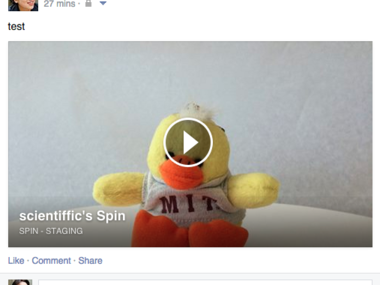
This research project explores how to create documentation that can draw people in. The plan is to build a physical turntable that helps you capture animated GIFs of your DIY projects over time, compiling the footage in a way that shows how your project came to life.


"Can the format of documentation be more engaging?"
For this project, I'd like to explore how documentation might draw people in and entice them to learn more about a project.
One direction I'm especially interested in is the use of animation and / or video to show how a project develops, taking inspiration from the popularity of Vine and GIFs. I also want to think about documentation as something that has a physical presence in the space and doesn't complete with your design process - switching back and forth between designing and documenting can be frustrating and difficult.
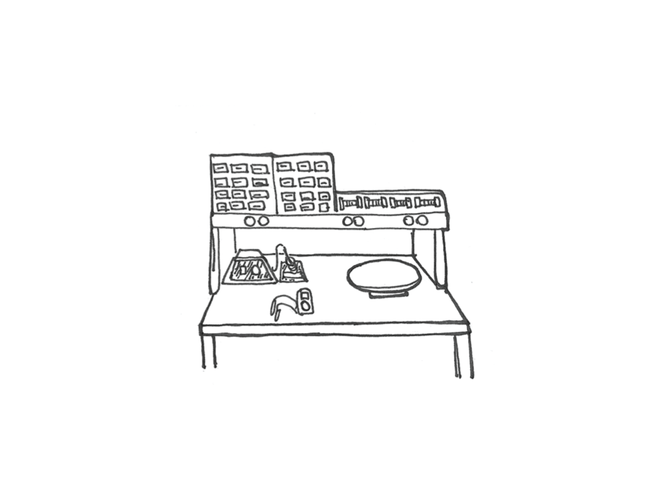
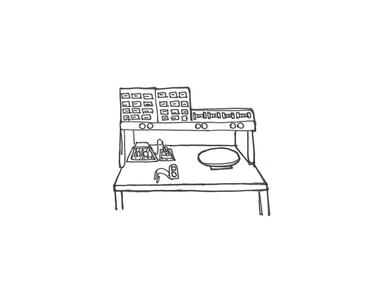
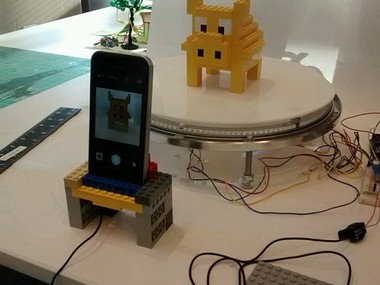
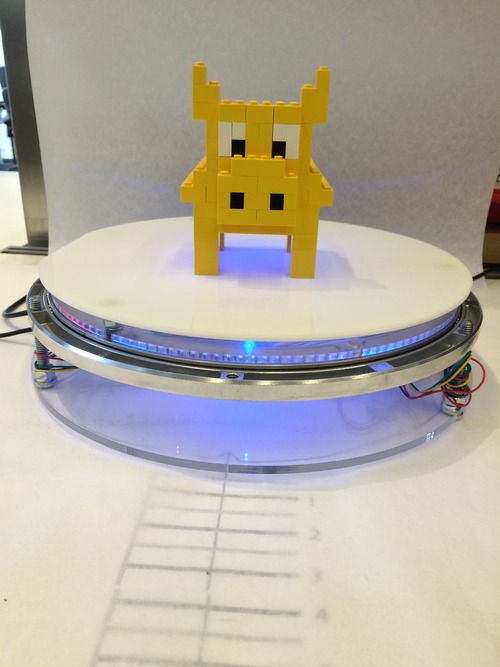
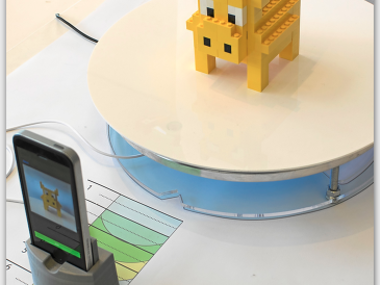
My current idea is to develop a physical turntable and mobile application that helps capture images of your project over time, compiling it into an animated GIF that you can share with others. This turntable would sit at a workbench or table within a Makerspace and would specifically focus on capturing physical prototypes.
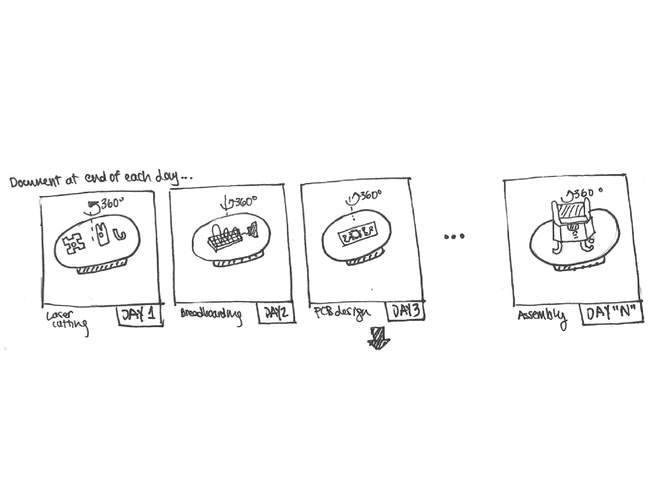
At the end of each day, you can place your project on the motorized turntable, which rotates and syncs with your mobile phone to take photographs of the current state of your project. Each day of the project is represented as a full rotation on the turntable, so that together, you get footage of your project as it evolves over time.
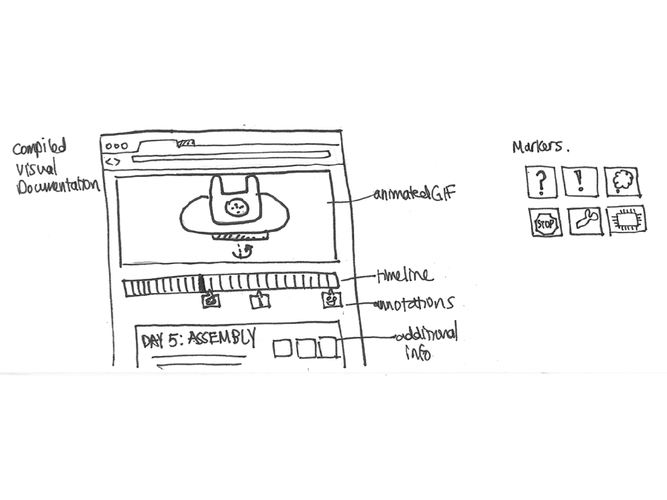
You can check out sketches of the design in the images above. I'll be updating this BiP project as I develop the project - please leave any comments if you have suggestions or feedback!
Comments (0)
There are two other projects that inspired this project. The first is a turntable system my friend made in How to Make Almost Anything, where the turntable connects to a DSLR to help take professional shots of an object. You can check out the project here:
http://fab.cba.mit.edu/classes/863.13/people/geoff/index.html (click on Final Project)
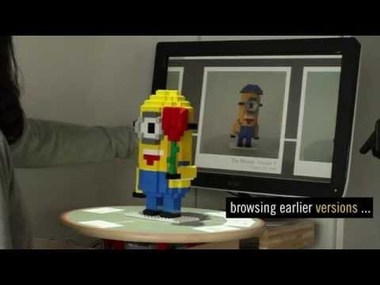
The other is a research project called Catch-Up 360, which is used to compare different versions of a prototype and help people collaborate over physical objects remotely.
I wanted to combine the idea of a DIY turntable with capturing how a project is built over time. I also specifically wanted to focus on exporting animations that could be easily shared.
The guiding principles for this turntable project are the following:
- The turntable should be open and accessible, using standard parts that people can easily purchase to build their own.
- The system should export animations that help people share their projects on other social networks (Twitter, Tumblr, etc.)
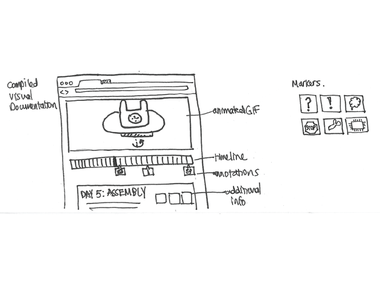
- The animation viewer should highlight key moments in the process (easily browsable and skimmable)
Comments (0)
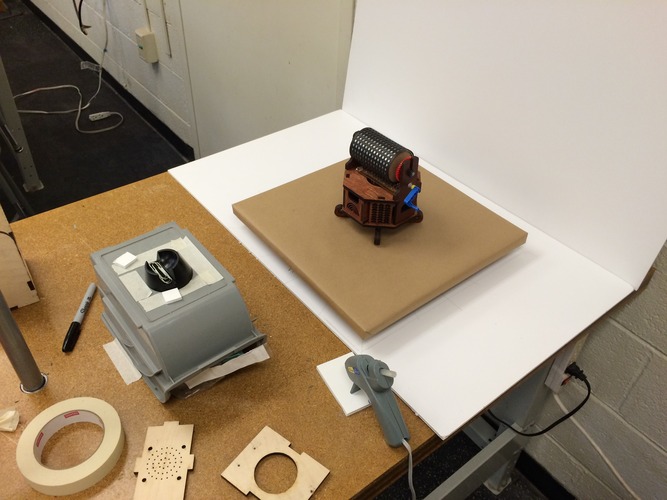
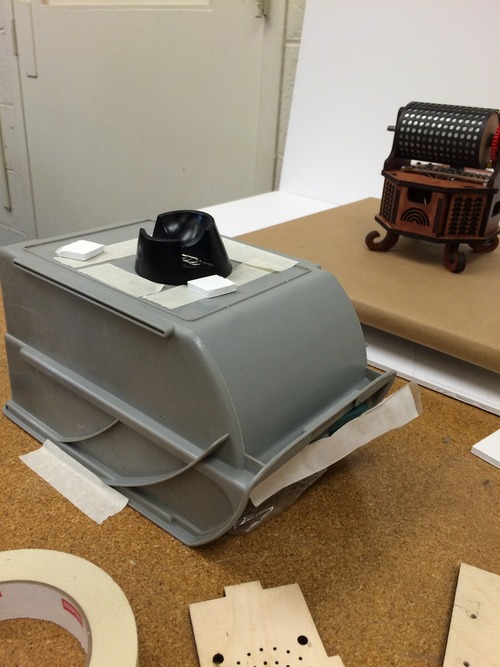
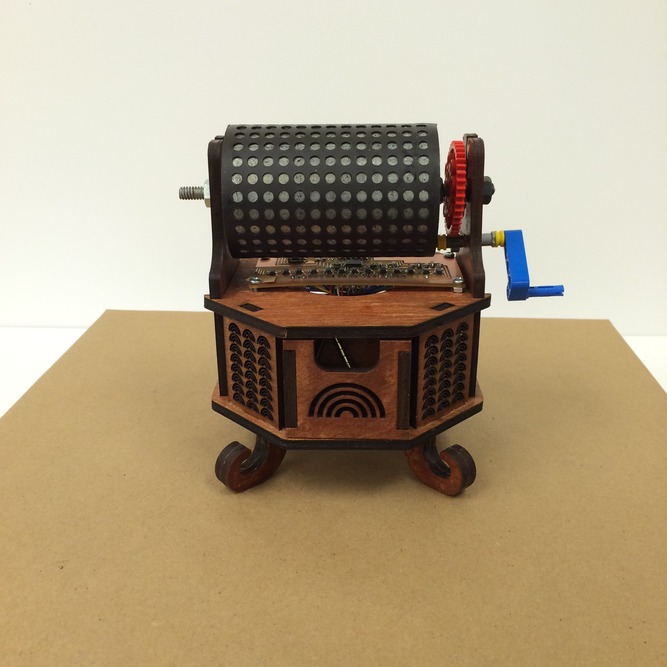

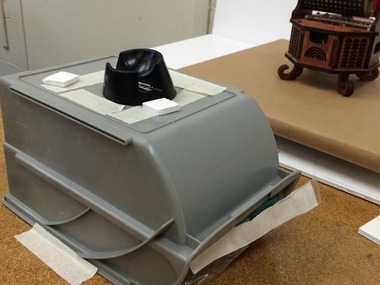
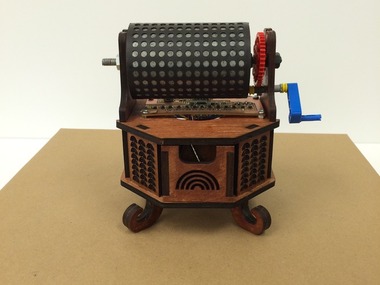
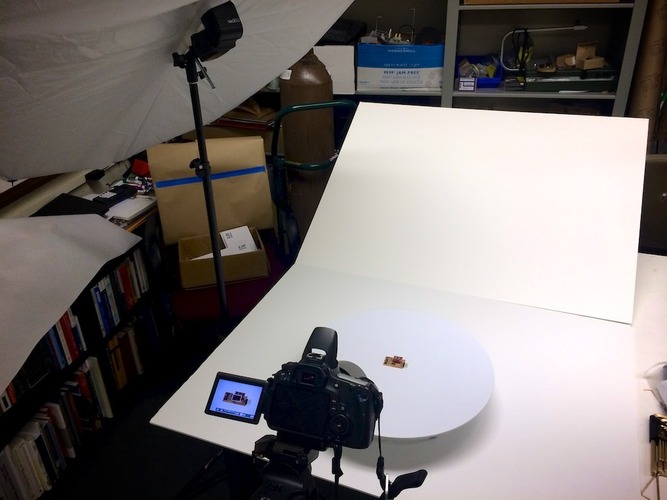
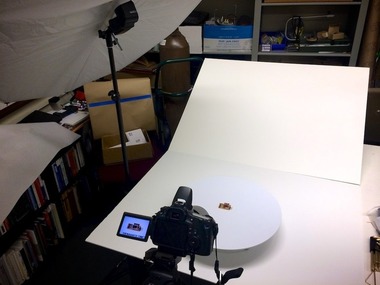
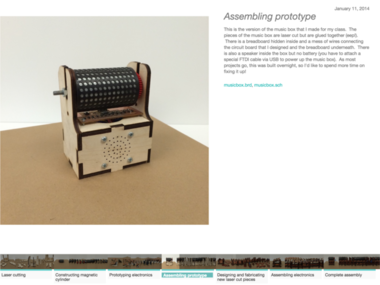
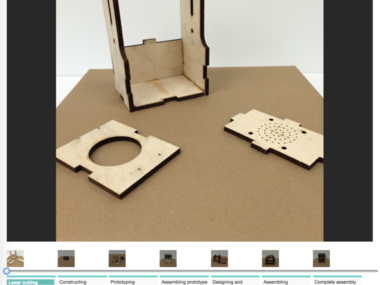
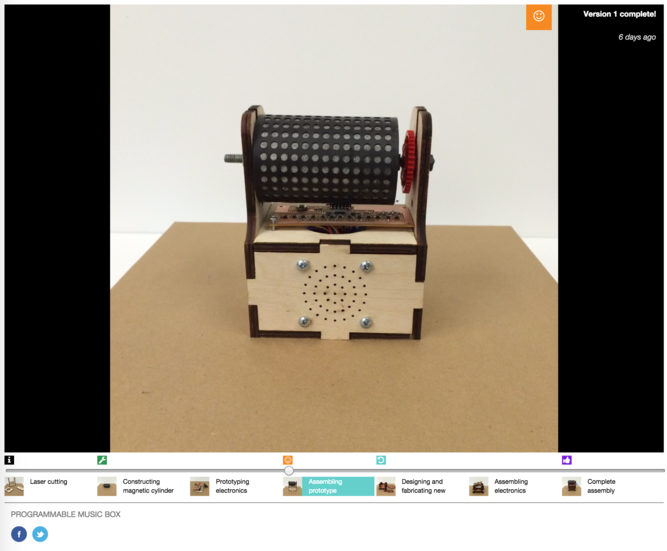
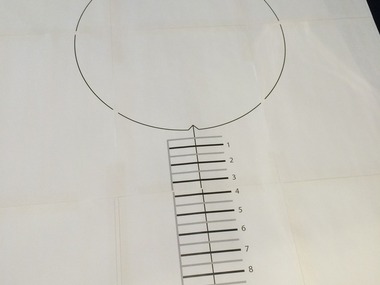
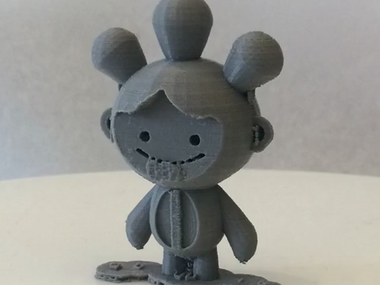
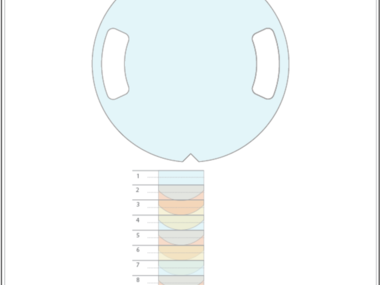
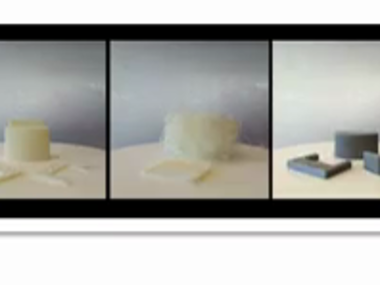
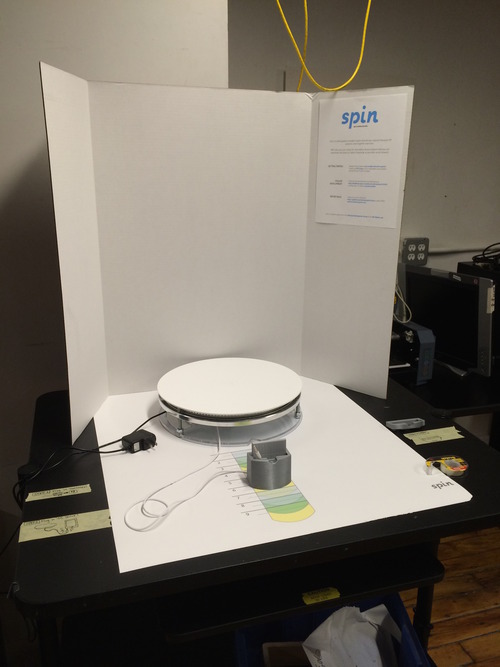
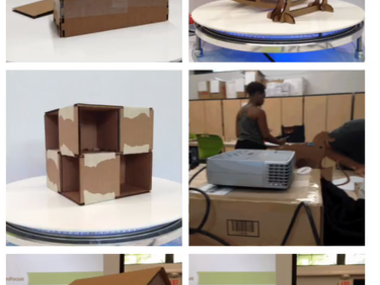
To test out what an animated GIF of a project might look like, I retroactively took a project that I had already worked on (The Programmable Music Box) and documented it manually with a turntable. Unfortunately, I had recently cleaned out my office and thrown away many of my old prototypes, but I tried to salvage what I had to show different stages of the project.
I used white foamcore to create a neutral background and then covered an existing manual turntable with butcher paper. I marked 16 points on the foamcore in which to rotate the turntable and propped my iPhone on a small stand to take the photographs. In total, I documented 6 prototypes leading up to the final design, leading to 112 images in total.
With my newly taken images, I could start prototyping the actual GIF viewer!
Comments (0)


For the web interface (GIF viewer), I'm starting off using a combination of the Galleria javascript image gallery framework and Gifshot library for exporting GIFs from images.
In my first mockup, I showed additional information to the right of the animation:
V1: http://web.mit.edu/ttseng/Public/360/v1/
Note: The transitioning between images doesn't appear to be right on mobile, so please view the mockup on a desktop instead.
- You can use the space bar to play / pause the animation
- You can use your arrow keys to scrobble
- I'm aware of the flickering issue with the Galleria library and am working to resolve it. (:
I also made a quick mockup of what this GIF might look like viewed through the (to-be-built) mobile application, which would let you share to your social networks:
http://web.mit.edu/ttseng/Public/360/v1/mobile.html
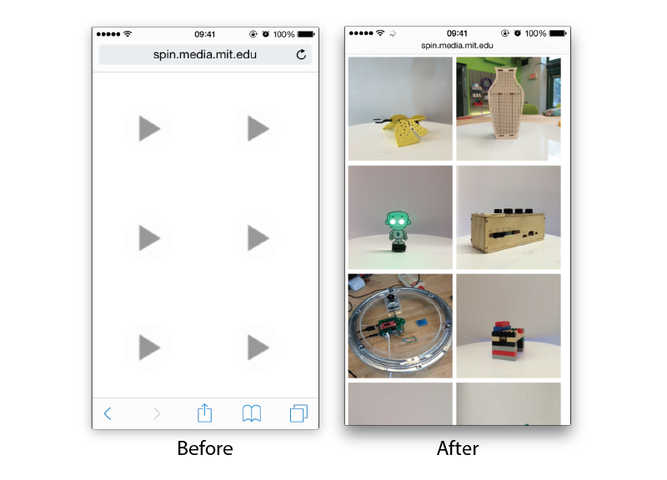
I also wanted to explore what the interface might look like with very minimal text. I think adding large amounts of text can really change the feel of documentation, making it lean more towards instructional documentation. So I also decided to build a mockup that really focuses on the animation and reduces the amount of text on the page.
Comments (0)
I'm basing this turntable design off of my friend's turntable, which he created for the Media Lab class How to Make Almost Anything: http://fab.cba.mit.edu/classes/863.13/people/geoff/index.html (you can find the project by clicking the link "Final Project")
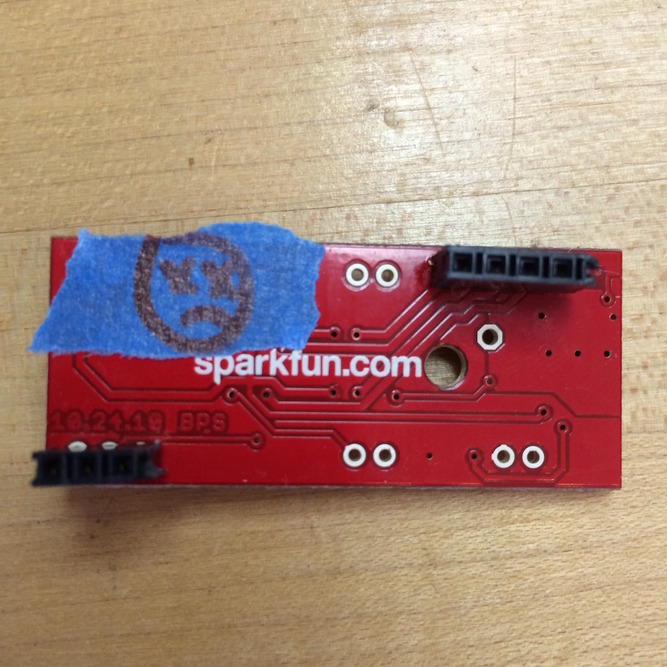
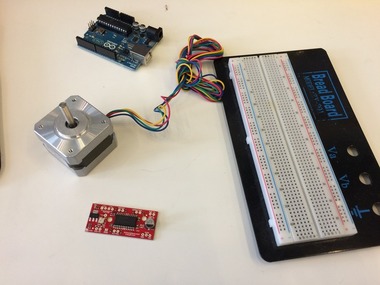
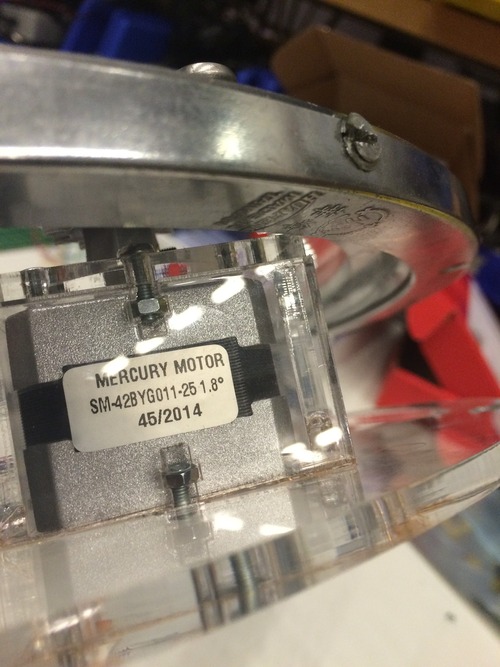
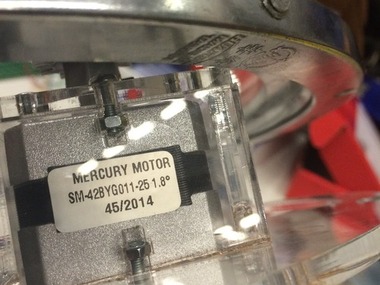
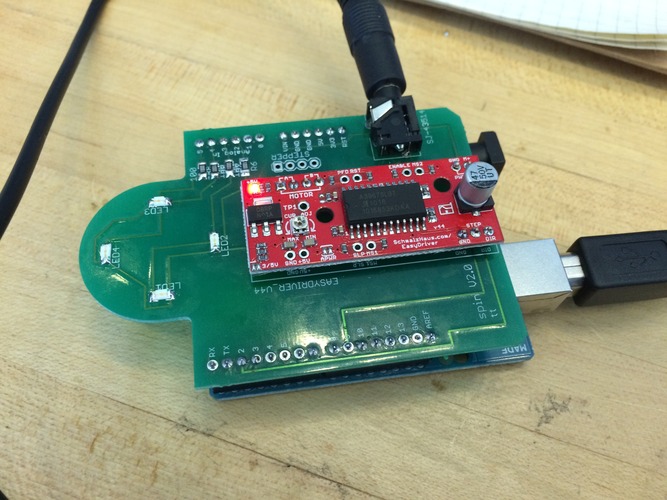
I purchased most of the hardware from McMaster, including a lazy-susan turntable, and ordered electronics from Sparkfun, including a stepper motor and motor driver board.
The remaining parts (like fasteners) I purchased from a local hardware store.
You can view all the parts I've been working with so far here: https://docs.google.com/spreadsheets/d/1yriQFKPACUN8z80e1JI1KAx2dcZP9s1S5_j7al98Be4/edit?usp=sharing
Comments (0)


Attempt 1
To get the stepper motor moving, I first followed this tutorial:
http://bildr.org/2011/06/easydriver/
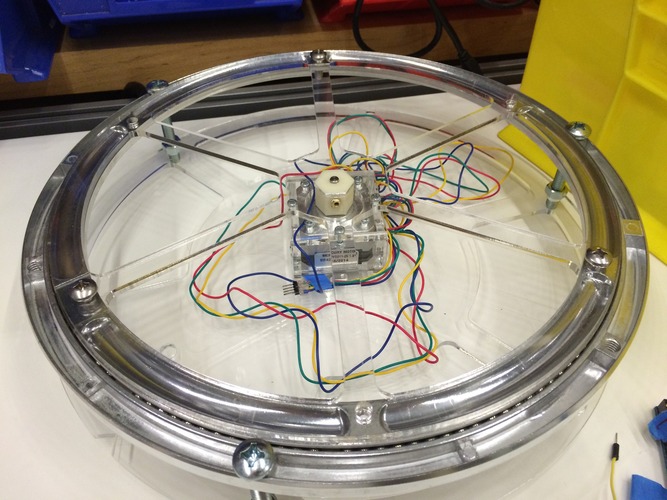
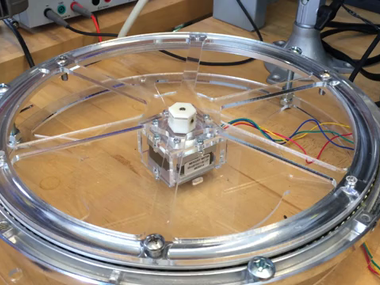
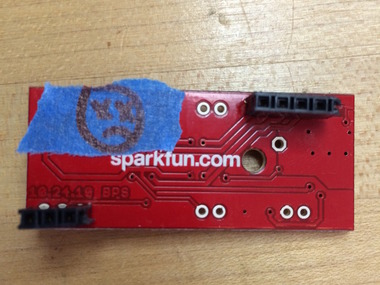
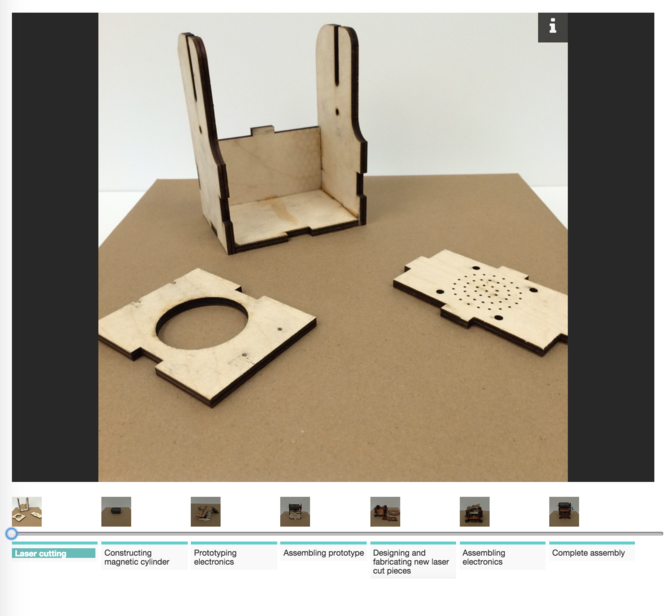
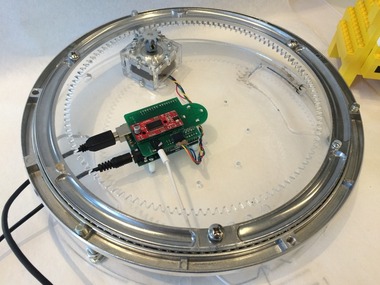
I also laser cut all the components for the turntable and began assembling it. However, when I attached the top of the turntable to the motor, there was a good deal of friction, and in the process of disconnecting the motor, I appear to have fried the stepper motor chip on the driver board from Sparkfun.
Lesson 1: Don't disconnect the motor from the EasyDriver board before de-powering the board! It fries the chip. ):
Luckily, Sparkfun's customer service is very good, so they sent me a new board to work with.
Attempt 2:
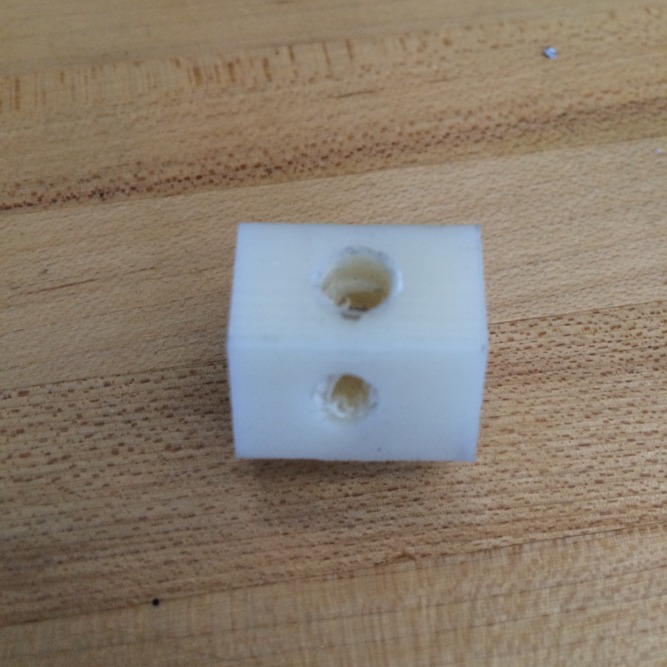
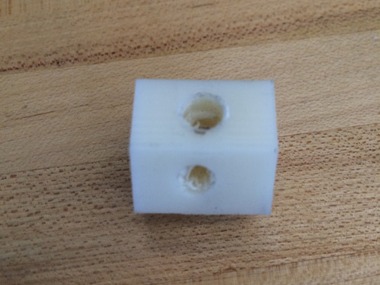
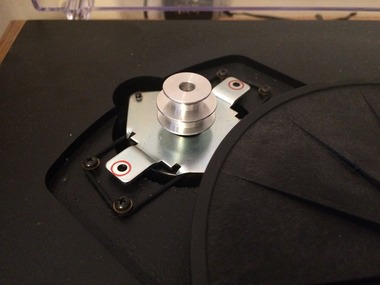
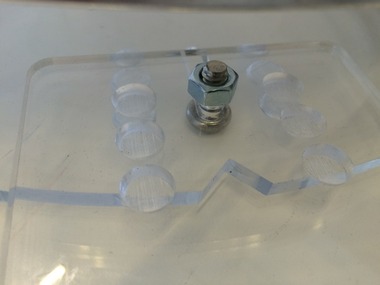
After getting my new board, I found that the coupling (that attaches to the motor shaft and turns the turntable platform) was not actually securely attached to the motor shaft. The way the coupling is attached is through set screws on the side of the coupling, which are screwed into heated brass inserts (check out a video of them here: https://www.youtube.com/watch?v=KUEFhiFB6Zs). In my first attempt to install the brass insert, I must have heated the insert too long becasue the internal threads seem to have gotten deformed. That led me to reinstall the insert a second time, which opening up the plastic hole too much so that the insert was actually getting pushed out when I tried screwing the set screw to hold the coupling in place.
Anyhow, I solved the problem by drilling a second set of holes and reapplying the inserts.
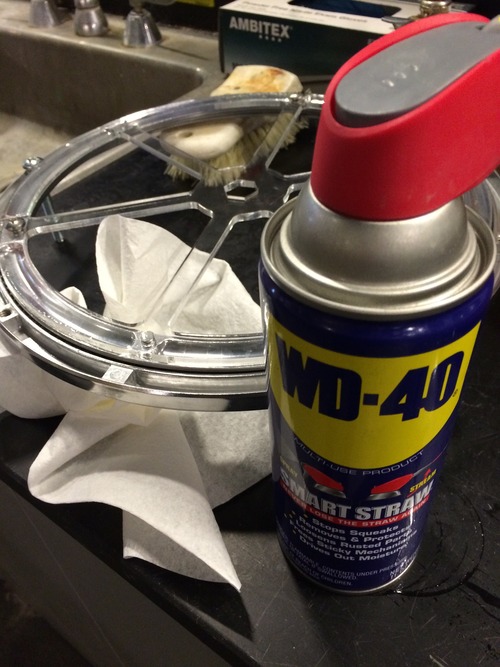
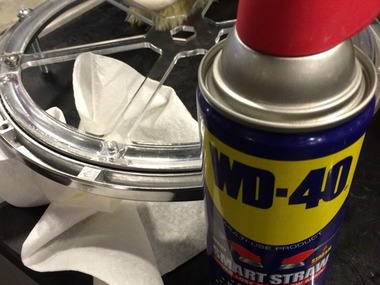
But, alas, the turntable still seemed to have too much friction. It would rotate about 50 degrees before it would get 'stuck.' I tried to fix the issue with lubricant (WD-40), but before I could really check whether this solved the issue, I fried a second board (!) =/
This time it happened because when I was re-powering the board, my jumper cable accidentally touched another component on the board. I saw a little spark, and the motor is no longer being powered. Hopefully it's an issue with the motor board and not the stepper motor. I ended up ordering a bunch more boards to have as backups and will be able to test later this week.
Lesson 2: Don't let your jumper cables accidentally short components on the EasyDriver!!
Comments (0)
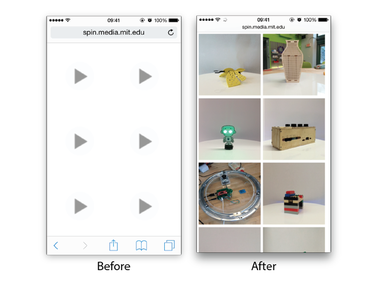
In this second interface, I focused on the animation by keeping it front and center:
V2: http://web.mit.edu/ttseng/Public/360/v2/
I'm leaning towards V2, which reduces the amount of text so that the documentation feels less cumbersome. Rather than adding full descriptions of everything that happened, users could add icons with a small note describing succinctly what they're working on or their emotions at the time of the capturing.
Some of the things I've learned from building these mockups:
- Exporting GIFs is going to be tricky.
- The library I'm using is not designed for compiling > 100 images into a GIF, so it takes a few minutes to export (right now in the mockup, there isn't really feedback that it's being exported when you click the "export" button, but it is in the background and will pop up a download window when it's complete).
- Additionally, different social networks have different limitations for sharing GIFs. Some don't support GIFs at all (like FB, Vine, or Instagram), while Twitter requires the GIF to be under 2MB. This means to actually tweet a GIF, it would need to have an extra step of compressing the GIF to make it small enough to tweet. Or, alternatively, I could explore video compilation options (to open up other networks), or the tweets could be focused on a single rotation (~16 images).
I used this site to export a GIF small enough to upload the GIF you see in this step to Build in Progress:
https://compressor.io/compress
After looking into this more, I found that sites that let you embed GIFs actually convert them to mp4s first to save space. So rather than creating an image slideshow and generating GIFs using these images, I decided to explore what it might be like to do all of this using video instead.
Comments (0)
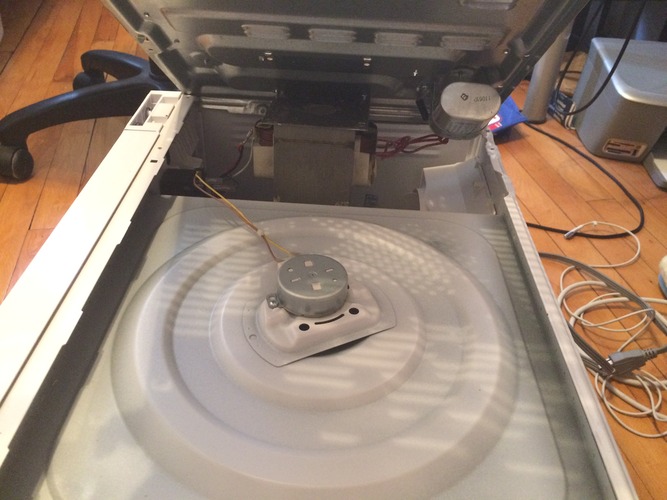
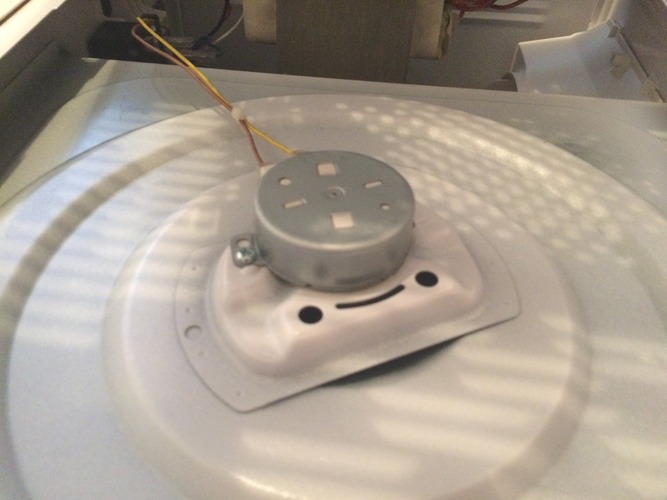

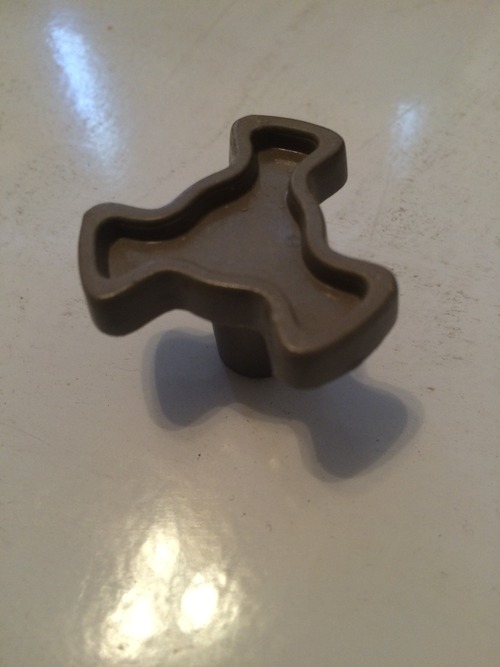
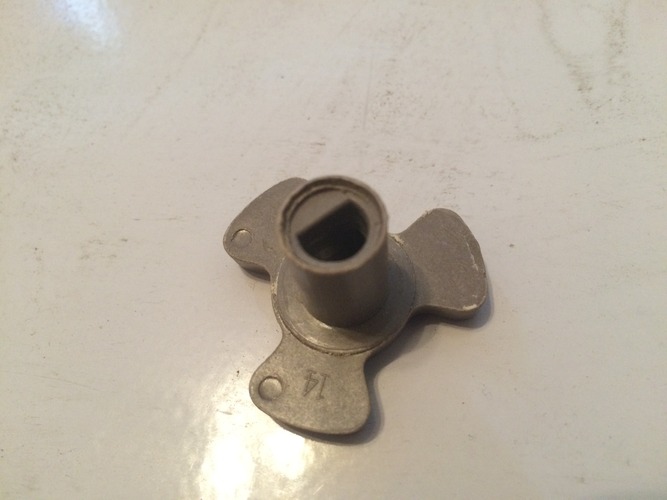


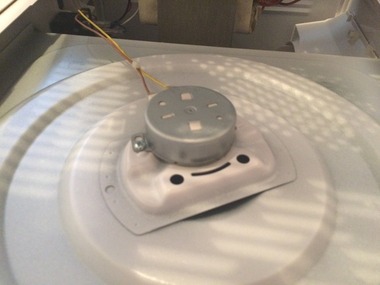
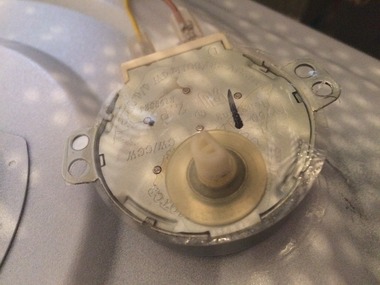
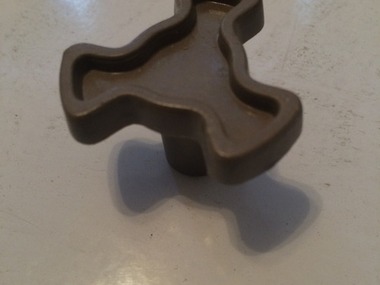
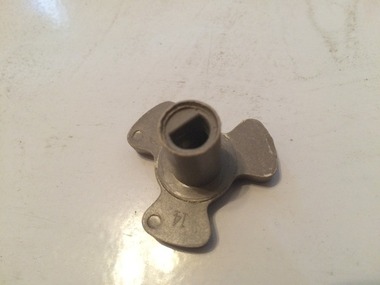

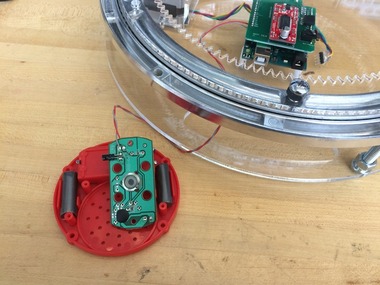
This step is also known as "Taking Things Apart."
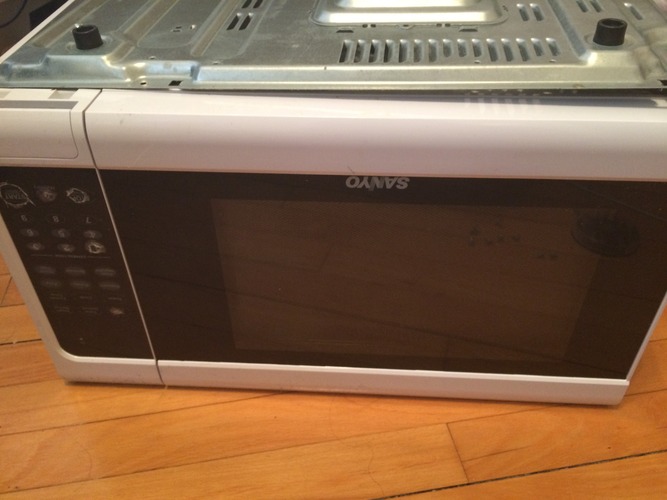
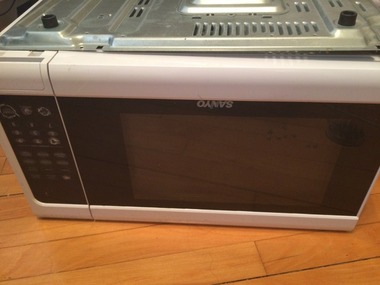
Totally unrelated, my microwave at home recently stopped working after a power outage. I decided to look inside to see how the turntable mechanism worked. It turned out that it was just a stepper motor directly turning a keyed component (the one you always see that holds your microwave platter). I cut out the stepper motor from the microwave to test with later. It says 100 / 120V on it (!) but maybe I can do something with it.
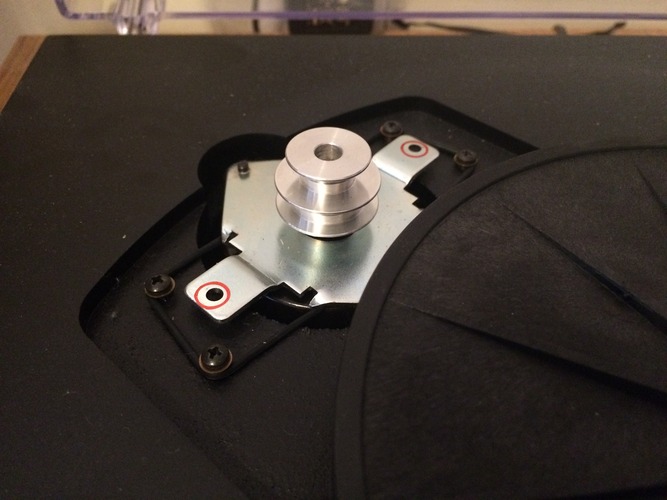
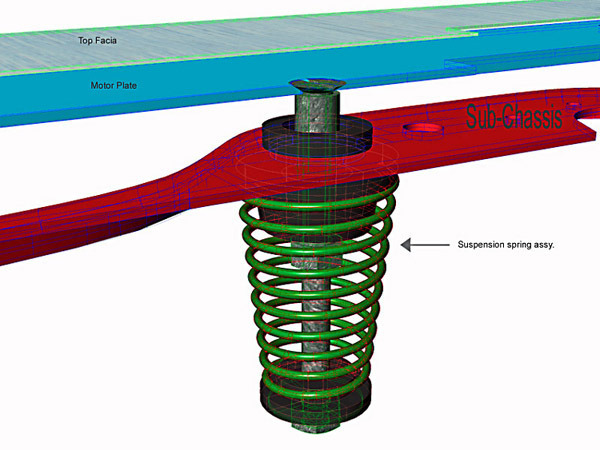
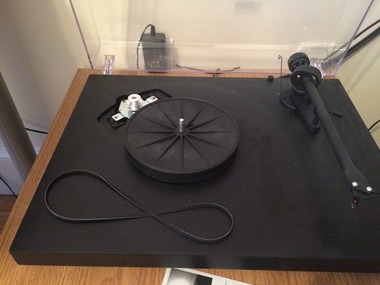
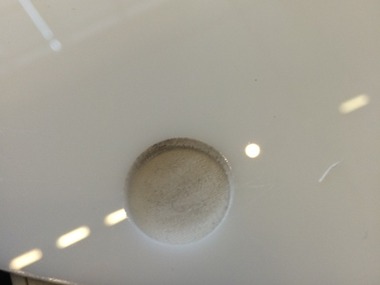
I also checked out my record turntable to see how that was set up. I have a belt-driven turntable, which looked like a coupling attached directly to a motor shaft, which drives the main turntable using a belt. I was curious, though, how the main shaft was suspended from the turntable frame. After looking online (I wasn't about to take this working turntable apart), I found that they're usually compression springs at the bottom of the shaft. One example even used motor oil as suspension fluid (see image above).
Anyhow, I think I will actually try out the microwave method to try to reduce the friction from the lazy susan turntable. But I won't actually be able to test until the replacement EasyDriver boards come in from Sparkfun, and may need to order a motor that can supply more torque. Stay tuned!
Comments (0)
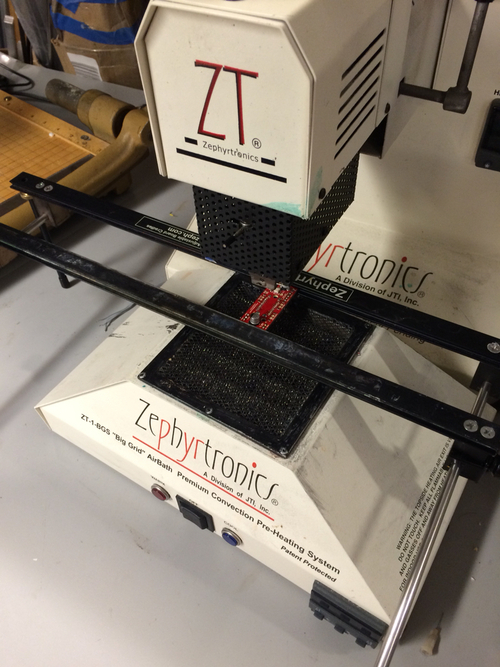

I ordered some replacement stepper motor boards from Sparkfun as well and several stepper motor driver chips from Digikey. To try to salvage the boards I fried, I first applied some solder wick and then used a special machine to heat up the board to the point that I could remove the chip. It basically applies a very concentrated amount of heat to a specific part of the board.
Comments (0)
So rather than using an image slideshow, I started looking into syncing content with video.
First, I discovered how to use ffmpeg to compile a series of images into a video. With all images (15) from a single rotation in a folder (currently with the naming convention img000.etc, img001.jpg, etc.), I can export a mp4 using the following command (with a framerate of 5 images per second):
ffmpeg -r 5 -i 'img%03d.jpg' output.mp4Then to compile all of these videos to a a single video file (for example, if you wanted to get all your turntable animations into one "GIF"), I can create a text file listing all the video locations:
file 'set1/output.mp4'
file 'set2/output.mp4'
file 'set3/output.mp4'
file
'set4/output.mp4'
file 'set5/output.mp4'
file 'set6/output.mp4'
file 'set7/output.mp4'
and then run this command:
ffmpeg -f concat -i input.txt -codec copy compilation.mp4You can check out the resulting video above!
Comments (0)
Once I had the video file, I could mock up what the timeline interface might look like. This involved learning about popcorn.js, a javascript library for syncing video to dynamic html content.
You can test out a version of the video player here:
http://web.mit.edu/ttseng/Public/360/v3/
I'm aware of some bugs, namely that if you click on a marker or "spin," it will update the corresponding icon only if you move forward, not backwards.
One of the biggest challenges with implementing this functionality is that ffmpeg concat will drop frames if you try to concat mp4 files. So instead of doing that, I figured out how to compile the mp4 video from each spin's images, which is pretty similar.
First, I created a text file that points to the location of all the images:
file 'set1/img%03d.jpg'
file 'set2/img%03d.jpg'
file 'set3/img%03d.jpg'
file 'set4/img%03d.jpg'
file 'set5/img%03d.jpg'
file 'set6/img%03d.jpg'
file 'set7/img%03d.jpg'
Then I can run the following command (need to specify the framerate with -r 5)
ffmpeg -f concat -r 5 -i input.txt compilation.mp4 Comments (0)


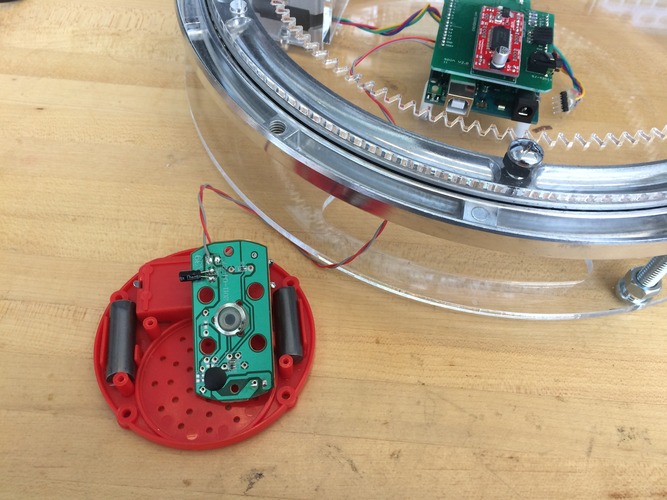
I met with my friend Geoff, who prototypes a version of this turntable as I outlined in the Related Work step. His hypothesis is that the turntable part from McMaster is not quite circular, leading to some resistance at certain degrees, which I could feel just from turning it by hand. At first, I had thought the issue had to do with overcontraints, but alas I think it actually has to do with the turntable part itself.
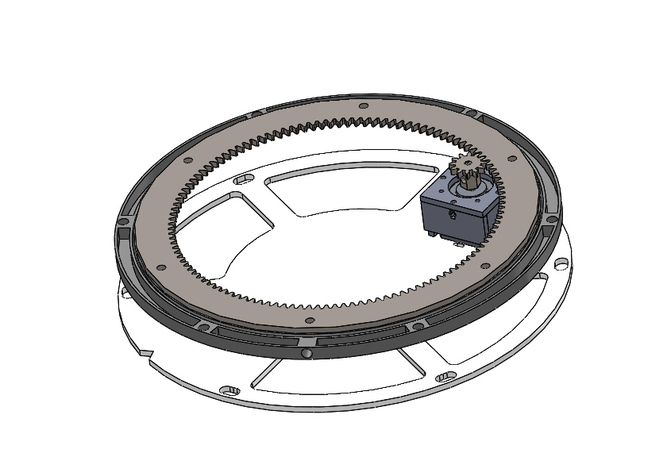
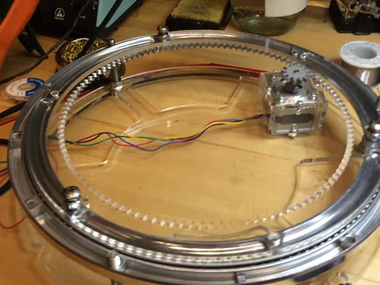
We brainstormed ways around this and decided that one potential way to get around this is to increase the amount of torque the motor has over the turntable. So instead of rotating the turntable about its center, it could be rotated closer to the edge.
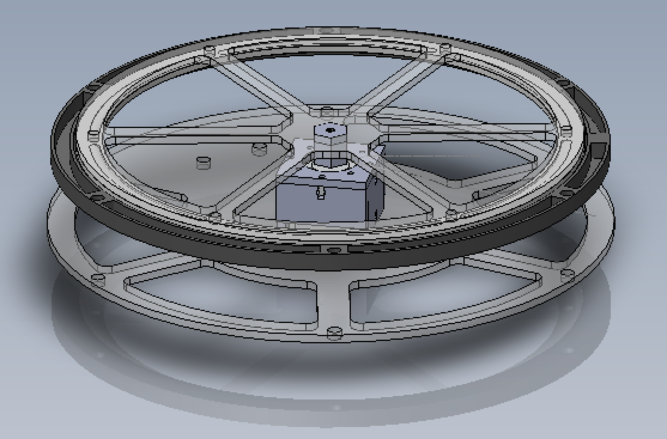
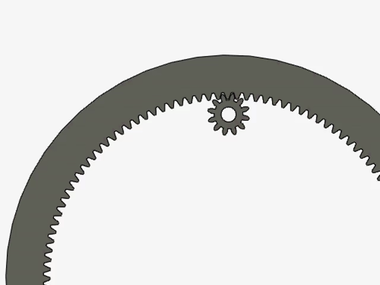
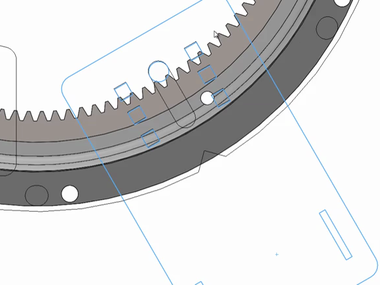
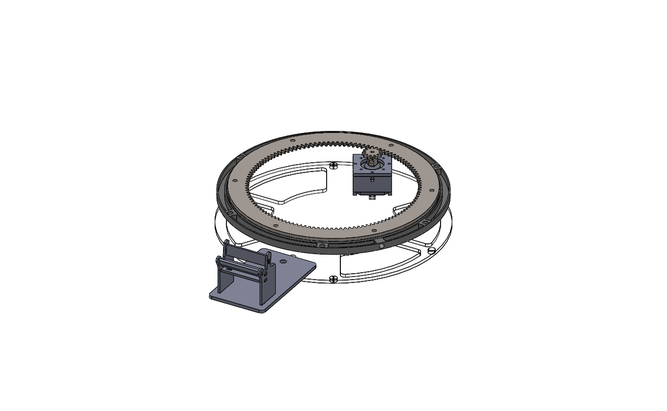
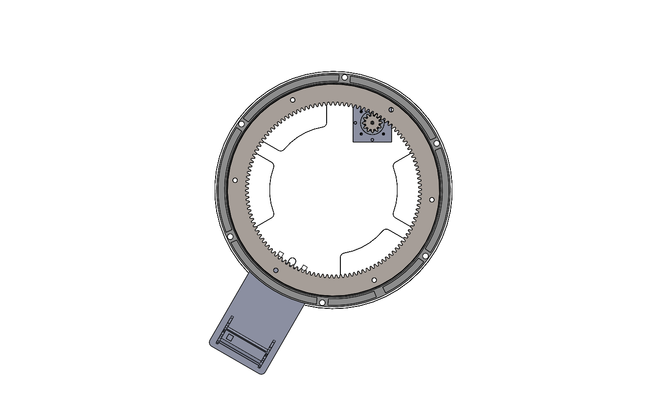
I worked this weekend to prototype a new rotation mechanism. CONFESSION HERE: I'm a mechanical engineer, but I had never designed a gear in SolidWorks. It turns out there is a tool within SolidWorks Toolbox that lets you model gears, but it is a total pain! I finally got something working (you can check a video above), but here are some general tips:
- On GrabCAD there are some good examples of planetary gears, etc. I used this one in particular: https://grabcad.com/library/epicyclic-planetary-gear-system-1 The strange thing is that in the definition of these gears, it uses "module" rather than "diametral pitch" As it made more sense to define the gear this way, I ended up just editing this assembly file instead of creating my own gears from scratch.
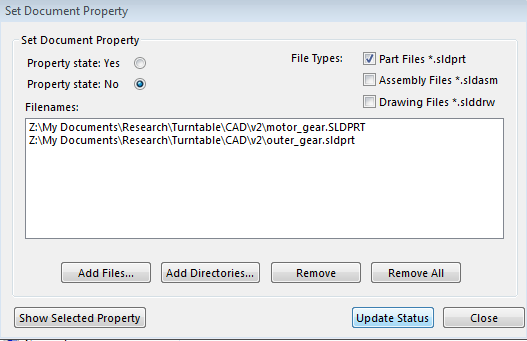
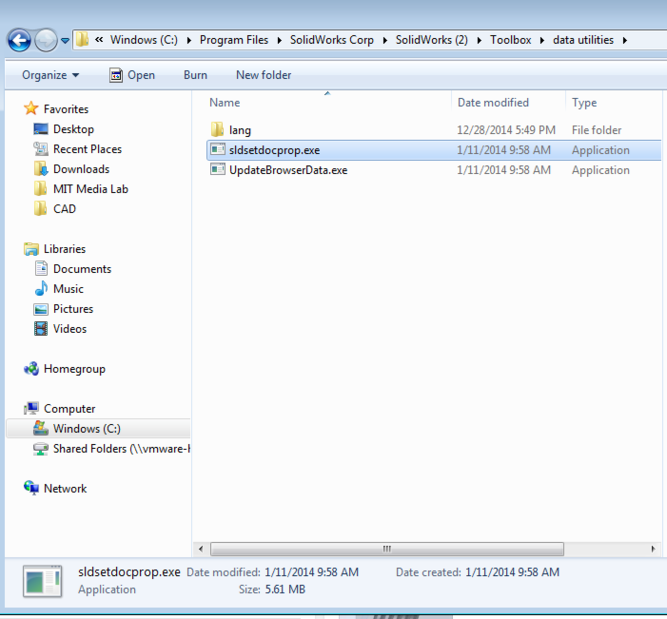
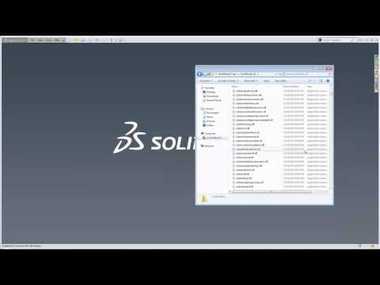
- If you use SolidWorks Toolbox, it annoyingly doesn't let you customize the part in assemblies. While you can export the part and customize it, when it gets put in assemblies, it reverts to the default gear parts. I followed the YouTube video above for how to export custom parts (I also added some images with screenshots from my computer with additional info).
Comments (2)
Only problem seems to be the bore diameter (6 mm) which is a mm too large for the 5mm shafts on NEMA 17 stepper motors. Another possibility would be to purchase a Delrin blank with a 5 mm bore like this and cut the gear with a laser cutter:
http://shop.sdp-si.com/catalog/product/?id=A_1T15M32905
What do you think?

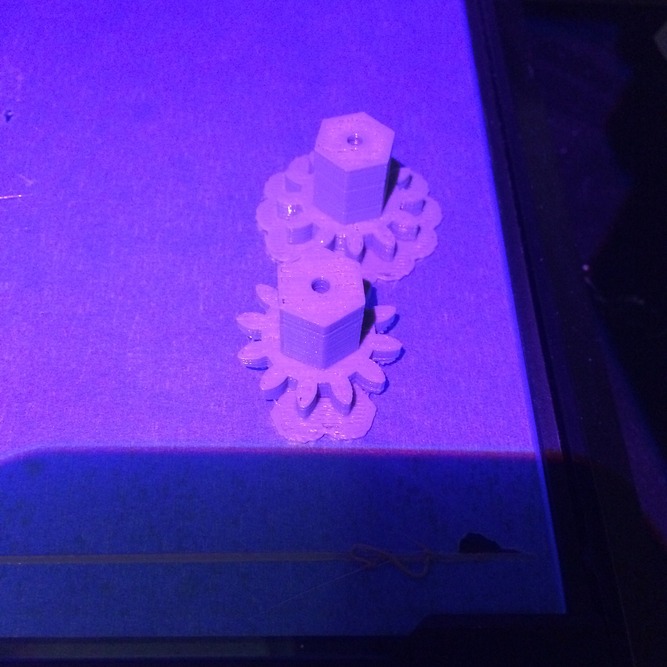
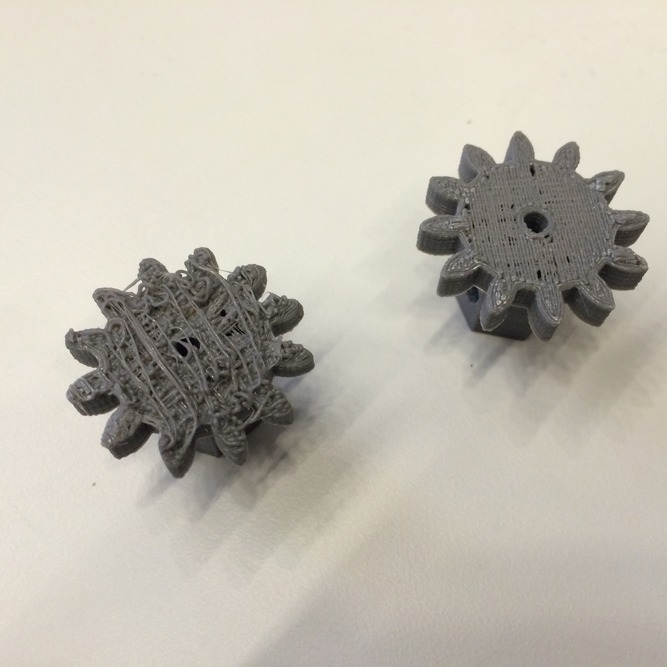

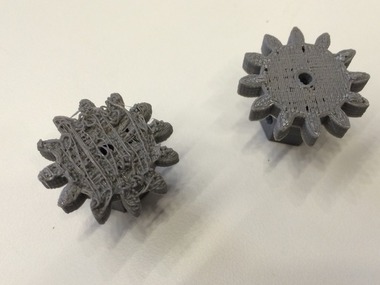
I ended up printing the motor gear on a Makerbot, which oddly undersized the central bore quite a bit. I had to drill a larger hole in the shop, and luckily I had printed two of them because one was way off.
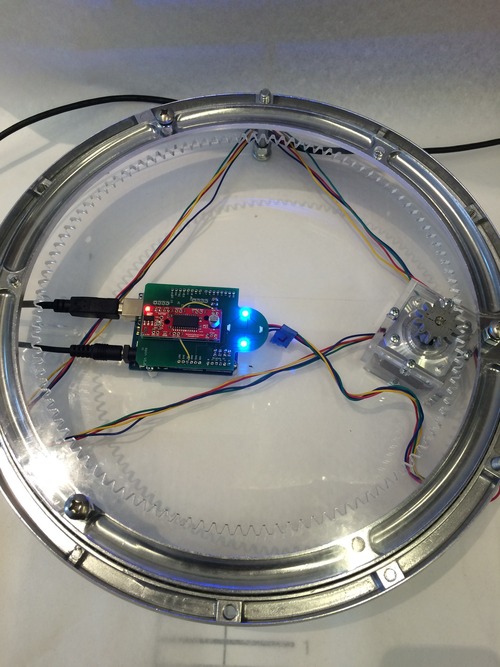
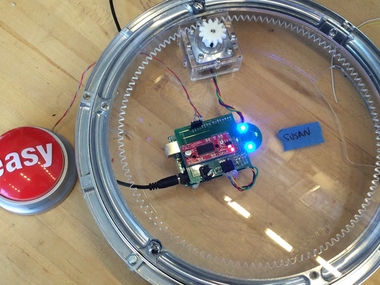
Anyhow, after tweaking the code a bit, I got the turntable to work (as you can see in the video above)! Right now, I have a processing sketch where I use the left and right arrows to control the motor moving 120 degrees (which should be 24 degrees of the outer ring, leading to 15 stops in a single 360 rotation).
Some lessons learned:
- I mis-measured the hole placement for the stepper and had to re-laser cut the piece. Luckily, I had designed a feature on the base so I could re-align it in the laser cutter in case I messed up anything.
- floats are not ints! I was confused for about 15 minutes as to why the motor speed was not being controlled properly and then realized I had been referencing an int variable rather than a float.
- The screws I had to attach the outer gear to the turntable are too long, and there isn't much clearance between the turntable and the stepper motor casing. So I will need to purchase some shorter screws.
Left to do:
- Design the base so that it's easy to hold the turntable (move it around)
- Design something into the base to enclose the electronics (which are off to the side right now)
- Start hooking this thing up to a mobile device!
Comments (0)

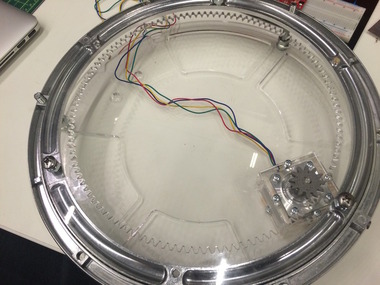
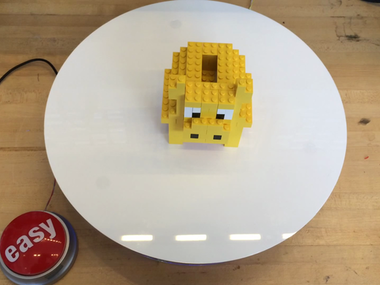
For the platform, I laser cut some white ABS, etching holes in the bottom for the screws on the outer gear of the turntable. For the material (ABS) and using the Universal laser cutter we have downstairs, I used 10/100 for S/P to get an etch 0.08" thick. Unfortunately, I didn't purchase a piece quite large enough, but actually it's kind of useful for checking that the turntable rotates a whole 360 degrees. (:
Comments (0)
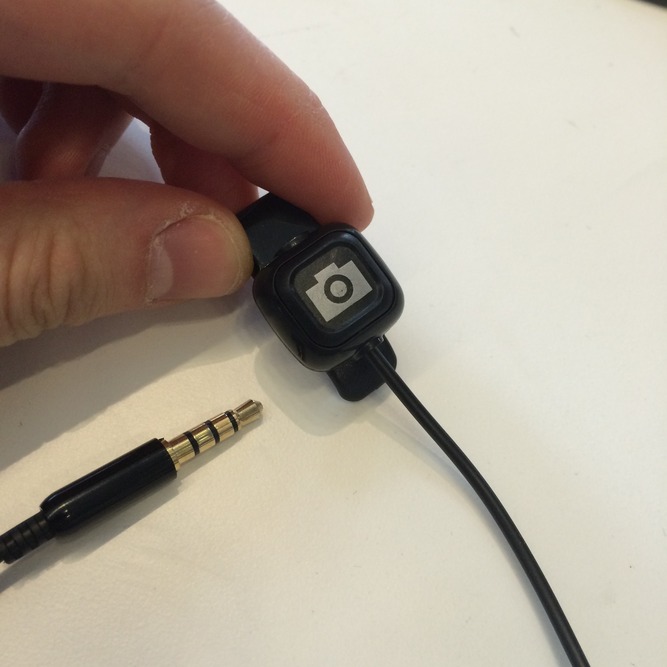
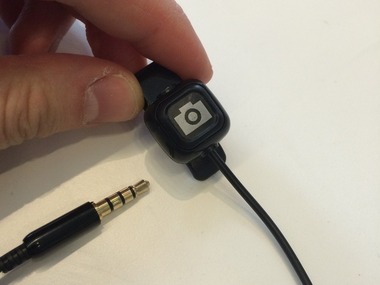
So a while ago, blamb purchased some mobile accessories for taking photographs. One of the things he purchased was a shutter release cable, which I wanted to try using to trigger the camera on my phone.
I replaced the switch in the shutter release cable with a transistor, mostly following this diagram:
You can check out a working video above. (:
I'm not sure how the turntable should connect with the phone - my first instinct is to go with a physical cable because I always find connecting via bluetooth to be kind of annoying. But there are potentially issues with cables getting in the way.
In the meantime, I ordered some shutter release accessories for iphones (including one bluetooth option) to play around with to explore some connection options:
Comments (0)
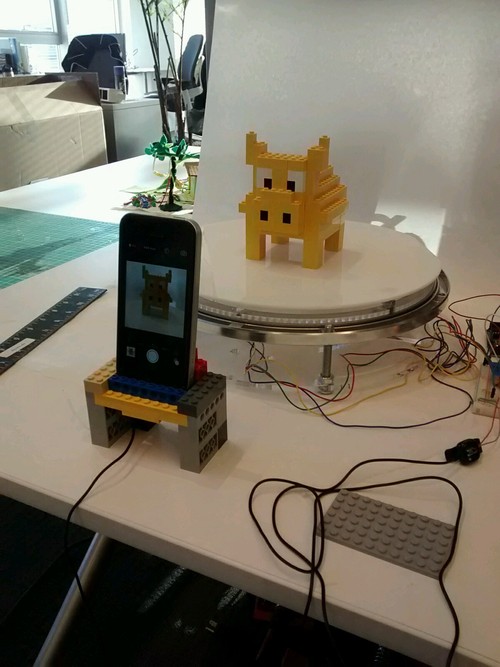
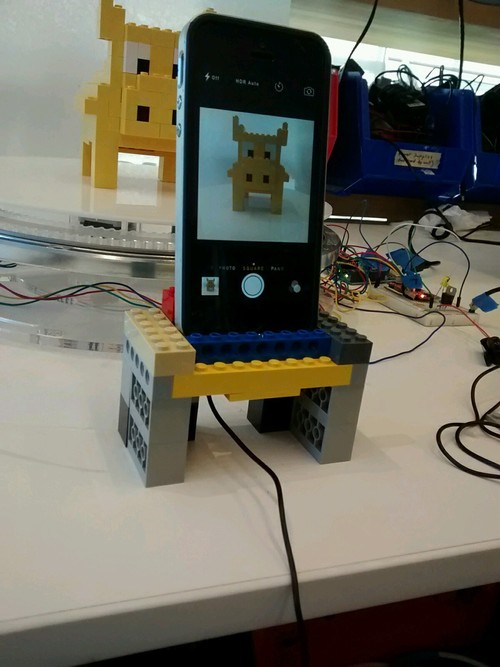

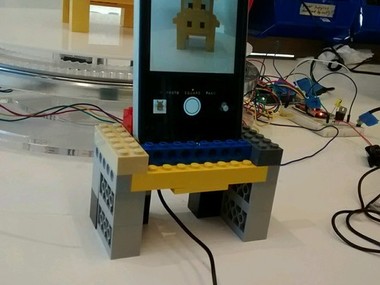

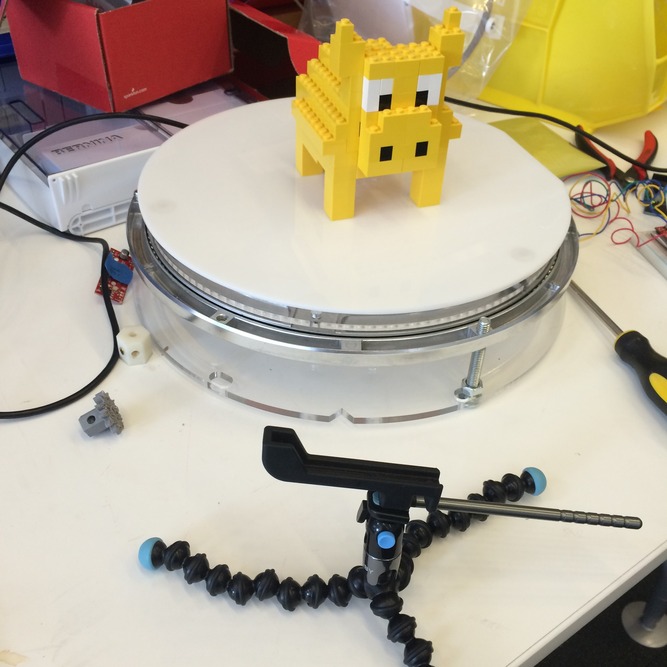
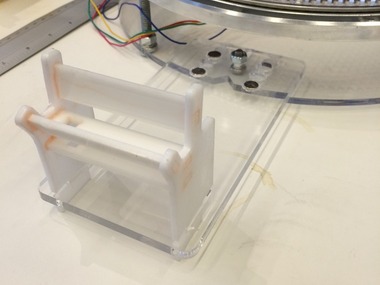
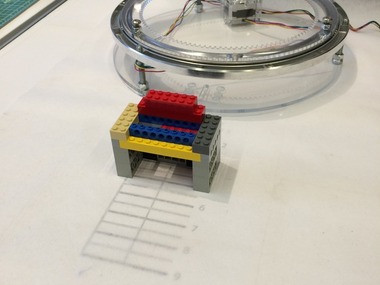
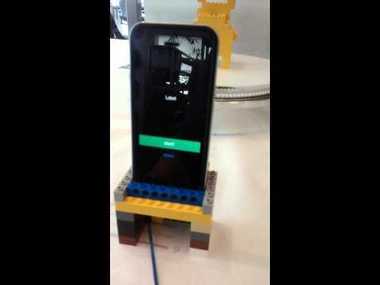
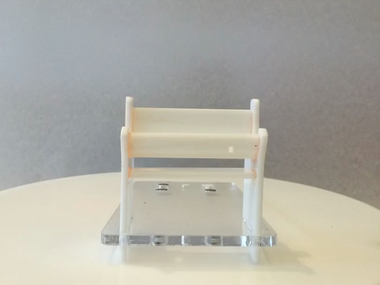
I prototyped a phone stand out of LEGO to get a sense of the dimensions (how far away it should be from the turntable, height, etc.)
I then went ahead and modeled a laser-cut stand of similar dimensions in SolidWorks. My idea right now is to have a sliding platform that locks into 3 different positions using magnets. The phone stand would locok into this sliding platform when in use and could detact when not in use - then the sliding platform can rotate into the base of the platform.
I am waiting on a magnets order from K&J Magnetics before I proceed with fabricating these new parts.
Comments (2)

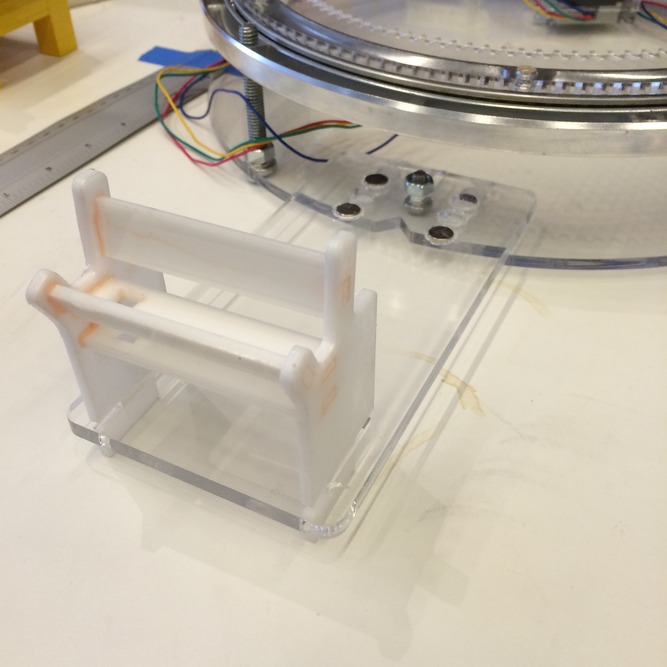
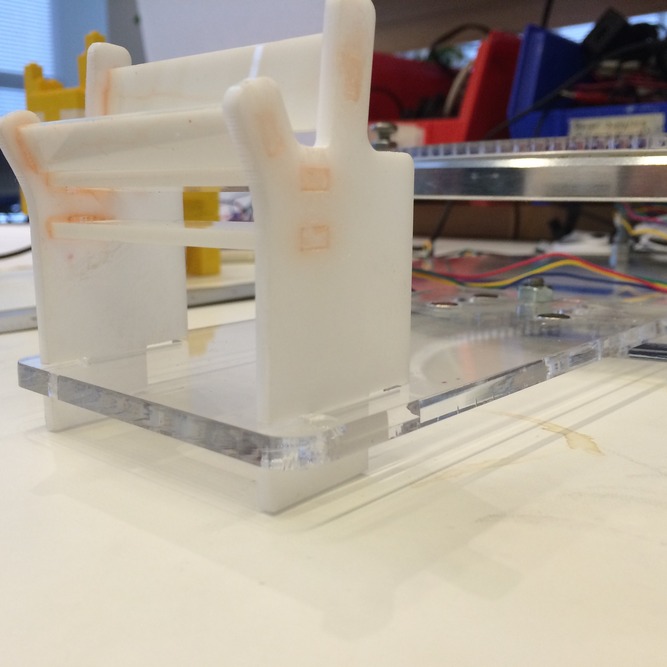


In thinking about aligning the phone with the turntable, I began by prototype a laser-cut stand that could slide to fixed positions away from the turntable. I designed it to use a track and neodyminum magnets on either side of the track for alignment.
To attach the magnets, I tried using Gorilla Glue and etching 1/8" deep into the acrylic for it to be mostly flush with the surface of the acrylic. I also designed the stand so that it locked into place (press fit) and could hold the entire sliding mechanism at level height.
Unfortunately, in prototype this version, I found the magnets to be very annoying to deal with as they would be attracted to one another in the gluing process. Further, when they came close to any other magnet, they would pop out from the acrylic (the glue wasn't strong enough to hold them down).
Also, after further measurement, I found that the phone stand would need to be 9" away from the edge of the turntable to capture its entire width. I decided that building a linear track that could extend 9" might be more hassle than its worth, and in the spirit of keeping this version of the turntable pretty simple, I decided to think of other options.
Comments (0)
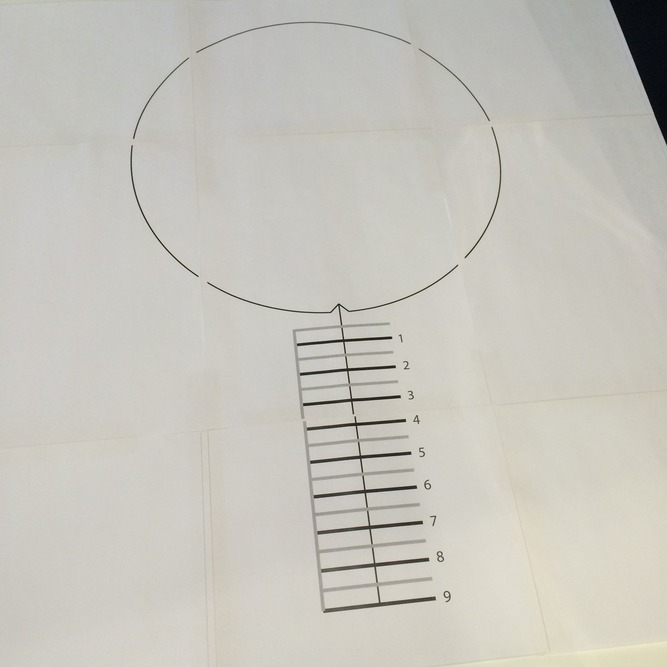
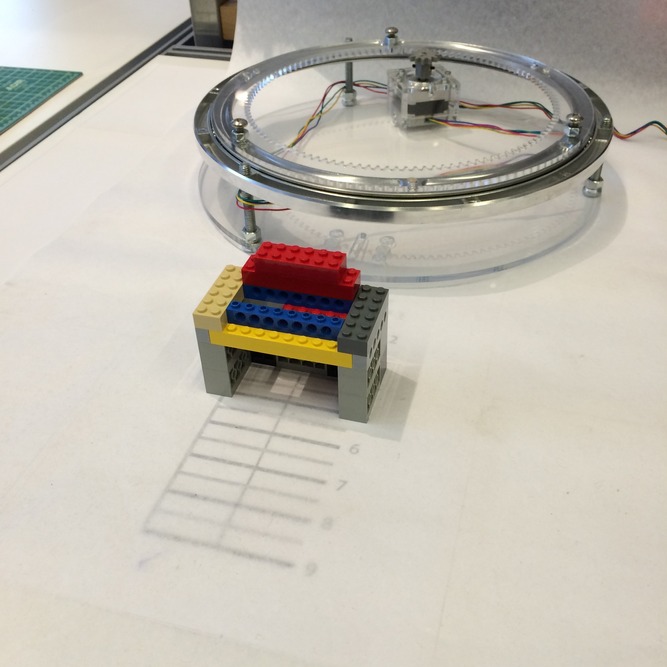
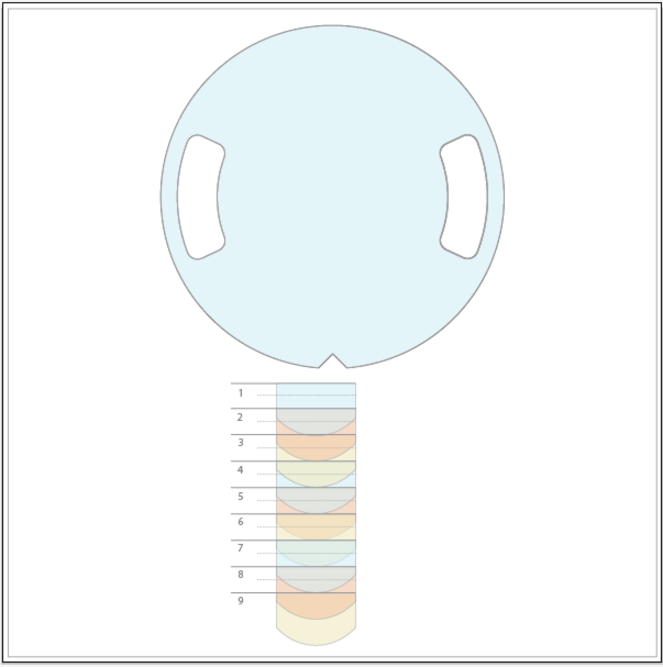
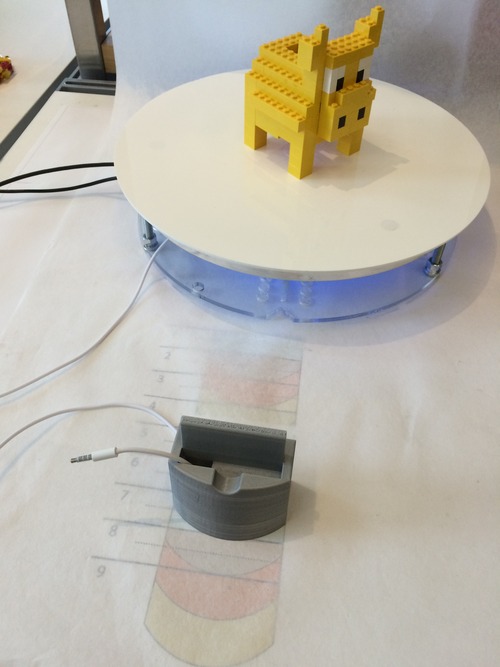
Rather than try to build a sliding mechanism for a phone stand, I decided to keep things simple and use a print-out that would help people align a 3D printed stand (to be designed) with the turntable. This version was taped together, but it could alternatively be printed on a plotter for a little bit of a nicer assembly. It's modeled in some ways after the playing mat that comes with Mindstorms kits.
As an aside, I ordered an Ultimaker 2 for our lab group, so hopefully I'll be able to 3D print a stand soon (after I design it, of course...)
Comments (0)

So to actually create these videos / GIFs, I need to create a server that can process images and create videos and GIFs from them.
Luckily, I had dealt with the nightmare that is FFMPEG on Heroku when building video uploading features for BiP, so I was able to skip most of that messy process. Getting everything integrated with AWS3 was tricky but ultimately doable.
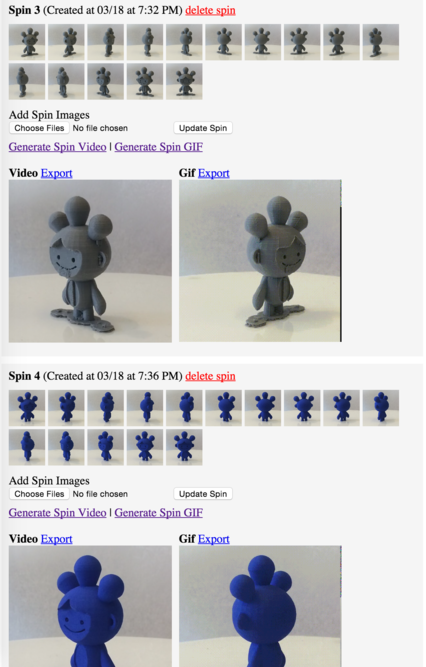
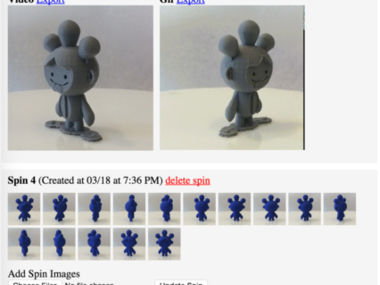
So now I have a test server where you can upload images and it'll give you a MP4 and GIF. You can create multiple "spins" and generate a "set" video that compiles all spin videos together.
I've included a screenshot above of what the test server looks like (and a GIF and video that was exported from it).
Comments (0)

I'd like to connect the turntable with an iPhone using a physical audio cable - while there are wireless options like using Bluetooth, I find it very frustrating to pair devices and think it's less of a hassle to have a physical connection.
The video I shared in the previous step used a hacked remote shutter cable that allows the Arduino to send a signal to the iPhone. But it isn't designed for the iPhone to send a signal to the turntable. At the very least, the phone will need to send a signal to the turntable to trigger it to start, so I needed to figure out a way to enable 2 way communication between an iPhone and the turntable.
Looking into this, I found two products, one retired and one I didn't really trust. One was a retired product from Sparkfun that I couldn't get, even if I wanted to: (https://www.sparkfun.com/products/retired/10331). The other was a board whose site looked a bit dodgy (and also had a lot of broken English): http://www.elechouse.com/elechouse/index.php?main_page=product_info&cPath=90_92&products_id=2199
I also found some examples projects online, none of which were fully documented. So basically my task was to compile a bunch of different documentation to get something working.
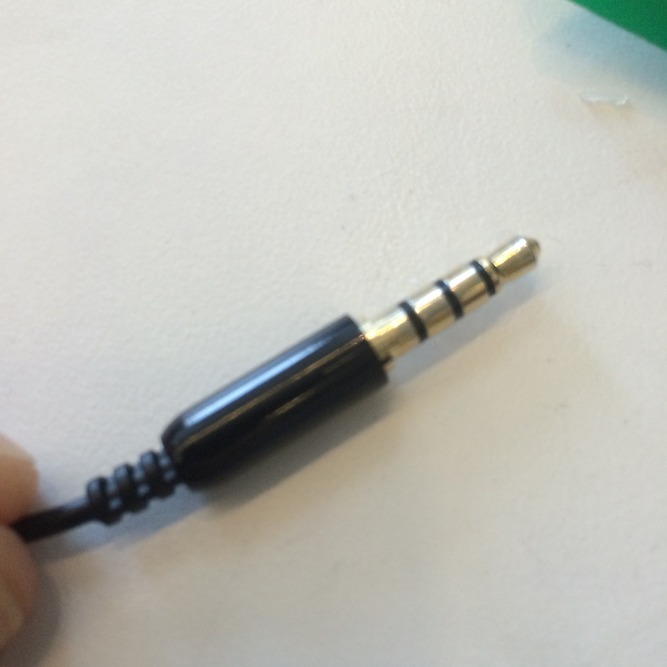
To connect an Arduino to a phone using an audio connector, you essentially send an audio signal (a short, audible clip) between devices. A popular way to do this is called FSK, which involves sending data via audio signals of varying frequencies.
There is an existing Arduino library called "SoftModem" that takes care of a lot of this. The person who created it is Japanese, so all the documentation is in Japanese, unfortunately. But I found that you actually need to have this particular patch of the SoftModem library to get it to work (otherwise, you get a compilation error):
(more on this forum: https://code.google.com/p/arms22/issues/detail?id=2)
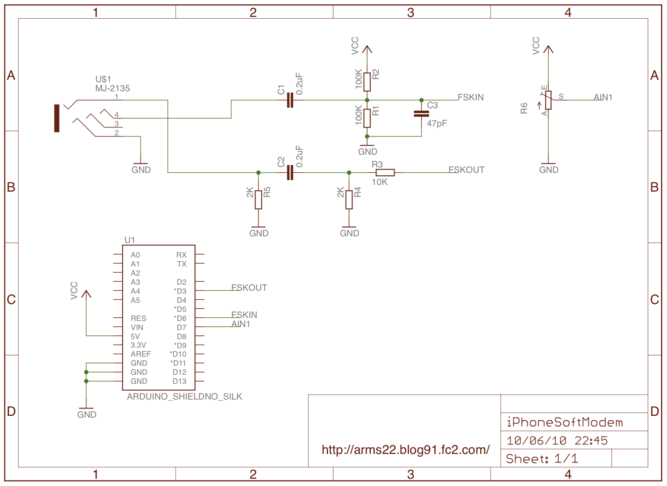
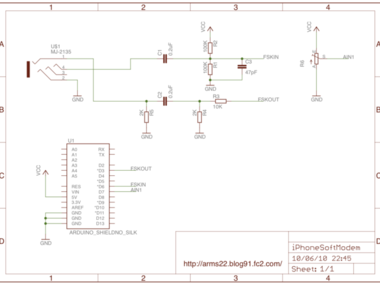
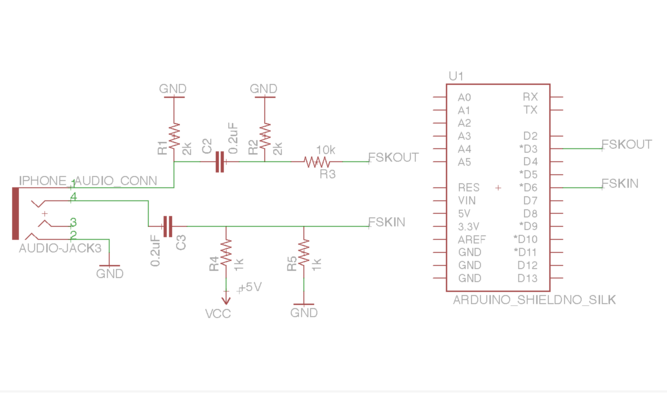
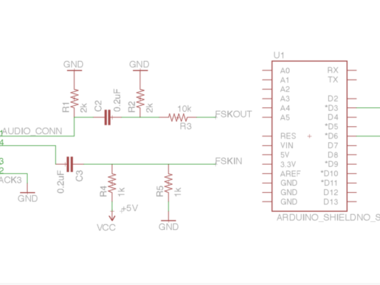
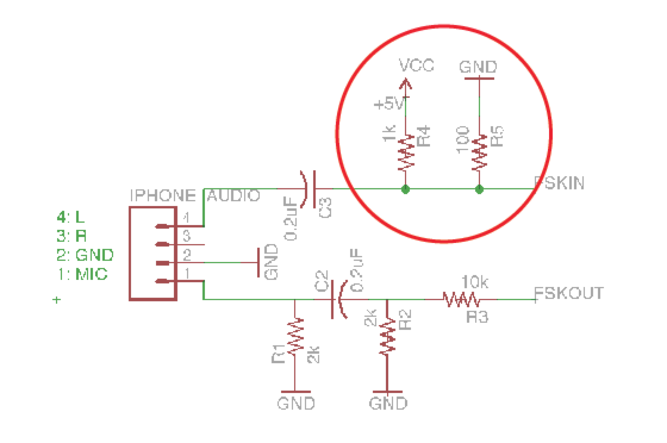
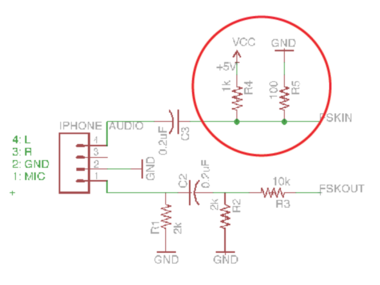
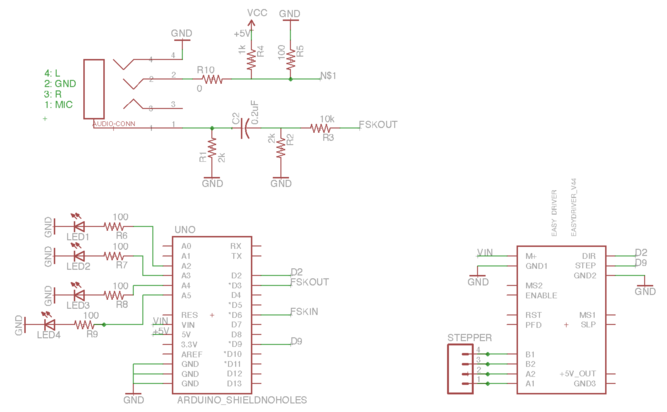
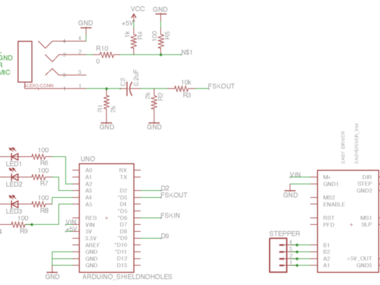
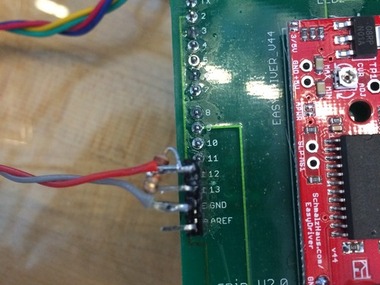
So after adding this library to Arduino (by putting the unzipped folder in the Arduino libraries directory), I then looked up circuit diagrams for the audio cable -> Arduino connection. There were a lot of different diagrams, but I've shared the most useful diagram above (found from this Japanese blog: http://arms22.blog91.fc2.com/blog-entry-350.html)
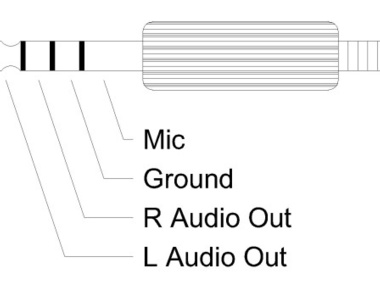
A few important notes - the SoftModem library defaults to receive on D6 and send on D3 of the Arduino. You connect the Mic and Ground pins of the 4-pin audio jack to the Arduino for just FSK out (I haven't started working on receiving yet and will work on that next, which will involve connecting to the L pin of the Audio jack).
After soldering together a 4-pin audio jack and constructing the circuit, I then wrote the following Arduino code:
#include <Stepper.h>
#include <SoftModem.h>
#include <ctype.h>

#define DIR_PIN 2
#define STEP_PIN 9
#define SHUTTER_PIN 7

int ledPin = 13;

SoftModem modem;

void setup() {
  pinMode(DIR_PIN, OUTPUT);
  pinMode(STEP_PIN, OUTPUT);
  pinMode(SHUTTER_PIN, OUTPUT);
  pinMode(ledPin, OUTPUT);
  pinMode(phonePin, INPUT);
  Serial.begin(9600);
  modem.begin();
}

void loop(){

  if(Serial.available()){
    val = Serial.read();

    modem.write (val);
    // blink LED to show that signal was sent to iPhone
    digitalWrite(ledPin, HIGH);
    delay(100);
    digitalWrite(ledPin, LOW);
  }
}
This basically connects to the Serial monitor and sends whatever character you input in the Serial monitor to the modem.
The final part was finding a sample iOS app to work off of. I found that here:
https://github.com/ezefranca/FSK-Arduino-iOS
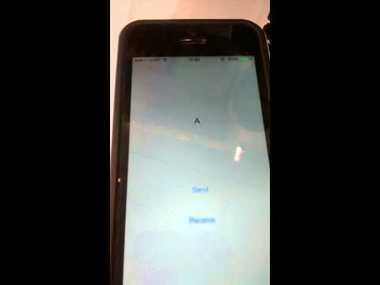
I did edit the code a little bit to convert the ascii input to a character so I could actually see the character sent from the Arduino to the phone (by default it shows the decimal value, and you would need to look up the corresponding character using a table like this: http://www.ascii-code.com/)
NSString *asciiCode = [NSString stringWithFormat:@"%d",[[AudioDemo shared] returnChar]];
int ascii = [asciiCode intValue];
NSString *s = [NSString stringWithFormat:@"%c", ascii];
(my edits to ViewController.m of the demo app you can get from the Github page).
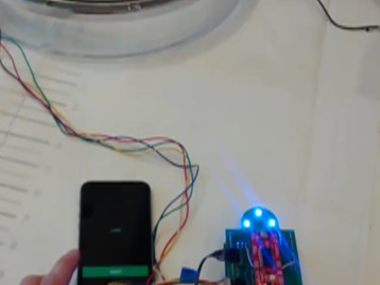
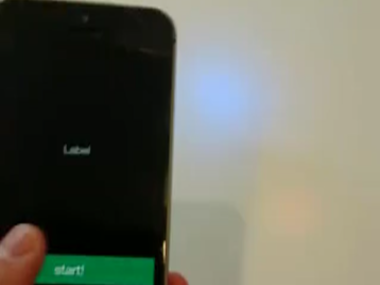
You can see a working video above. It's primitive, but it's working!
Comments (0)
After getting the turntable > iPhone communication working yesterday, I worked today on getting the iPhone to send a signal to the turntable.
The first schematic I worked off of from the Japanese SoftModem documentation didn't work for me, but in my research, I also found another example from the book iPhone Hacks, where they have a chapter about connecting an external keyboard to your iPhone using FSK. Luckily this circuit ended up working for me. Honestly, I don't fully understand what it's doing exactly - I know that the turntaable > iPhone circuit is limiting the voltage to the iPhone, which I believe is limited to 3.3V. My guess is that the transmitting circuit is essentially preventing the input pin from floating, acting as a pull-up or pull-down...which, I don't know. (:
Anyhow, you can see a working video above. I'm also starting to lay out the circuit for all of this to create my own PCBs. Originally, I was thinking that people could breadboard all the elctronics, which you certainly could, but it would take some time to do and a lot of things could go wrong...so I'm going to design my own board.
My Arduino Code is attached.
Comments (0)
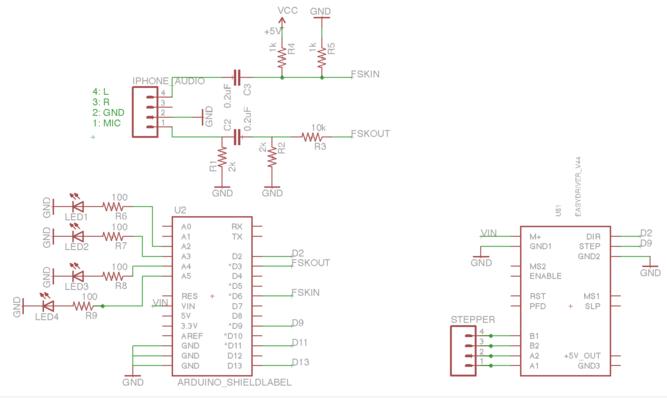
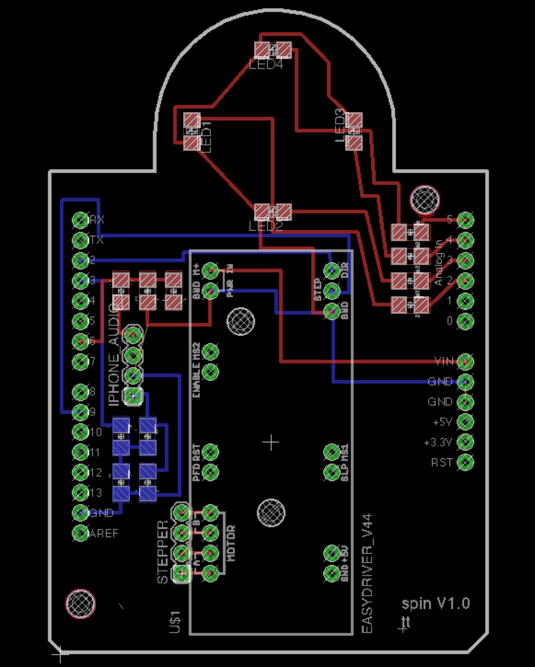
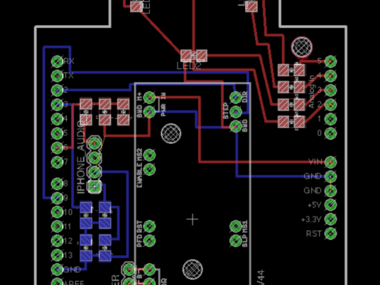
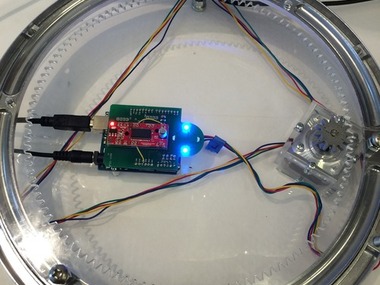
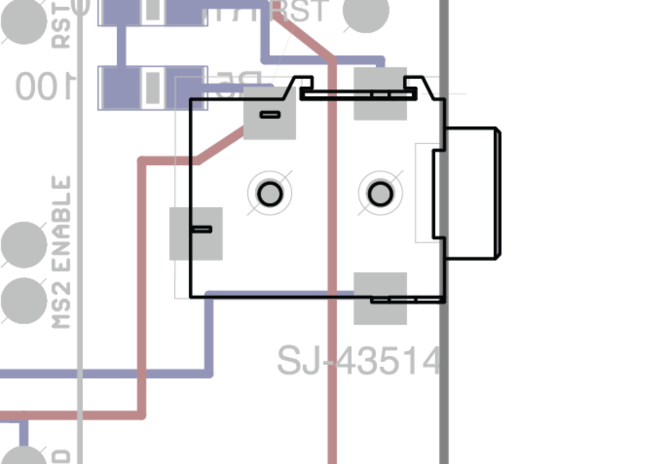
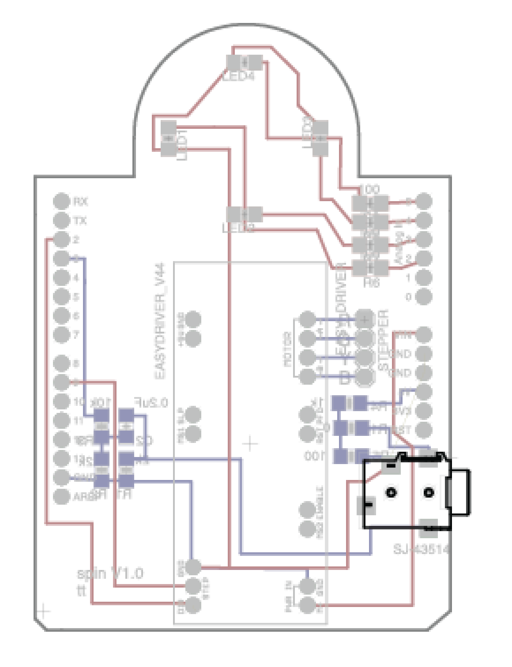
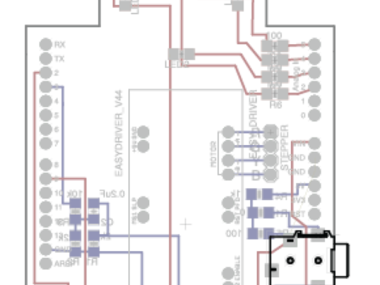
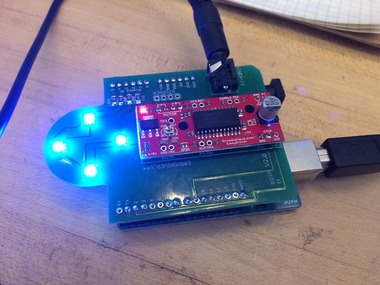
I started laying out a board for the Turntable system now that I have a general idea of all the necessary components. I've designed an Arduino shield that connects to an UNO and has room for an EasyDriver board (from Sparkfun).
I added a ring of LEDs that would be centered underneath the platform so that the user can more easily align their part to the center of the turntable (the circular part of the board). My idea right now is that the ring will illuminate before the turntable begins to rotate to help indicate the center of the platform.
Here are my current list of components:
- Arduino Uno
- EasyDriver
- female headers
- male headers
- 4 x 100 Ω resistor
- 2x 2kΩ resistor
- 2 x 1kΩ resistor
- 1 x 10kΩ resistor
- 4 x Blue LEDs
- 1 x 4 pin audio connector
- 2 x 0.2 uF capacitor
Comments (0)
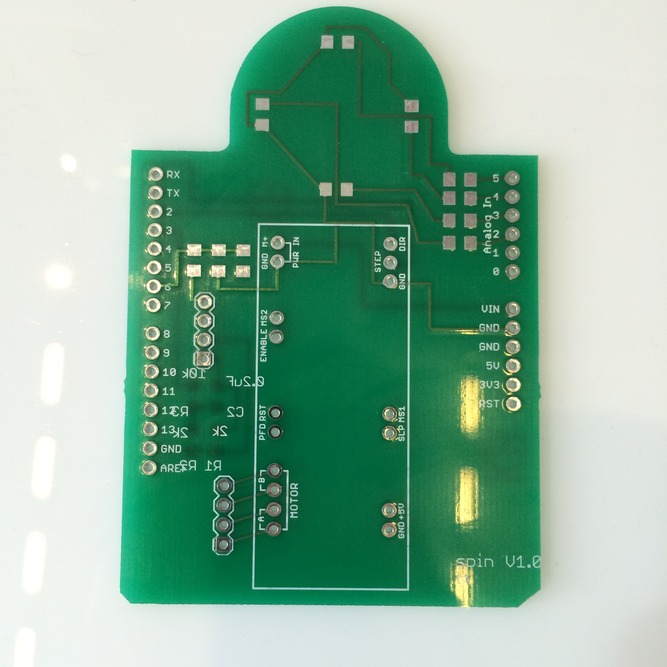
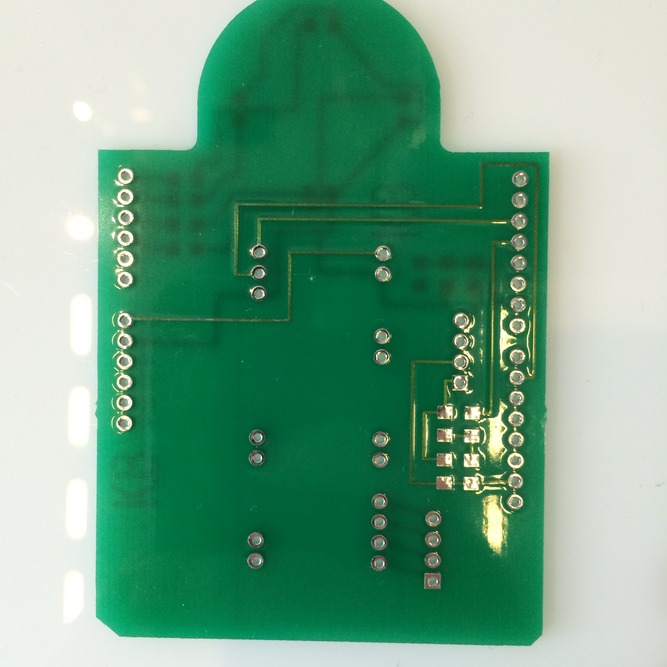
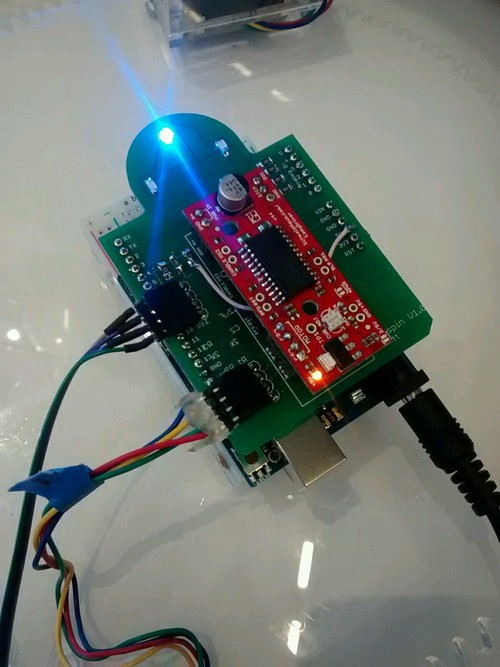
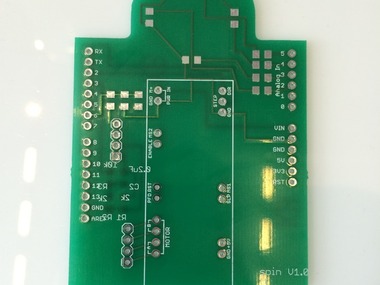
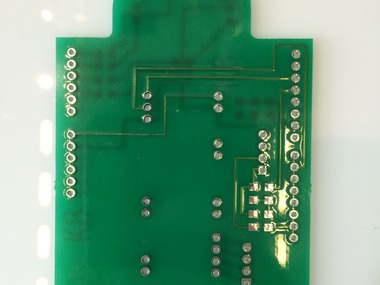
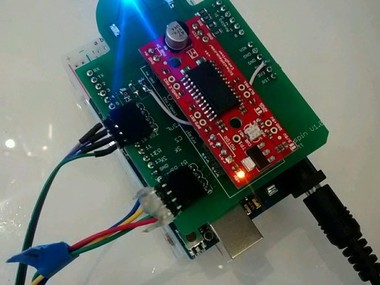
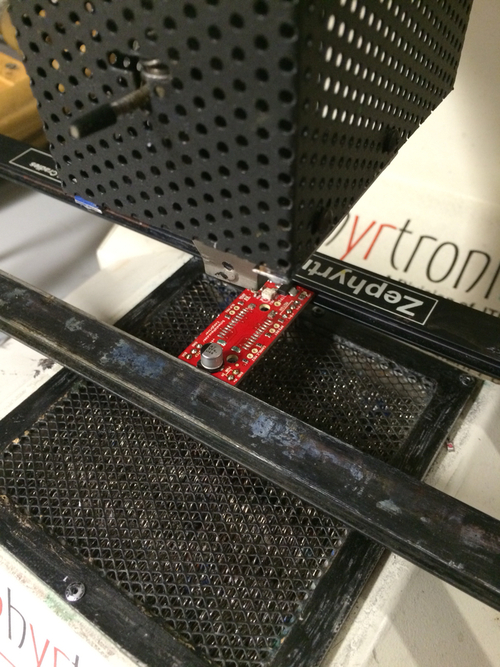
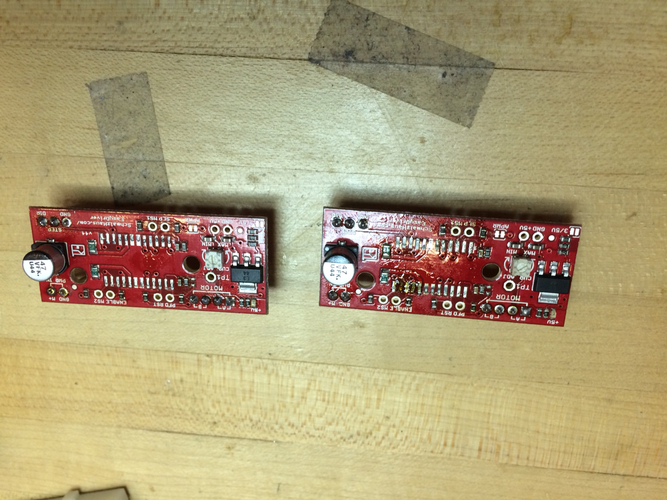
My PCBS came in the mail on Tuesday! For the most part, the boards worked as designed, except that the bottom silkscreen got printed on the top (and nothing got silkscreened on the bottom). I did make an error where I forgot to connect one of the resistors to 5V on the PCB, so I soldered a wire in place instead.
After soldering all the components to the board, it unfortunately (but not surprisingly) did not work. I spent a day debugging, ultimately recreating the circuit on a new breadboard. One of my labmates helped me discover that the FSKIN RC circuit was slightly different on my original breadboarded circuit. We hooked up the FSKIN pin on the Arduino to a scope to see what the signal from the iPhone looked like (you can see a video of the scope output above). It turned out that by tweaking the resistor values, I was able to get the circuit to work - I included an image highlighting the change (originally, I had two 1K resistors, but I now have a 1K and 100 ohm resistor instead).
One issue that I didn't anticipate was that the EasyDriver board sits quite far from the PCB - I designed it to fit into female headers on the PCB. The outline of the board affects the ring of LEDs (it looks a little cut off when lit). I think I might solder the components directly to the PCB rather than have it easily connect or disconnect. As far as I know, the main reason the EasyDriver board would break is if you pull out the motor before depowering the board, and you're more likely to do that if the motor pins aren't soldered directly to the board and are attached, instead, through headers.
One of my undergraduate research assistants is going to start working on the iOS app - in the meantime, I plan to work on the phone stand and updating the turntable base to include mounting holes for the circuitry. Glad to have a major part of the project prototyped!
Update: Even with the 100 ohm resistor, I found the board started working inconsistently. So I've sinced added a 0 ohm resistor instead, and that's been working for me!
Comments (0)
After showing the output GIFs to my advisor, he suggested adding a short delay to the first frame of each spin so the viewer can see the project more clearly.
I was able to execute this, but I don't think I'm doing it in the most efficient way - I first create a video with the first frame and then create another video with all the frames, then stitch the two videos together.
I've been showing people this GIF to get a sense of which they like better - the GIF with a delay and the GIF without. I've been getting mixed feedback - with the original, single-speed GIF, it seems more animated (the delay at the beginning can make it appear like the animation is not starting properly). But others have commented that they like viewing each spin more clearly at the start of the spin.
UPDATE
I've informally asked a few people from my research group - most have said that they prefer the spin without a delay because it's more playful, and the delay would need to be longer to feel more deliberate (and not like a mistake). Since technically creating the single-speed spin animation is easier, I will probably stick with that. But I'll leave this question open to see if anyone else has any ideas.
Comments (0)
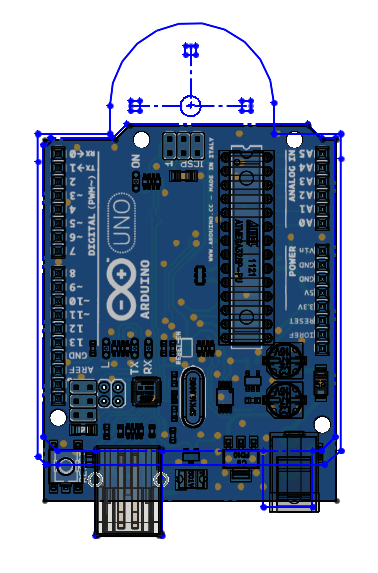


I adjusted the CAD model for the turntable to add the Uno mounting holes - to do this, I had to export the board outline from Eagle and import this drawing as a DXF in SolidWorks. Then I aligned the sketch with an Arduino part file I found online to ensure that the shield and Arduino were properly placed. Finally, I sketched a center at the top of the PCB in Eagle to make sure the LED ring is centered on the turntable (see image).
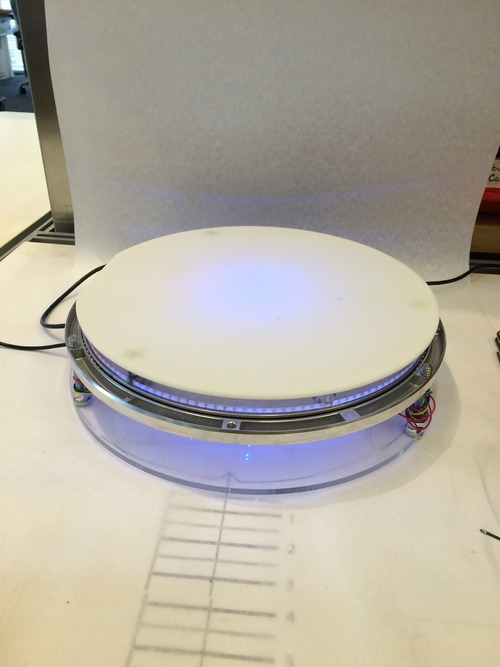
After centering the boards, I added mounting holes on the base of the turntable and assembled everything - I was a little worried about the indicator lights being visible only when you view the turntable from above, but since the base is open on the sides, it actually gives the turntable a nice outer glow.
I am a little bothered by the shadow cast by the EasyDriver board, even when it is soldered directly to the PCB (rather than attached using female headers). If I were to make the board again, I would probably flip the EasyDriver positioning so the large capacitor is at the base of the PCB - this would reduce the amount of shadow cast by the board.
Comments (0)

While the turntable system worked, there was one problem I wanted to resolve - surprisingly, Digikey only sells 2 4-pin audio connectors with housings, and they both aren't long enough to fit into a regular iOS device with a case on. That would require the user to have to take off their phone case every time they want to use the turntable, which I thought would be really annoying (and already was annoying for me just testing things).
I thought about potentially 3D printing a thin-walled housing for the audio connector, but the examples I found are very thin and I think would be hard to manufacture on a DIY scale. Additionally, I would need very thin wire to solder to the connector pins with such a narrow housing. The other option would be to purchase some pre-made cables in assembled products, like a shutter release cable or earbuds, but that would add a lot to the cost.
After brainstorming with my friend gtsai, he suggested the brilliant idea of adding a female audio jack to the PCB and using a male-to-male audio connector. Rather than attempt to retrofit this onto my already fabricated boards, I decided to redesign the board to incorporate this feature.
This involved me modeling a custom part in Eagle, which I've done before but not recently. I learned a very important lesson: DO NOT ADJUST THE SIZE OF THE GRID! This makes it really hard to make connections in your schematic later on.
After adding the audio jack, I also made some other changes to the board:
- I rotated the EasyDriver 180 degrees to reduce the amount of shadowing on the LED ring (the large capacitor would be on the bottom of the board rather than along the edge of the ring)
- I added labels for the stepper motor pins to make it easier to remember which colored wires go to which pin
Also, I fixed a mistake I made when exporting my first board:
- When you export the bottom silkscreen, rename the file to %N.sts (this ensures that the bottom silkscreen doesn't override your top silkscreen)
To make it easier for myself if I ever have to resend the boards to APCircuits, here the different files that need to be sent:
- .cmp - top copper layer
- .sol - bottom copper layer
- .drd - NC drill hole
- .plc - top legend
- .pls - bottom legend
- .stc - top silkscreen
- .sol - bottom silkscreen
Comments (0)
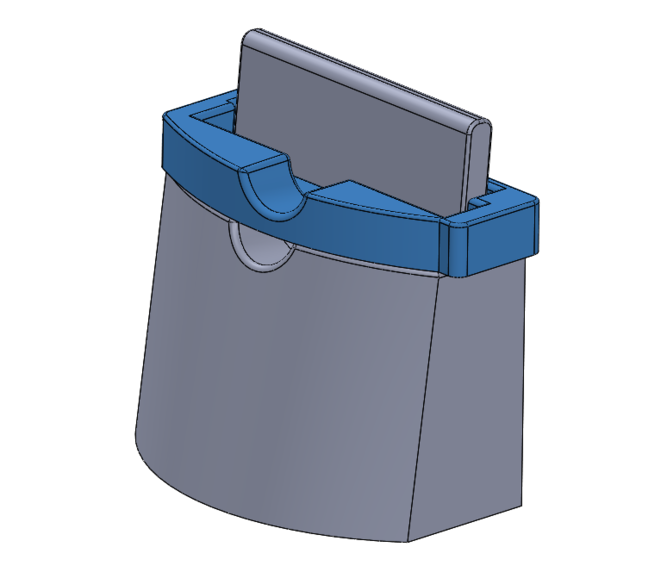

After deciding not to use a pull-out iPhone stand, I started designing one to 3D print. I did some research and determine that I'll design the turntable for iPhone 5 and newer since the iPhone 5 has the same dimensions as my current device (iPhone 5S), and also supports iOS 8. This will make it easier for development.
I also want to support newer devices, though, so I also thought about designing an adapter for iPhone 6.
You can see images of the CAD model above. In the meantime, I also ordered a 3D printer for my research group, and since it arrived yesterday, I've been printing test version of the stand and adapter. I did have to make a few changes, mostly to account for support material that is hard to sand off (because of geometric constraints). You can check out a video of the evolution of the stand above as well, made with the Spin turntable of course. (:
UPDATE:
After struggling with the Ultimaker a bit, I think I know the best way to print the stand. I originally started off with ABS, which was prone to warping. I tried rotating the part on two separate jobs - the first made the back of the stand curved, and the second was even worse, as the bottom came curved and made the stand unstable.
After talking to Ultimaker support, I was able to find that PLA wasn't being fed properly into the machine because the bowden tube (the tube that feeds the plastic into the extruder) was unset. After fixing this, I was able to use PLA, which did not have any warping. I did find that the support material was harder to remove for PLA, and it was added in sections that were very hard to sand out. So I'm now printing a final version that has no support material and is "fine" quality. You can see in the animation above that the PLA (grey) for some reason just didn't complete, even though the printer said the job was done. FIngers crossed this isn't the case again since I just sent a 13 hour job!
Comments (0)


I got the updated board from AP Circuits yesterday and put them together today. I made a really big mistake, though - I somehow didn't connect the FSKIN pin to the Arduino. I just added a jumper cable to the underside of the board, but it's unfortunate I made the error. But it works!
In terms of Audio cables, I purchased some very cheap cables (at around $1.30 each) from MyCableMart, but it turns out that the barrel is too big to plug into iPhones with cases on. I found a different cable on Amazon and have ordered them:
The updated Eagle boards are attached.
Comments (0)
Since the 3D-printed stand has a curved shape, I redesigned the map to incorporate its outline. I also redesigned it with a color gradient to make it easier to align the stand. Finally, I realized that the camera is off center on the iPhone (for an iPhone 5, it's off center by 0.625"), so I also shifted the alignment markers by this amount. I still have to test with an iPhone 6, but hopefully that will work out.
Comments (0)
So there wasn't too much to document here per se, since most of it is just code. But we finally have a semi-functioning iOS app!
With the app, you can view your sets, plug the phone into the turntable, and generate a spin animation. The animation can be downloaded as a GIF or a mp4 to your phone.
You can see a working video above.
Left to do:
- Implement set viewer interface for adding multiple spins to a set
- Integrate with facebook and twitter so you can share directly
Comments (0)
I use Heroku for Build in Progress, so I chose to continue using it to deploy the Spin website. Right now, I have a staging server that hosts the Spin RoR app. The images uploaded via the mobile app are hosted on Amazon S3.
You can check out a video of the latest website interface above. I'm not going to share the URL just yet but will soon when the real website is up! Hopefully this will happen in the next few weeks.
Comments (0)
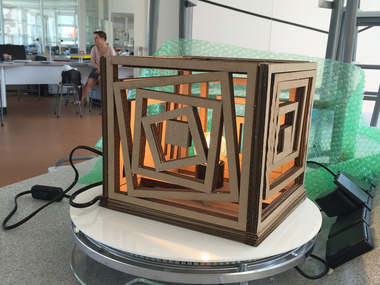
I shared Spin at the annual Computer Clubhouse Conference in Portland this past week, and the response was really positive! Several coordinators grabbed some of the projects they brought to share during the conference, and we created Spins for them (which you can see in the images above).
I definitely learned a lot in the process too. First, I was lucky that I brought an extra gear for the motor shaft because the threaded inserts had loosened in the part, which meant that the motor wasn't actually turning the turntable. I plan to 3D print this part again to decrease the size of the hole for the insert to try to minimize this issue.
A second issue I ran into is that the app would sometimes experience a memory leak when too many images were being queued to upload to the server. I think this has to do with connectivity, as I never experienced this issue in the Media Lab where our wi-fi is very fast. I need to look into ways to test how Spin responds with slow network connection.
Finally, I brought Spin in my carry-on and was luckily not stopped at security. On the way back from Portland, I had to check in my bag because they ran out of overhead bin space on my plane. Luckily, Spin arrived in one piece unharmed. I guess a combination of bubblewrap and a padded blanket can go a long way!
I would share the website where all these animations are visible, but it's still the staging server and I don't want people to sign up for accounts there. So I will share the website hopefully in a few weeks (before Maker Faire!)
Comments (0)


One of my labmates recently got business cards from Moo for her research project, and I thought the quality of the cards was nice. I wanted to bring some cards to Maker Faire this week, so I ordered a bunch of square cards from the site. Unfortunately, I had to pay for rush shipping, so the shipping ended up costing more than the cards - but that's always how it is!
Comments (0)
I decided to invest in a nicer camera, both for photos and video, and purchased a Nikon d5300. It was perfect timing since I needed to put together a promotional video for Spin!
Unfortunately, I don't have many images of the actual filming setup because I was using my DSLR to film and my phone to run the turntable. But after a lot of different takes and half a day of editing in Premiere, I ended up with something I'm pretty happy with!
There are definitely some errors in the video I'd like to address soon. I kept getting notifications on my phone when shooting the video, which meant I couldn't use a bunch of the shots. Because the sharing to Twitter and Facebook feature isn't implemented yet, I saved the GIF / video to my device and open up Twitter separately. I'd like to replace this part of the video later on when these features are finished.
Comments (0)
Spin is now live at spin.media.mit.edu!
Putting together the website was fun and a lot of work. But mostly it was fun because I got to play around with my new D5300, which I love! It was also fun to get some more experience using Premiere.
In the process of putting together the site, I also created the first set of instructional documentation I've assembled in a while:
http://spin.media.mit.edu/build
It reminded me of why people don't like to document! I basically created a second turntable (which I had to do anyway) in order to make sure I wasn't missing anything from the documentation. Here are a few things I learned in the process:
- Hosting all your design files on Amazon S3 rather than locally in the app makes it much easier to switch out files if you make any changes - no need to push new code!
- It's really cool how you can share wishlists on Sparkfun! I found some workarounds for other sites. On McMaster, you can only email a parts list, but within the email, there's a link that's publicly viewable. So I grabbed the link from the McMaster email and put it on the site. Unfortunately, it's an editable BOM, so hopefully no one messes with it...
- I know a lot of people use CorelDraw for laser cutting, but it's such a pain to have to export for it! Basically, I have to go down to the shop just to create a new design file if I make any changes. I think the CDR for the 3/16" acrylic is a little outdated, but not in a way that would prevent anyone from assembling a new turntable.
The one question I have is where the best place is for people to post their questions about assembling the turntable, debugging, etc. I suggested posting it either here on Build in Progress or using Github Issues, but I think I might have to create a forum if these don't work well. We'll see what happens!
Comments (0)
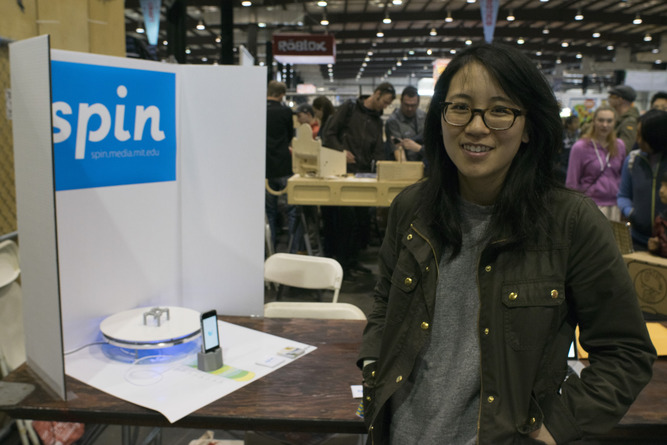
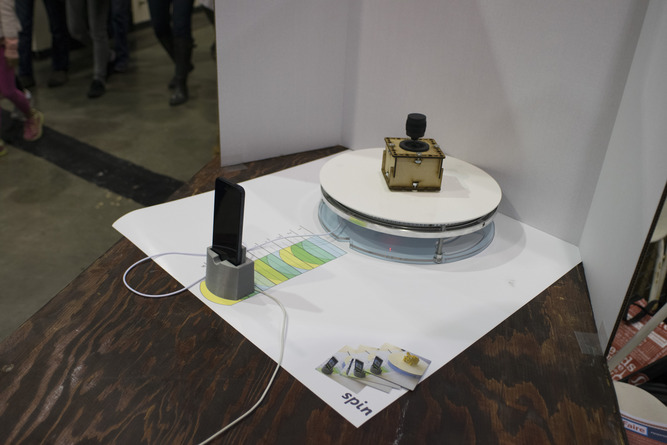
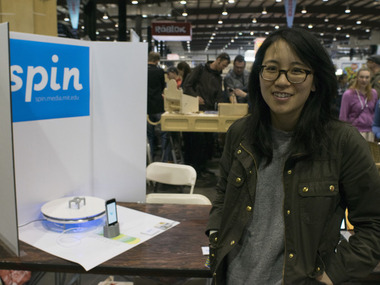

Today was day 1 of Maker Faire Bay Area and the first time I've been back to the original Maker Faire since 2011. I previously presented at the Bay Area Maker Faires in 2010 and 2011 and found the whole experience to be very fun but also very tiring, and this year was no different. Luckily, I recruited a good friend to help with running the table, which proved to be an essential way to keep sane throughout the day.
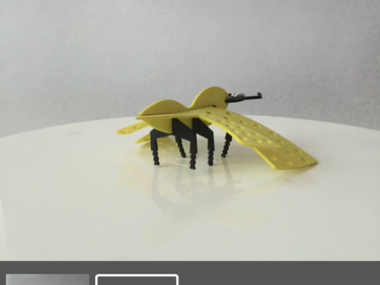
Like the last time I demoed spin at the Computer Clubhouse conference, I forgot to bring an actual object to put on the turntable for a demo. I was hoping to have time to walk around Maker Faire to get a cool item for this purpose but unfortunately didn't get time to. Luckily, we were next to an awesome table with very cool modular laser-cut robotic pieces, and Aaron (who was running the table) graciously lent us a part to use.
In general, this is what I learned about running the Maker Faire table today:
- Next time I should bring a tablecloth! I noticed most other tables had them.
- Some tables aren't close to the outlets, so next time, I would need to remember to bring an extension cord. We were really lucky that the table next to us swapped so we could plug into the outlets.
- The Internet connectivity was very bad, which I had expected because of the number (and concentration) of people at the event. We tried to set up a mobile hotspot on my friend's iPhone 6, but even the cellular network was weak. As a result, I ended up demoing the photo taking part of using the Spin turntable and skipped the video / GIF generation part (since that's currently done on a server). Luckily, I had the demo video on loop on my laptop screen to show what it actually looks like.
- Because of the Internet connectivity issues, I also tried to pre-load certain important pages, like this Spin Build in Progress page, the build instructinos on spin.media.mit.edu, etc. But if a link on the page was accidentally clicked, it was impossible to go back to the pre-loaded page. I'm looking into ways to view those pages offline for tomorrow.
- It was also unfortunate that the Internet wasn't working consistently because I coudln't let people request a Spin turntable through the website. My friend suggested using an Excel spreadsheet instead, which I think I may do for tomorrow.
- I learned that a lot of people are interested in 3D scanning. It seemed like ever other visitor to my table asked about 3D scanning applications. My default answer was to point them to the "build" page on Spin and suggest that they build their own using the documentation I had. (:
- We ran out of handouts / cards within the first 2 hours, which unfortunately means I'll have nothing for tomorrow. I had printed 50 cards for Spin and brought probably around 30 business cards and Build in Progress handouts. Next time, bring ~100s handouts!
That's it for today - I'll update this page with reflections on tomorrow's event after it's over!
Comments (0)
It took me a week to recover from Maker Faire!
Overall, I had a great time sharing Spin at Maker Faire. The second day wasn't too different than the first in terms of demoing. Because I ran out of cards, my friend used his iPad to pull up the handout I had given out the day before about Build in Progress, and people took photographs of that instead.
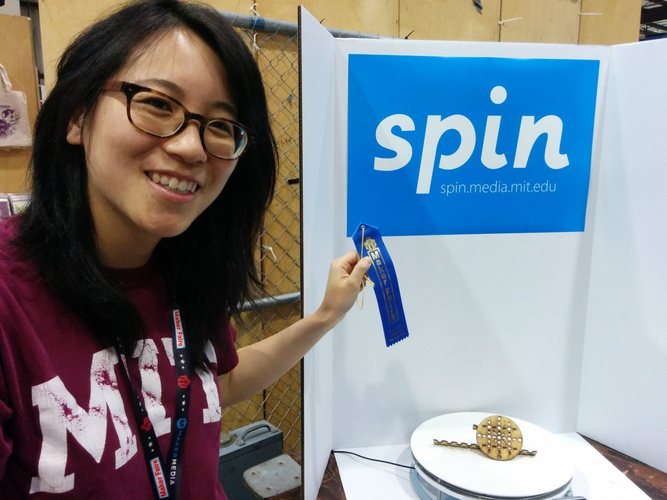
On the first day of Maker Faire, a tech editor from Make Magazine stopped by and filmed me doing a demo of Spin. On the second day, he stopped by and gave us a blue Editor's Choice ribbon, which I was surprised about but happy to receive! The image above is one he took: http://makezine.com/2015/05/21/drumroll-please-ribbon-winners-maker-faire-bay-area/
Thanks to all the awesome people I met at Maker Faire - it was a blast!
Comments (0)
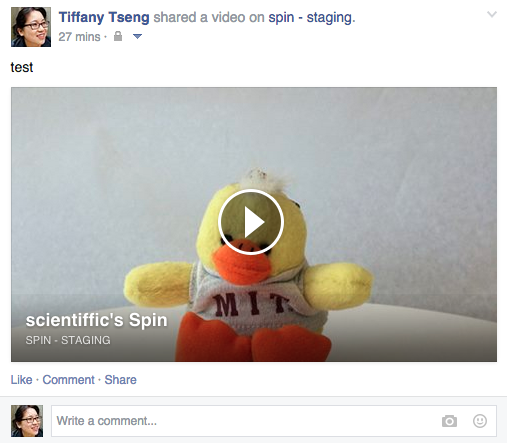
I designed Spin to use Facebook / Twitter login credentials so you could share your animations directly on these platforms. I had made dummy buttons for sharing to Facebook and Twitter on the web viewer but have started to actually implement this feature.
For Twitter, I learned that it mostly came down to metatags for the shared page. I designed a Player Card for playing a Spin video: https://dev.twitter.com/cards/types/player
Supposedly this is what you should use for playing GIFs (rather than a Photo Card), but I saw no documentation about this. Ultimately, I'd like to embed the GIF directly to Twitter (or perhaps an autolooping video?), but I'll have to figure that out later. I appreciated that Twitter has a nice Card Validator, but they have an approval process, and I don't have a sense of when Spin might be approved: https://cards-dev.twitter.com/validator
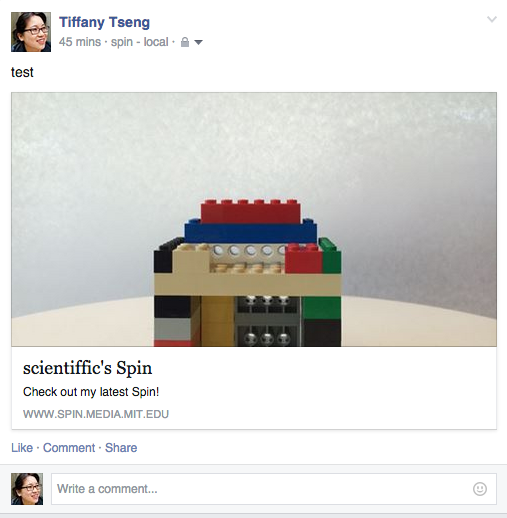
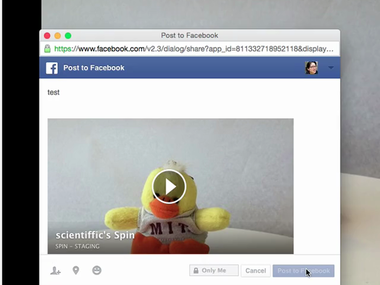
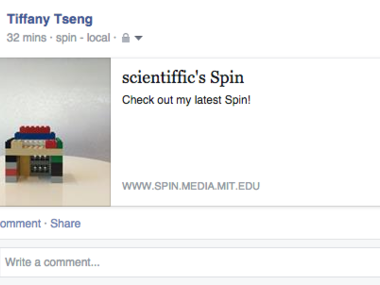
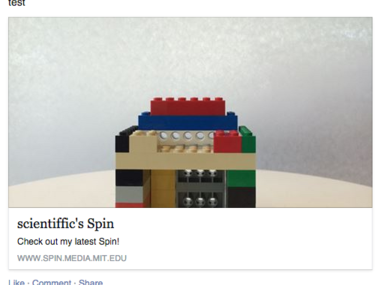
For Facebook, I started off creating a Facebook Feed Dialog: https://developers.facebook.com/docs/sharing/reference/feed-dialog/v2.3
But I ran into a lot of issues trying to embed video. Supposedly you need the video player on your site to be HTTPs, but setting particular pages to HTTPs in a Rails app is non-trivial (though I'm sure it's doable). You can see some images above of my early attempts, which failed to embed video and only showed a thumbnail image that would link to the project page on the Spin website.
After consulting with @chrisg, we discovered that the Facebook Share Dialog did exactly what we wanted:https://developers.facebook.com/docs/sharing/reference/share-dialog
This draws from Facebook metatags where you specify the media format and video. You can see a demo of it working in the video above.
If you care about the details, you can read more about it here:
EDIT
So I just resubmitted my Twitter card player after 2 rejections. The issue was two-fold.
First, Rails 4 automatically sets a header called "x-frame-options" to "SAMEORIGIN" which means if Twitter tries to create an iframe with your video player, it fails. To override this, I added the following to my application.rb file in my Rails app:
config.action_dispatch.default_headers['X-Frame-Options'] = "ALLOW-FROM https://twitter.com"The second issue is that I have a custom domain for my production server (spin.media.mit.edu rather than the herokuapp URL). Because the Twitter video player needs to load from a secure page (HTTP), it doesn't know what to do with a custom domain. I solved this problem by setting my Twitter metatag to point to the herokuapp URL (which automatically has SSL enabled) rather than the media lab URL. If I didn't do this, I would have to go through some complicated process of paying for an SSL certificate.
So after these changes, I resubmitted the card to Twitter - hope they get approved!
Comments (0)

I had a conversation with folks from the Exploratorium's Tinkering studio a few weeks ago that inspired me to think about alternative viewing modes for Spin projects / "sets."
I'm designing a filmstrip interface that enables users to view all spins from a set side-by-side as a way to easily compare differences across time. You can see some examples above.
Some challenges / thoughts I have about this interface:
- I think I would like all Spins to be side-by-side, but this can be difficult with projects that have a lot of Spins, as they take up less space on the page. I think the ideal situation is Sets that have 2-3 Spins. One option would be to always have 2 side by side and require the user to scroll, but this would break the timeline interface where you can click and drag to see all the spins change to the same orientation.
- After showing my advisor this interface, he commented that he would really like to see some annotaton to learn more about why changes were made to a design. I took out all annotation for the mobile application originally because I didn't have time to implement it for Maker Faire, but now I prefer for the app not to have annotation and to be as simple as possible. My current plan is to see how people use it and if there are requests for annotation - and if so, whether people want it for mobile or web. Then I'll worry about designing it. (:
- I also want to have a name for this viewer that is aligned with this DJ terminology I tried to use for the rest of the app (spins / sets). I'd love to hear if anyone has suggestions!
Comments (0)


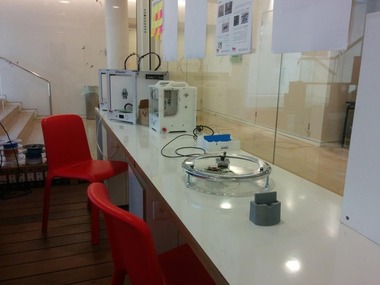

After Maker Faire, I was busy assembly four additional turntables to send out to different Makerspaces around the world!. One is curently in the Netherlands, one is in a Hackerspace in New Jersey, another is in a Makerspace in Israel, and the last is in at NYU!
I recently found a community partner, the Possible Project, who will be using the turntable for 10 weeks over the summer. I'm excited both because it's an awesome program and it's literally 5 minutes away from my lab!
You can see some images of the Spin Turntables around the world above. (:
Comments (0)
To be honest, I haven't been documenting development work around the iOS app very much because there isn't much to show. Mostly just changes to code!
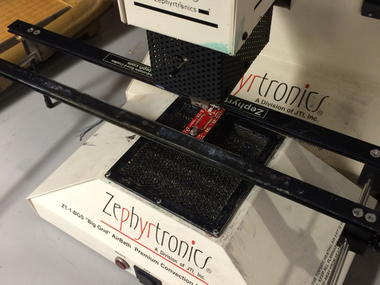
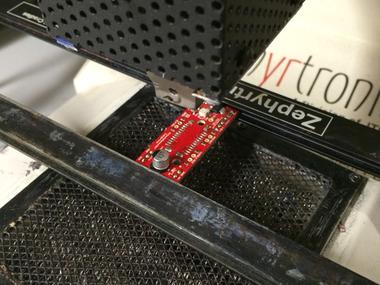
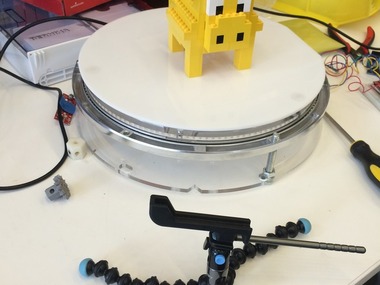
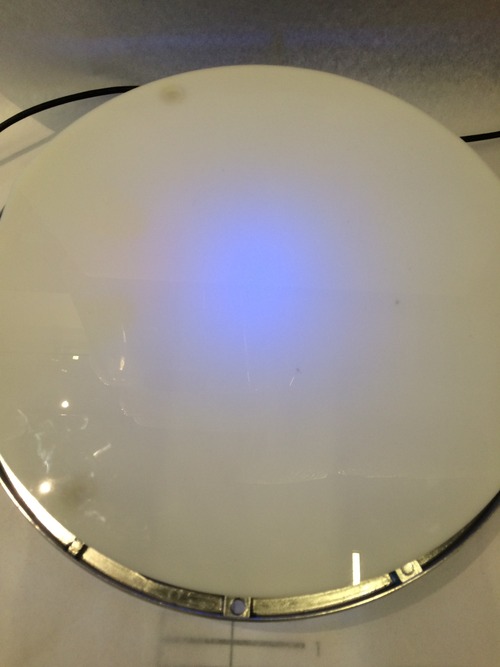
I did make a significant change today that fixes an intermittent communication problem we were having with spin rotations. Once in a while, the turntable wouldn't make it all the way around 360 degrees, as you can see from the image above. I'm pretty sure this was a software issue having to do with the Audio library I'm using for generating tones to send to the turntable.
In the original code, the phone would send a signal each time the turntable need to rotate (24 degrees). I did this so a user could easily cancel a Spin midway (at which point, the app would cease sending the rotation signal). But sometimes the turntable wouldn't rotate even when the signal was supposedly sent from the phone. This would happen in a very unpredictable way. With integrated projects like this, it can be hard to determine what the source of the problem is because it can be a software issue, a hardware issue, or a mechanical issue.
Anyway, I decided to restructure the communication protocol so that a single start signal is sent to the turntable, and a single stop signal is sent as well. Once the turntable receives the start signal, it will rotate the turntable 15 times unless it receives the stop signal, at which point, it stops rotating:
void loop(){

  if(rotating == false){
    digitalWrite(LED_PIN_3, HIGH);
    digitalWrite(LED_PIN_1, HIGH);
  }

  if(modem.available ()) {
    // RECEIVED SIGNAL FROM IPHONE
    int input = modem.read ();

    if(input == 253){
      // begin spin - flash LEDs
      Serial.println("start");
      flashLEDsOnce();
      currentRotation = 0;
      rotating = true;
      cancelled = false;
      delay(1000);
    }else if(input==251){
      Serial.println("stop");
      // stop arduino
      rotating = false;
      cancelled = true;
      currentRotation = 0;
    }else if(input == 250){
      Serial.println("done");
      // arduino is done
      rotating = false;
      cancelled = true;
      currentRotation = 0;
      flashLEDs();
    }
  }

  if(rotating && !cancelled && currentRotation < numRotations){
    Serial.println(currentRotation+1);
    singleRotation();
    currentRotation++;
  }else{
    rotating = false;
    cancelled = true;
  }
}
(Full code attached)
It was important to place the check in the loop() rather than in the singleRotation() function.
I'm still running into an issue where sometimes the Audio signal isn't generated properly and the audio signals don't seem to be sent; restarting the app seems to fix it. If I get my hands on an audio splitter, I'll try to figure out when this is happening; since the phone is plugged into the turntable, I don't audibly hear the signal.
Comments (0)
I got a request to be able to shoot continuous video (rather than GIF-like videos). The reason for the request is for a more professional application than what I I designed the Spin turntable for, but I built a custom extension that basically takes button input to trigger the turntable to do a full rotation. Rather than building video capture for this continuous spin into the Spin app, I suggested capturing the video directly through the camera app on the phone.
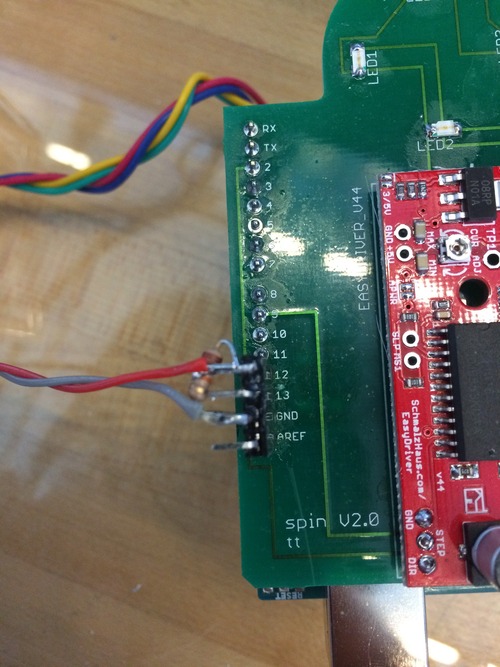
Creating the button input was pretty straightforward as far as buttons go, but I wanted to incorporate a substantial button, so I opened up a Staples Easy Button that we had lying around in lab. I unsoldered the speaker leads and soldered one cable to one of the speaker pins (the top-most one on the board when the speaker leads are on the left side of the board) and cable for GND. I then soldered these cables to a female header to plug into the shield (you can see the image above), with the non-GND cable going to a digital input on the Arduino.
I also added a pull-up resistor (10K) to prevent floating values at the input pin, but then I realized that I could do this programmatically with INPUT_PULLUP. I realized after I had already soldered the resistor to the header, though, so it's still there.
Arduino code attached!
Comments (0)
Today, I launched an updated version of the iOS app that has a pretty major change - instead of uploading 15 images to a server and processing them off the phone, videos and GIFs are now created directly on the device.
This doesn't get rid of all network dependency - the app still needs to upload the resulting video and GIF to the server (for record keeping and also because sharing the spins directly on Facebook and Twitter require a URL to the video hosted on the Spin server). Also, stitching multiple Spin videos together in a project still happens on the server.
Creating the videos and GIFs locally has a few advantages:
- It's not as network dependent, since some people were previously running into issues getting all 15 images to upload to the server before they were processed.
- Video and GIF creation are generally faster and don't run into timeout issues, which can happen on Heroku when processes take too long.
The only disadvantage I can think of of this approach is I no longer keep image records of all the images in a Spin. That means if you want to regenerate a Spin from the images (which I had previously done), I can't because those images are only generated on the device. One potential workaround is getting the images directly from the GIF, which you can do in Preview or other viewer software, but the quality of the stills in the GIF are not quite as high as the original images.
I used two tools for generating videos and GIFs from images on an iOS device. There is a great library called CEMovieMaker that saved me a lot of time. With the library, I basically pass it an array of UIImages and it'll return a video created with them:
NSDictionary *settings = [CEMovieMaker videoSettingsWithCodec:AVVideoCodecH264 withWidth:videoDimensions.width andHeight:videoDimensions.height];
self.movieMaker = [[CEMovieMaker alloc] initWithSettings:settings];
[self.movieMaker createMovieFromImages:[_spinImages copy] withCompletion:^(NSURL *videoURL){
                    self.videoURL = videoURL;

                    // UPLOAD ASSETS TO THE SERVER
                    [self uploadVideo:self.videoURL];
}];
I did make a few modifications within the CEMovieMaker files. The first was to adjust the frame time so that each image would be visible for 0.2 seconds:
_frameTime = CMTimeMake(1, 5);The next was a slight change to the createMovieFromImages method so all images had the same length in the video (with what's currently on Github, the first frame lasts 2x as long). More on that here:
https://github.com/cameronehrlich/CEMovieMaker/pull/9
Then for GIF generation, I found a StackOverflow post that helped me write this method:
-(NSURL *)generateGif{
    NSDictionary *fileProperties = @{
                                     (__bridge id)kCGImagePropertyGIFDictionary: @{
                                             (__bridge id)kCGImagePropertyGIFLoopCount: @0,
                                             }
                                     };
    NSDictionary *frameProperties = @{
                                     (__bridge id)kCGImagePropertyGIFDictionary: @{
                                             (__bridge id)kCGImagePropertyGIFDelayTime: @0.2f,
                                             }
                                     };
    NSURL *documentsDirectoryURL = [[NSFileManager defaultManager] URLForDirectory:NSDocumentDirectory inDomain:NSUserDomainMask appropriateForURL:nil create:YES error:nil];
    NSURL *fileURL = [documentsDirectoryURL URLByAppendingPathComponent:@"animated.gif"];

    CGImageDestinationRef destination = CGImageDestinationCreateWithURL((__bridge CFURLRef)fileURL, kUTTypeGIF, [_spinImages count], NULL);
    CGImageDestinationSetProperties(destination, (__bridge CFDictionaryRef)fileProperties);
    for (NSUInteger i = 0; i < [_spinImages count]; i++) {
        @autoreleasepool {
            UIImage *image = [_spinImages objectAtIndex:i];
            CGImageDestinationAddImage(destination, image.CGImage, (__bridge CFDictionaryRef)frameProperties);
        }
    }
    if (!CGImageDestinationFinalize(destination)) {
        NSLog(@"failed to finalize image destination");
    }
    CFRelease(destination);

    NSLog(@"FINISHED GIF AT url=%@", fileURL);
    return fileURL;
}
Hopefully this will make it easier for people to use Spin without having a fast Internet connection.
Comments (0)
Even with the fixed communication bug I posted about ~2 weeks ago, there was still a bug where sometimes the audio signal wouldn't be generated properly. I knew all along that the ideal situation would be to do a sort of handshaking protocol between the turntable and the app - the app should send a signal to the turntable, wait for a confirmation signal from the turntable, and then start the Spin.
I decided to finally implement this, which should solve all communication problems going forward. I was glad I had documented my earliest attempts at this before the Spin app was even implemented since I could refer back to it. The chain of events is as follows:
- User clicks "start" in the Spin app, which sends a start signal to the turntable
- When the turntable receives the start signal from the app, it returns a confirmation signal to the app
- When the app receives the confirmation signal, it begins the spin.
I send a confirmation signal from the turntable to the app using the SoftModem library. This is what the Arduino code looks like, where the important line is "modem.write(0xFC)"
if(modem.available ()) {
    // RECEIVED SIGNAL FROM IPHONE
    int input = modem.read ();

    if(input == 253){
      // begin spin - flash LEDs
      Serial.println("start");
      modem.write(0xFC); // send confirmation signal to app
      flashLEDsOnce();
      currentRotation = 0;
      rotating = true;
      cancelled = false;
      delay(1000);
    }
...
}
Then in the iOS app, I check if a confirmation signal from the turntable was received and trigger a NSNotification to start the turntable:
- (void)receivedChar:(char)input {
    self->local_input = input;
    [self returnChar];
    NSLog(@"Received: %d", input);
    if(input == -4){
        NSLog(@"start turntable confirmation signal received");
        [[NSNotificationCenter defaultCenter] postNotificationName:@"turntableStart" object:self];
    }else if(input == -2){
        NSLog(@"stop turntable confirmation signal received");
        [[NSNotificationCenter defaultCenter] postNotificationName:@"turntableCancelled" object:self];
    }
}
One thing I haven't figured out is why the received character doesn't seem to match the decimal value of the hexadecimal character from the turntable – when the iOS app receives 0xFC, it reads it as -4. Nonetheless, it always sends -4, so this is what I used.
Then in my SpinViewController.m, the ViewController for creating a new Spin, I add an observer for the NSNotification:
[[NSNotificationCenter defaultCenter] addObserver:self selector:@selector(executeSpin) name:@"turntableStart" object:nil];Another issue I had to tackle was that the start signal would not always be properly generated in the app. To address this problem, I set a timeout within which the app expects to receive a confirmation signal from the turntable. If it doesn't receive a confirmation within this time, it sends the start signal again. It does this up to 5 times before it gives you an error message in the app that it's unable to connect to the turntable:
- (IBAction)startSpin:(id)sender {
    NSLog(@"clicked startSpin");
    startPressed = TRUE;

    [self writeArduinoStart];

    //add timer method here to resend writeArduinoStart if it hasn't started
    confirmationTimer = [NSTimer scheduledTimerWithTimeInterval:confirmationTimeout target:self selector:@selector(checkConfirmation) userInfo:nil repeats:YES];
}

-(void)checkConfirmation{
    if(_spinStarted){
        // the confirmation signal was received - invalidate the timer
        [confirmationTimer invalidate];
    }else if (!cancelPressed){
        confirmationCount++;
        if(confirmationCount < confirmationLimit){
            NSLog(@"resending writeArduinoStart");
            // the confirmation signal was not received - resend signal
            [self writeArduinoStart];
        }else{
            [confirmationTimer invalidate];
            // show error message - unable to connect to turntable
            UIAlertView *alert = [[UIAlertView alloc] initWithTitle:nil
                                                            message:@"Unable to connect to turntable!"
                                                           delegate:self
                                                  cancelButtonTitle:@"Cancel"
                                                  otherButtonTitles:nil];
            [alert show];
        }
    }
}
You may have noticed in the code I pasted that I also have a similar NSNotification for cancelling the spin, which essentially has the same handshaking functionality.
One side effect of all of this is that you can no longer created GIFs without the turntable connected – if the app doesn't receive a confirmation signal, it never starts the Spin. This is good because before, it would sometimes begin capturing a spin without a proper connection to the turntable.
I'm going to use this same functionality to ensure that you can only register for Spin when you actually have a turntable so I can just put the app on the App store and avoid this Beta nonsense - that way, people with a turntable can download the app much more easily.
Because I made changes to both the Arduino sketch and the iOS app, anyone with a turntable will need to upload a new sketch to their turntable.
Comments (0)
I had been using Crashlytics for Beta testing (which I actually really recommend compared to using Apple's beta process, since you can push as many updates as you'd like and it's pretty seamlessly integrated). But the whole sign up process for Beta testing has been a challenge for a few reasons:
- It's easy to lose track of emails - you need to click a link in an email to first register your device and then click another link once you've been approved and can download the app.
- It's a difficult process for me to approve new devices, which includes updating my developer certificates and re-exporting new builds each time new users request the app.
To bypass this, I decided to submit the app to the App Store. But I still only wanted people to be able to register to use the app if they had a physical turntable (since my lab is paying for AWS hosting, the Heroku server, etc. and I didn't want to pay for random GIFs).
I debated a few different options for checking if someone was approved to use the app. My first thought was to create a password that all approved users would need to use to register via the app, but that didn't seem ideal since you would need to remember the password. Luckily, I had just gotten two-way communication working between the app and the turntable, so I decided to have a one-time setup process where you confirm that you can connect to the turntable, and then it lets you register for an account.
This involved creating the startup sequence, which was kind of fun because I got to make a fun little animation for plugging the audio cable into the phone (fun fact: I made three different still images in illustrator and then created the video using FFMPEG, the same process I use for creating the videos / GIFs with Spin! Very meta). Then when the app connects to the turntable, the turntable does a short back and forth movement to confirm that it received the signal.
You can see the whole process in the video above! Of course, it then took Apple over a week (9 days to be exact) to approve the app, which required me to call in because the app was listed as for sale in iTunes connect but wasn't appearing on the App store...anyhow, here is the link!
https://itunes.apple.com/us/app/spin-turntable/id999530437?ls=1&mt=8
Comments (0)
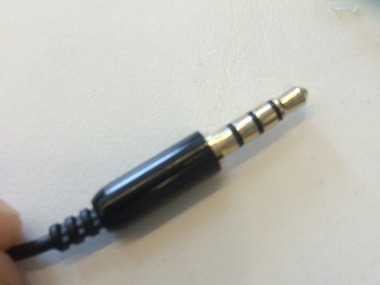
The Spin turntable connects to the iPhone using an audio cable. In particular, the Left channel and Mic lines are used for two-way communication. (The Left channel transmits an audio tone to the Arduino, and the Arduino returns a response via the Mic line).
I have purchased several audio cables up to this point to test with. It turns out that sourcing 4-pin audio cables is not as easy as it may seem, as most audio cables are 3-pin. If you filter out 3.5mm 4-conductor cables on Digikey, for example, you only get one result!
I wanted to find a cable that had a narrow barrel that would let you plug into your iOS device without having to remove any case you might use to protect your phone.
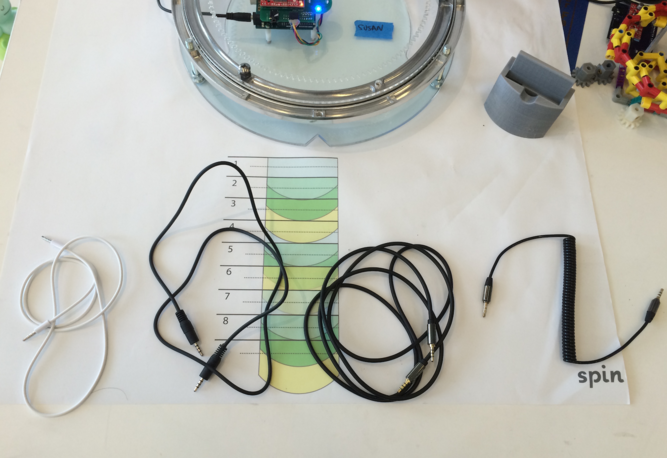
You can see from the image above the four audio cables I tested, from left to right:
1) ENEMO audio cable from Amazon - This was the best option up to this point because it wasn't unnecessarily long, had a very thin barrel, and matched the aesthetic of the rest of the system (white). Unfortunately, it turns out that 3/10 of the cables I purchased from Amazon had faulty mic lines, which I confirmed using a multimeter. This was what led me to reconsider other options.
2) My Cable Mart 4-pin 1.5ft cable - This cable was actually the first one I purchased and was a nice option mostly because it was so inexpensive, at less than $2 a piece. Unfortunately, the barrel was too big and required you to remove your phone case before connecting to the turntable, a restriction I didn't want to have.
3) Supertech 6" cable - This is the most expensive cable, at $8 a piece. However, after purchasing it, I could see that it was very good quality, despite its very long length. Unfortunately, they don't sell a shorter cable, and this seems like the most robust option.
4) Poweradd coiled cable - This is a coiled cable that is 5' at its extended length. The coiled cable, though, ended up being a restriction because it had resistance, making it difficult to position your phone.
The winner, for now, is the Supertech 6" cable!
Comments (0)


Recently, I've been trying to figure out a way to post GIFs / Videos to Twitter directly from the app. I would love to get some thoughts about a few different options.
Option 1: Twitter Player Card
Currently, when you tweet from the app, it includes a URL to the animation on the Spin website. The project page on the Spin website includes tags that create a Twitter Player Card [more on that here: https://dev.twitter.com/cards/types/player], which appears when you click on the tweet in your feed (see first video above).
Pros:
- Videos can play on Twitter, no matter the size. Normally, there are size restrictions for videos and GIFs uploaded directly to Twitter, but using the Twitter Player card, I can play (theoretically) whatever video I want since it's hosted on the Spin website.
- The video autoloops, so it appears GIF-like, even though it's a video.
Cons:
- There's really only one con, which is a huge con: Twitter doesn't auto-expand Player Cards. That means a user has to click on your tweet to view the actual animation, which gives an animation much less visibility and chance of being seen on a feed.
Option 2: Image Thumbnail
I'm using TWTRComposer [more on that here: https://dev.twitter.com/twitter-kit/ios-reference/twtrcomposer] to create the tweet via the iOS app. With TWTRComposer, you can attach an image, but not a video. This means that you'll see an image in-line with the tweet, but it won't be animated - you'll have to click the link to view the animation on the Spin website (video 2 above)
Pro:
- Having the preview image inline gives the tweet more visibilty in a Twitter feed.
Con:
- Spin is supposed to be about animations! So having a static image kind of defeats the purpose.
Option 3: UIActivityViewController
The third option, which I still need to figure out completely, is using the UIActivityViewController, which you can see in the third video. The trouble with this option is that you would technically click a button to share the post, then select which platform you want to post it on (Twitter or Facebook), and then compose the tweet.
Pro:
- In theory, this would enable me to upload video and have that embedded directly in the Tweet (although there are a lot of complications to this I still need to figure out.
Cons:
- The video won't auto-loop.
- There's an extra step to tweet because you have to click share and then click tweet before you can compose your tweet.
- Development time (which is only really a problem for me, I suppose!)
Option 4: Download the GIF / VIdeo and post directly
Finally, the last, and probably best option, is to just save the GIF / video to your phone and then add it to a tweet. You can, of course, do this right now. But it means several extra steps to posting on Twitter, which isn't ideal.
Pros:
- The GIF / Video is auto-expanded on Twitter because it's hosted by Twitter.
Cons:
- You have to go through several extra steps to download the animation and post it on Twitter.
- You have to deal with Twitter file size constraints (only a single Spin GIF can be posted because any more than one rotation creates a GIF greater than 5 MB, for example).
- Videos don't autoloop
So, as you can see, there are a few different considerations for posting to Twitter. Any suggestions or thoughts?
Comments (0)
I recently realized an issue with viewing Spin animations through the Spin website on mobile devices. By default, iOS devices do not allow for autoplay HTML 5 Videos, which is clearly an issue for Spin since most of the site is made up of autoplayed, looping videos! You can see an image of what the user's profile page looked like, for example, in the image above, where it was essentially nothing but play buttons.
Luckily, I found that you can add a "poster" to a video, which can point to a GIF. This is kind of bizarre because I think video autoplay was disabled on mobile devices to prevent users from paying for network usage unnecessarily, but GIFs are much larger and thus more time intensive to load, so this workaround doesn't quite make sense. Anyhow, it works, so the last step was to remove the HTML5 Play button from mobile so you just view the GIFs directly. I did this by adding the following code:
	<style>
	video::-webkit-media-controls {
    	display:none !important;
	}
	</style>
This code runs if I detect that the website is being loded on a mobile device.
This means that profile pages, project pages (both timeline and filmstrip interfaces), and spin pages now have looping video when you view it on a mobile device!
Comments (0)
Last week, I had a blast spending two days experimenting with the Spin Turntable at the Exploratorium. The Tinkering Studio purchased and fabricated all the components to make their own turntable, so after assembling it together, we brainstormed how we might use it on the museum floor.
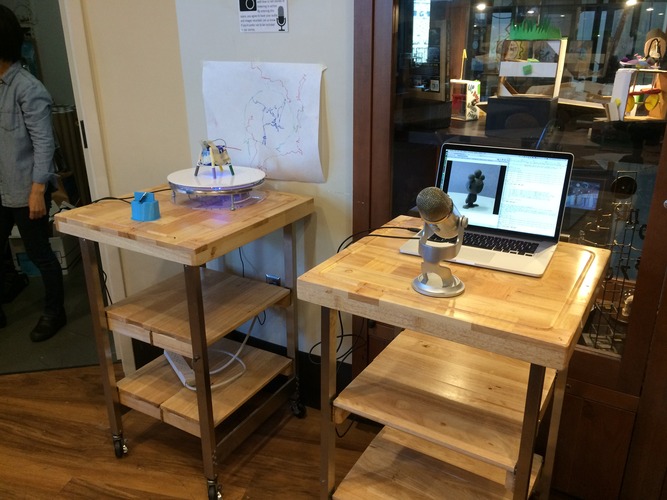
One aspect I wanted to test out was an audio annotation feature that would enable people to record descriptions of their projects. This is the most popular feature request I've received from the adults who have requested the turntable.
For testing this out, we set up my laptop with a microphone next to the turntable. After the kids created their Spin animation, we asked if they were interested in telling us more about their creation. If they said yes, I would pull up their project on the website, and while the video was playing, I would capture their audio recording using Quicktime. Then I uploaded the audio file to the website (a feature only I have access to at this point).
You can check out an example here: http://spin.media.mit.edu/spins/798 (there is an audio icon in the top right you can hover over to hear the audio).
I really appreciated being able to test this rough prototype with kids and learned a lot about some of the design considerations for developing this feature. Here are a few things I'm currently thinking about:
- How to frame the reflection? What are good questions to prompt meaningful reflection?
- When to record? Should the audio annotation happen while the turntable is capturing the Spin, or should it happen after the GIF is created?
- How to record? Should the recording happen in the mobile app or on the website? This is made somewhat more complicated by the fact that the audio cable connecting the turntable to the phone uses the Mic line, so I believe the user would have to unplug the phone from the turntable to do the recording.
- How to show the recording? Each spin is only 3 seconds long, so currently, the recording appears on the Spin page (rather than the project page), where the Spin animation loops indefinitely. What happens when a project has multiple Spins, each only 3 seconds long?
- How to share the recording? Should the recording only be listenable on the Spin website, or should the recording be embedded in the video so that you can hear it when it's shared on Twitter / Facebook / Instagram, etc.?
Lastly, and probably the most important question, is whether kids are interested in adding the audio recording to their Spins or if it's something mostly educators want to have integrated into the platform. During the workshop, only two of the children wanted to record a description of their projects, but this may be because of the nature of the short, drop-in workshop. Would things be different for projects built in a classroom over several weeks?
I'm looking forward to prototyping a few different options for the audio annotation feature in the coming weeks!
(Thanks to Ryan from the Exploratoirum for the picture of the setup!)
Comments (0)
As the first pass of embedding audio with Spin animations, you can now upload audio files to a Spin. Ultimately, I will try out recording audio directly in the browser (and perhaps a way to add recordings through the app) but I thought I would share a first version for people to try.
You can add an audio recording by following these steps:
- Open up a project on the Spin website and then click the "i" button for a particular Spin.
- On the Spin page, you can click the Add Audio icon in the bottom right to upload a mp3 or m4a.
- Once the file is uploaded, you can hear the audio by hovering over the volume icon in the top right.
Check out the video above for more information.
Comments (0)
After sending out a short survey to Spin turntable owners about embedding audio descriptions with Spin animations, I confirmed that most are interested in capturing audio recodings directly in the iOS app.
The trickiest part about doing this is ensuring that audio recording and playback works when there is an audio cable plugged into the device. If you think about when you plug headphones into your iPhone, apps will typically default to playing sound through the headphones and may assume that you're using an accessory with a built-in mic. Because I'm guessing most people will want to create the audio recordings right after they've created their Spin animation, I need to account for overriding these defaults so they don't have to unplug their iOS device from the turntable each time they do a recording.
The general UI I'm designing is that,
- The user creates a Spin animation and is shown a preview of the animation
- If they want to create an audio recording, there is a button they can hold down to create a recording that's up to 20 seconds long
- Once they let go of the button, they are shown a preview screen of the animation with the audio overlay. If they want to save the recording, they tap a button to add it to the animation.
- The audio then becomes associated with the animation and is listenable through the app or on the Spin website.
You can see the first working prototype in the video above.
When Spins are created, I need to force the Audio to work over the audio cable (not using the internal speakers on the iOS device). I'm doing this with the following code:
    [[AVAudioSession sharedInstance] setCategory:AVAudioSessionCategoryPlayAndRecord error:nil];
    [[AVAudioSession sharedInstance] overrideOutputAudioPort:AVAudioSessionPortOverrideNone error:nil];
    [[AVAudioSession sharedInstance] setActive:YES error:nil];
Then when the user creates an audio recording and wants to hear their recording, I force the audio to play through the internal speakers:
    UInt32 audioRouteOverride = kAudioSessionOverrideAudioRoute_Speaker;
    AudioSessionSetProperty (kAudioSessionProperty_OverrideAudioRoute,sizeof (audioRouteOverride),&audioRouteOverride);
Ultimately, I would like to add a third option for exporting a Spin through the app and website: Save Video + Audio. This will involve looping the video to the length of the audio clip so that the video plays until the audio recording is over. I'm also working on adding a feature so users can remove audio recordings they've previously added to a Spin.
I plan to send out beta invitations this week for users who want to test this feature out. Since I only have a few iOS devices to test on, it'll be really helpful to see how it works across a range of devices!
Comments (0)
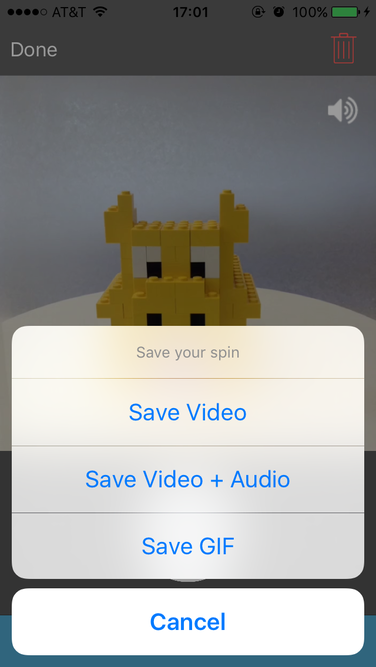
The last part I wanted to build into the audio recording interface (for now) is being able to export a video of a Spin that includes an audio recording.
Here are the steps for doing this:
- Get the length of the audio clip in seconds & determine how many times the video needs to be looped to account for the length of the audio clip
- Create a copy of the video that is looped based on (1)
- Merge the audio and video together into one video file
For Step 1: Get the length of the audio clip, I used Carrierwave's Uploader to download a temporary copy of the audio recording and determine the length using ffmpeg:
tmp_audio = AudioFileUploader.new
tmp_audio.download! @spin.audio.audio_file_url
length = FFMPEG::Movie.new(tmp_audio.path).duration
(FFMPEG was important because I initially used some other Gems, like AudioInfo, to find the length of the audio clip, but this led to strange Heroku Postgres connection errors).
Since each spin is 3 seconds long, I then duplicate the Spin video (using the same method I use to stitch together videos for a project). This involves creating a text file that specifies the file that needs to be duplicated, which looks something like:
file 'video.mp4'
file 'video.mp4'
where 'video.mp4' is the path of the Spin video and the number of lines in the text file are the number of times the video needs to be looped. I then run this line using the text file:
ffmpeg -f concat -i [txt_file_path] -c copy [loop_video_path] -y(the brackets around the path are not necessary and are just used to indicate what needs to be replaced)
Then, to stitch the video and audio together, I use the following command:
ffmpeg -i [loop_video_path] -i [tmp_audio.path] -acodec copy -vcodec copy [output_path] -yThis creates a video that has the corresponding audio clip.
Exporting the video works on both the website and through the mobile application. I'm now uploading the app for Beta testing and hope to try it out with a smaller set of users before putting it on the App Store.
Comments (0)
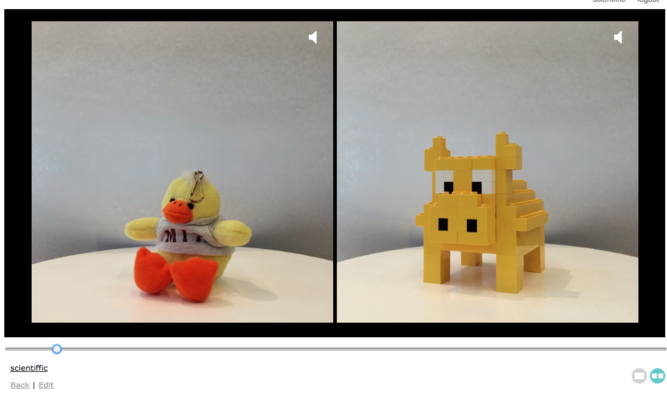
I added a feature so that you can listen to audio recordings on the Spin website through the filmstrip interface. By hovering over different audio clips, you can hear the corresponding audio while the video loops.
You can check out an example on the test server here:
http://spin360-staging.herokuapp.com/projects/1186/filmstrip
Comments (0)
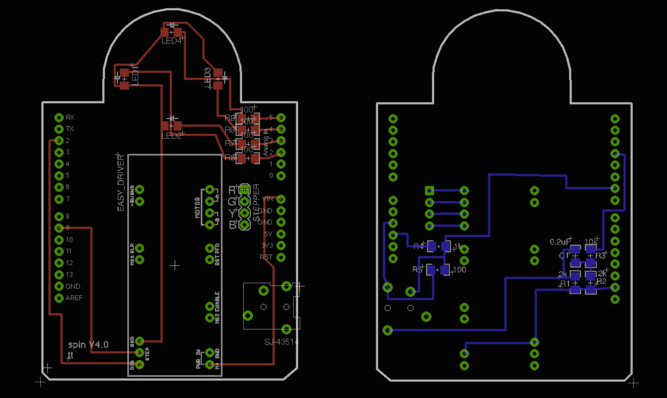
I got a very helpful suggestion from jaymesdec, who made a Spin turntable for his Makerspace. He suggested indicating the direction of the LEDs directly on the PCB. I did this by adding a diode symbol to the silkscreen. I also added board outlines to the various 1206 resistors and capacitors, which I hope will make it easier to know what orientation to place these components. You can check out the updated board here: https://oshpark.com/profiles/scientiffic
Comments (0)
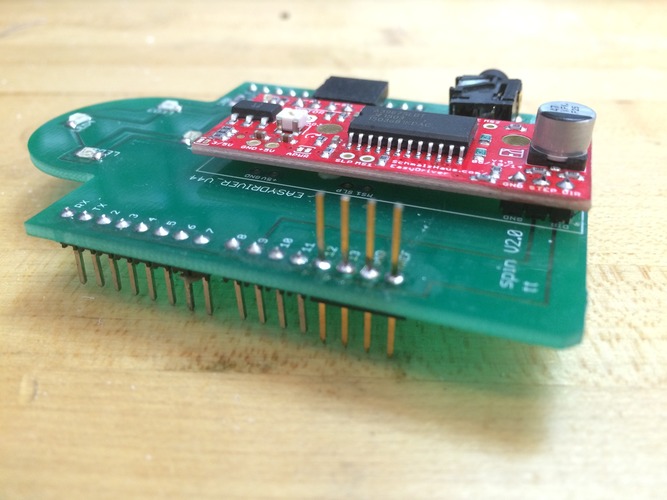
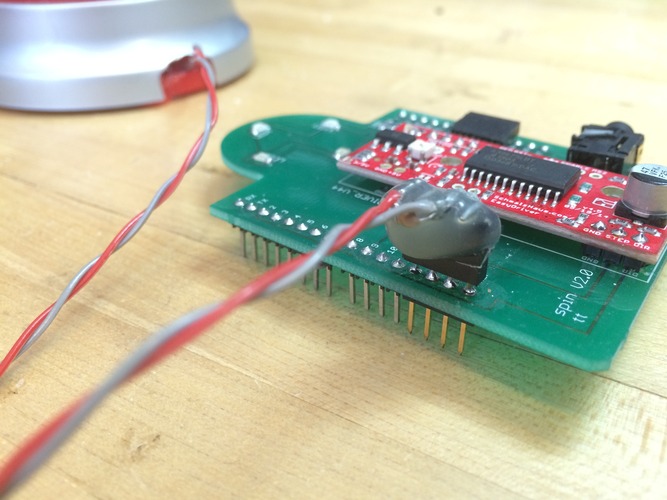
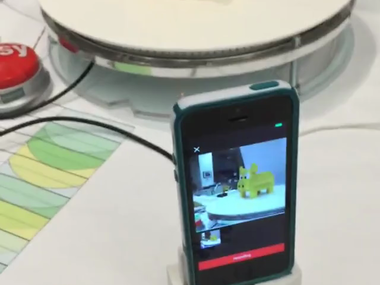


I created an extension to use a remote shutter button to start a Spin in the Spin iOS app.
When the user clicks "create set" to begin a new Spin, the app communicates with the turntable to let it know it's ready to receive input from the turntable. Then when the user actuates a button that's connected to pin 12 of the Arduino, the app will start taking photos.
If you're interested in building your own remote shutter, check out this tutorial I wrote about how to hack a Staples Easy Button (though you can certainly use any button of your choice). I recommend soldering long male headers to the Arduino shield and connecting the button using a 90-degree female header (you'll need to make sure there's enough clearance between the board and the moving platform).
I'm going to submit the update to the app store today, so the functionality should be available sometime next week.
_______________
Some notes about updates I made to the app to enable the remote shutter:
I needed to detect if the user has plugged in the turntable to their phone in order for this remote shutter to work. This involved detecting an AVAudioSessionRouteChange in the app. I set a notification in the viewDidLoad of the ViewController:
[[NSNotificationCenter defaultCenter] addObserver:self selector:@selector(audioRouteChangeListenerCallback:)
                                                 name:AVAudioSessionRouteChangeNotification
                                               object:nil];
and then send a signal to the turntable when a user plugs in the turntable:
- (void)audioRouteChangeListenerCallback:(NSNotification*)notification
{
    NSDictionary *interuptionDict = notification.userInfo;

    NSInteger routeChangeReason = [[interuptionDict valueForKey:AVAudioSessionRouteChangeReasonKey] integerValue];

    switch (routeChangeReason) {

        case AVAudioSessionRouteChangeReasonNewDeviceAvailable:
            NSLog(@"AVAudioSessionRouteChangeReasonNewDeviceAvailable");
            NSLog(@"Headphone/Line plugged in");
            if(!startPressed){
                NSLog(@"sending signal to Spin for remote button initiating");
                double delayInSeconds = 1.0;
                dispatch_time_t popTime = dispatch_time(DISPATCH_TIME_NOW, (int64_t)(delayInSeconds * NSEC_PER_SEC));
                dispatch_after(popTime, dispatch_get_main_queue(), ^(void){
                    [[[Audio shared:audioReload] generator] writeByte:0xFF]; // send signal to initative wait for remote button press
                });
            }
            break;

        case AVAudioSessionRouteChangeReasonOldDeviceUnavailable:
            NSLog(@"AVAudioSessionRouteChangeReasonOldDeviceUnavailable");
            NSLog(@"Headphone/Line was pulled out");
            break;

        case AVAudioSessionRouteChangeReasonCategoryChange:
            // called at start - also when other audio wants to play
//            NSLog(@"AVAudioSessionRouteChangeReasonCategoryChange");
            break;
    }
}
Comments (0)
A few teachers with Spins recently brought up an issue they were facing: now that they have a lot of sets, it can be difficult to find the exact set you want to add another spin to. (As an aside, this is great problem because it means the Spin turntables are getting a lot of use!)
One feature I've been wanting to implement for some time is tagging so you can easily search through projects. The feedback was a good excuse to start working on it!
Some types of tags I can anticipate are adding tags of a student's name, a fabrication process (e.g., lasercut, 3dprint), and materials (e.g., LEGO).
The most difficult part of thinking through the tagging interface was imagining the workflow of adding tags – when and where would the tags be added, and at what point would users want to search through their tags?
My working assumption is that people would add tags immediately after creating a Spin – that is, the tag would be associated with the spin rather than a set.
However, I imagine people wanting to search through their sets so that they can easily find a project and add a new spin to it. Because of this, I wanted tag searching to work for sets rather than spins.
What I ended up designing is a way to add tags to any spin so that you can add tags immediately after the spin is created. Then when a user loads the Spin app, they can search for a tag, and the app will return all Sets that have spins containing the particular tag.
On the Rails side of things, I set up tags using the gem acts-as-taggable-on and enabled people to filter through tags on their own projects by typing in /tagged/name_of_tag after their profile (for example spin360-staging.herokuapp.com/users/scientiffic/tagged/lego)
Once that infrastructure was in place, I could start working on the tagging interface for mobile, where I imagine most of the tagging will be done. Because of this, I haven't built a UI for adding tags through the website, just viewing tags. You can check out what those pages look like in the video above!
Comments (0)
With the tagging feature in place on the website, I could start working on what tagging would look like through the iOS app.
In the app, you can tap a "tag" button in the navigation bar after creating a Spin (or when viewing a Spin). When you hit the tag button, you can enter in as many tags as you want, each separated by a comma.
Once you've added tags, you can search by tag when viewing all your sets. The search results include sets with any spins that contain a particular tag.
You can check out a video of the current implementation above. I'd like to get rid of the flickering that occurs when loading the new sets, but otherwise, I'm pretty happy with the workflow.
I think in testing, I'll be able to see whether people are interested in adding tags to their sets. I could imagine there being some confusion over tags that are added to spins and those added to sets, so for now, I've restricted tagging to spins.
Comments (0)
I changed my mind about having an editing interface for tags on the website – since some educators now have almost a hundred spins, I figured it might be faster to edit tags on the website than through the app. You can see a video of the tagging interface above. Also, I pushed the feature just a few minutes ago, so people can begin adding tags to their projects! It will take about a week for Apple to approve the mobile update, though.
Comments (0)
One of the most popular requests I've received is Instagram integration, and it seems as if this is more desirable than the Facebook integration already built into the app. Looking at my logs of how often people share to different platforms, I discovered numbers that are pretty telling: Spins have only been shared on Facebook 4 times (compared to 47 times for Twitter).
After exploring some other apps, such as GifX, I realized that rather than completely posting to Instagram, you can simply open up the Instagram app and start a post. That way, the user can add any captions and filters within Instagram (and it would be easier for me to implement!)
I did a quick search on Stack Overflow for some relevant posts and came across this response: http://stackoverflow.com/a/26372278/1720985
However, to implement their code, I first had to update the Info.plist of my app and add new Key called "LSApplicationQueriesScheme" (as an Array type). Then I could add an item called "instagram" to enable people to open up an Instagram URL.
You can see a mostly working version in the video above. Unfortunately, there is a problem where the newly saved video may not automatically appear, but I found this is a problem in other apps too, not just Spin, so it is a known bug with this implementation. I don't think there is anything I can do to resolve it on my end. Nonetheless, I think this is good enough for now!
Comments (0)
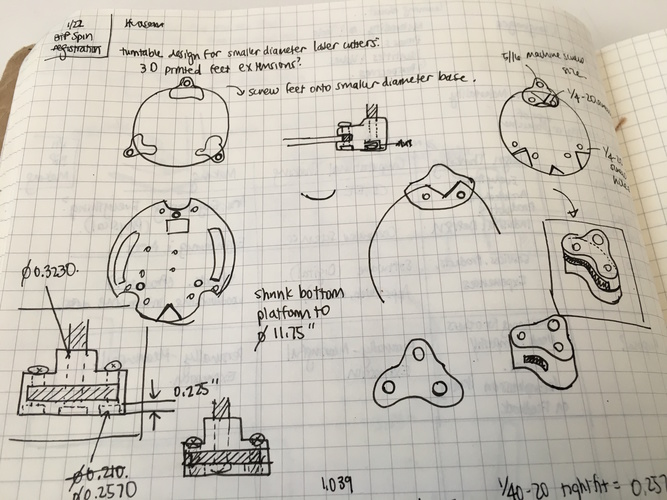
Since the Spin build instructions have been shared online, I've gotten several questions from people about laser-cutting components. What I discovered is that 12x24 is a common laser cutter bed size, and because of this, the 13" base of the Spin turntable is too large to cut.
The size of the turntable was determined from the dimensions of the turntable bearing from McMaster. I selected the smallest bearing, which has an outer diameter of 12.40". My first instinct was to look into smaller turntable bearings from other sources, leading me to examples such as this one from Amazon: http://www.amazon.com/300mm-Aluminum-Bearing-Turntable-Bearings/dp/B0045DTQ76/ref=pd_sim_328_1?ie=UTF8&dpID=41ztrOBAxZL&dpSrc=sims&preST=_AC_UL160_SR160%2C160_&refRID=1ZJ8CGZN6MKNVNXZSBZJ
But changing the size of the turntable bearing leads to a series of other changes, including adjusting the teeth size of the laser-cut outer gear and 3D printed motor gear, changing the screw sizes (and sourcing new hardware), and adjusting the Arduino code and iOS app to account for the time difference resulting from the gear adjustment. Ideally, the design of a smaller turntable would minimize the number of changes and make the app usable for both sized turntables.
That led me to think about only adjusting the base of the turntable and adding 3D printed "feet" that the turntable bearing could be secured to. This would enable me to keep the exact same placement of the stepper motor and retain the design of the motor gear and laser-cut outer gear.
You can see some initial sketches of the design above. I'm starting to work on the CAD model for the feet and hope to have something by the end of the week!
Comments (0)
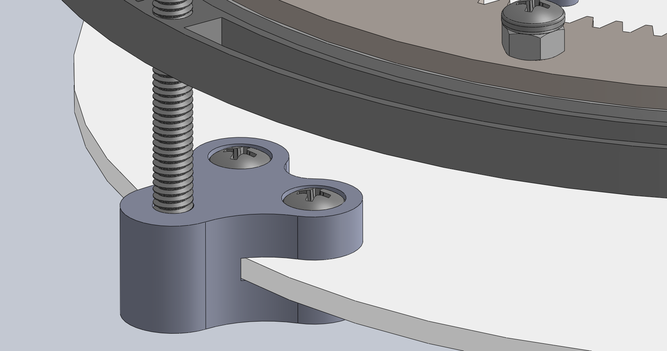
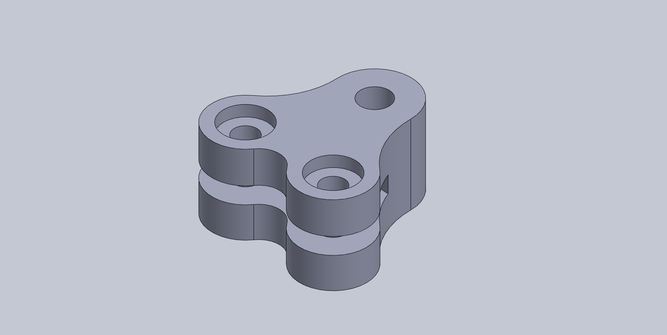
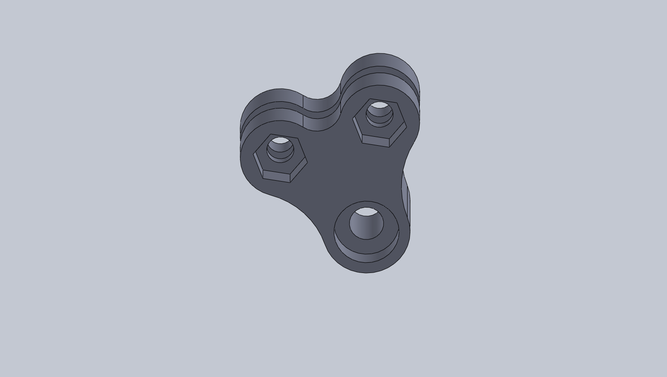
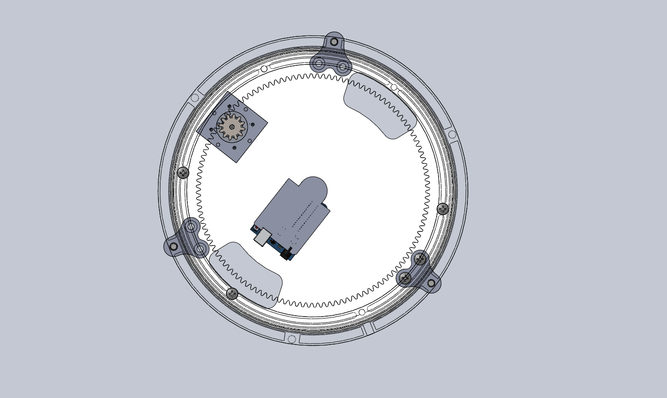


Today, I worked on a CAD model for feet that accommodate the outer diameter of the turntable and a smaller diameter base that will fit a 12" laser cutter. To minimize the number of extra parts, I reused the same sized hardware (1/4-20 screws) to secure the feet to the base, and I also added features to hold the corresponding nuts. I started a print job on our group's Ultimaker to check for sizing and hope to have an assembled turntable soon!
Comments (0)
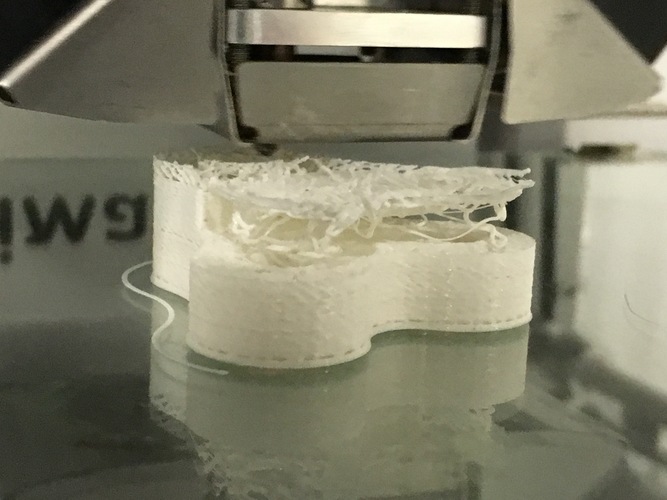
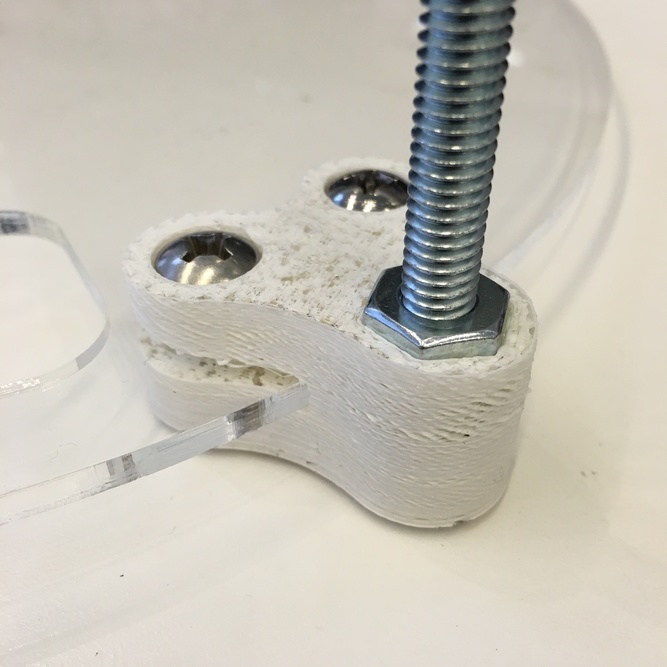
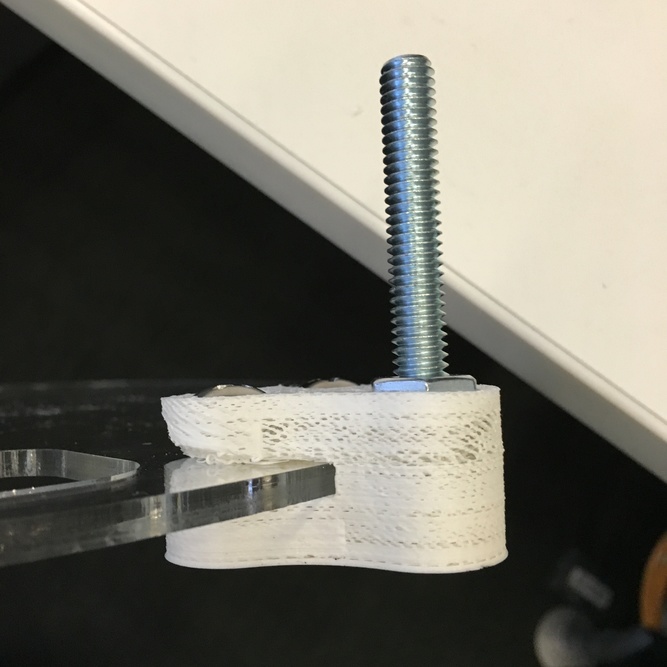
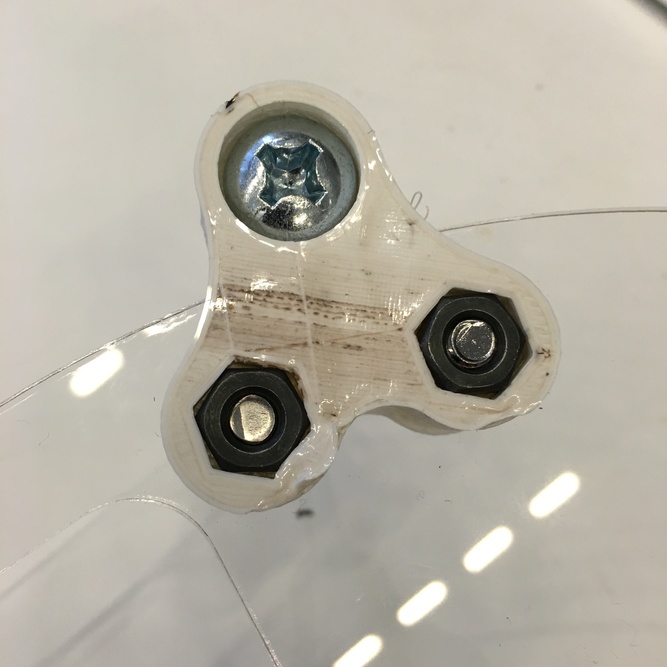
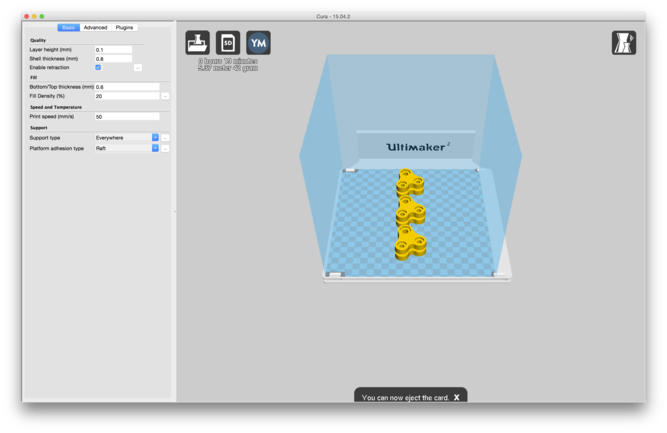

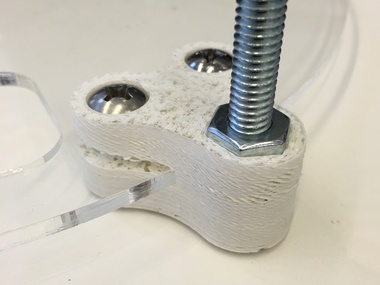
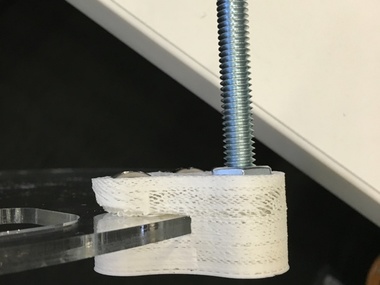
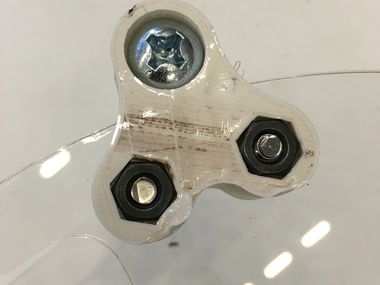
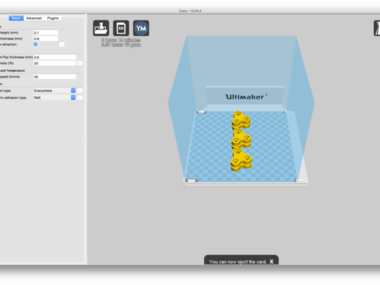
Today, I experimented with 3D printing the feet, starting off with a fast print just to check for dimensions. I accidentally forgot to add support for the first job, which meant that the overhang didn't turn out so well. Adding support in Cura and printing a second time also showed that, by default, the support is set for "touching baseplate," which means it didn't create support for internal features. By going into the expert settings in Cura, you can select "Everywhere" for the support type, which hopefully will add support within the part.
Even with the low quality printing, the feet worked well. I laser-cut all of the 3/16" acrylic on a single 12x24 sheet (the size of smaller laser cutters) and was able to secure the feet to the base easily. I've sent an 8 hour job to print all 3 feet in normal quality (with internal support material) – I'm excited to see how it will turn out! I unfortunately don't have an extra turntable bearing, which I ordered from McMaster last night, so hopefully a fully-assembled turntable will be complete in about a week or so.
Comments (0)
I'm starting to work on an Android version of the Spin app. I was hoping I would be able to find an undergraduate student to help build the app, but unfortunately, I've been unsuccessful with recruitment. Rather than wait, I decided to get started with the communication protocol.
I found some sample code for connecting to an Arduino using FSK and Android:
https://github.com/tatung/FSKModemTerminal
The first step was to get Android Studio set up (which took much longer than expected) and then running the FSKModemTerminal example app.
Then, after modifying the sample Arduino code (and ensuring that the volume was all the way up on my Android device, an issue that took me an embarrassingly long time to realize), I was able to get a working version.
Here's an explanation of what's happening in the video:
- The Arduino and Android device are connected via an audio cable.
- First, when I send a signal to the Arduino via the mobile application, the lights blink to show that the signal was received.
- Next, when I send characters via the Serial Monitor, the corresponding characters appear through the Android app.
This is essentially the Hello World of FSK!
Now that I know this works, I can get started on implementing the actual UI for the app.
Comments (0)


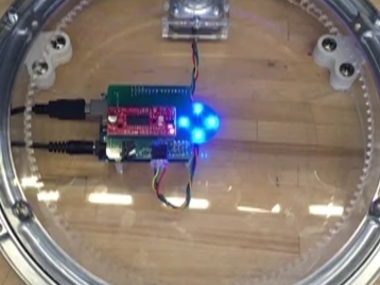
The modified turntable "turned" out great! Miraculously, everything worked as expected.
You can see an image of the fully assembled turntable and a video of it working above.
I updated the Spin build instructions to include a special page just for this modified design: http://spin.media.mit.edu/build_modified
Comments (0)
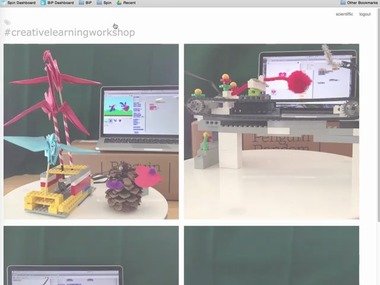
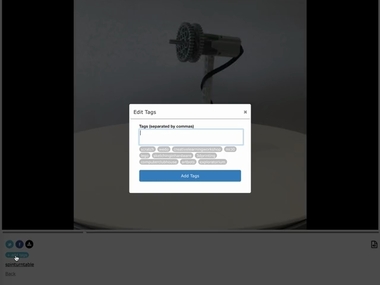
Based on how I saw the tagging interface being used over the past couple months, I realized there were two key improvements I wanted to make:
- Users should be able to easily see all the tags they've added to their spins.
- When you add tags, both on mobile and the website, you should be able to easily add recently added tags to new spins.
I updated the tagging interface on the Spin website and plan to update the mobile app over the next week or so.
You can see in the first video above what it looks like to view all of a user's tags on their profile page. Clicking on a tag will open up a new page with all spins with this tag.
In the second video, you can see how when you edit tags for a Spin, it will show you a list of recently created tags to make it easier to add existing tags to the spin.
Comments (0)

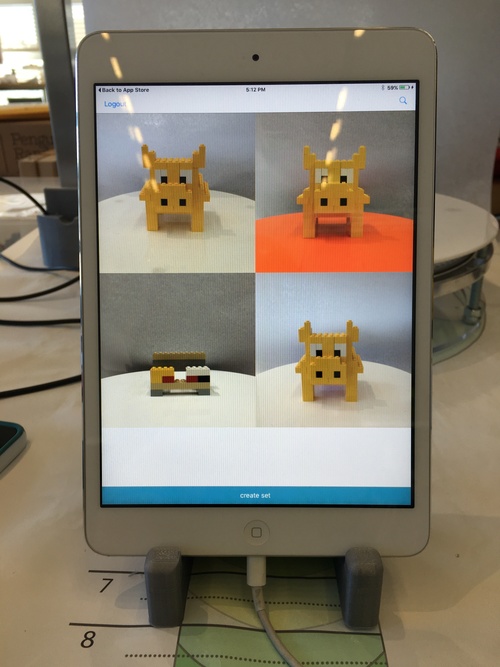
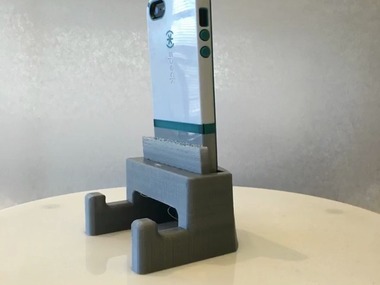
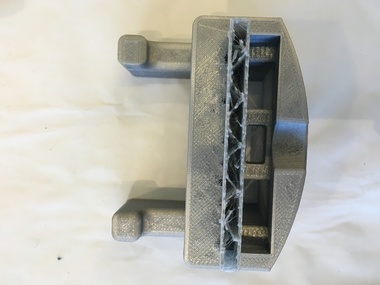
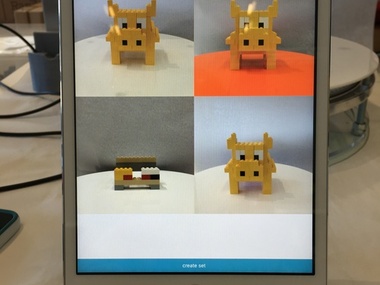
Over the past several months, I've seen Spin used with iPads and iPhones in different makerspaces. While I previously recommended this LEGO stand design, I thought it would be convenient not to have separate stands for different devices.
I originally sought to expand the original dock so that it could fit both an iPhone 4 and iPhone 6 (making the dock slot wider for larger devices), and I also wanted to make the dock more stable so it wouldn't tilt when you tap the screen. In the process of building extensions to the back of the dock to make it more stable, I realized that the extensions could double as supports for an iPad!
You can see the latest version above, though the 3D printer failed on me the last 2% of the job (frustrating!). In addition, I opened up holes so that the microphone won't be as obstructed for audio recording.
I'll be putting up the designs on the website and project repo on Github very soon. In the meantime, here's a spin of the different versions of the stand: http://spin.media.mit.edu/projects/1941
Comments (0)

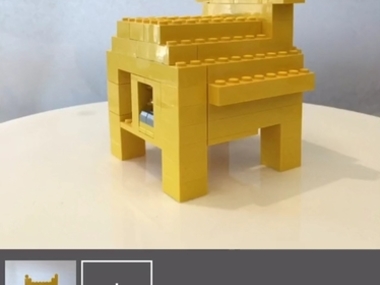

A while back, someone suggested that I add an onion skinning feature so that you could easily align new spins with any previous spins in a set.
It turns out this is really easy to do! First, I procrastinated by designing an icon. I wanted something cuter than an onion, so I designed a little ghost. Icons are very important.
Then in the app, I basically passed the URL of the previous thumbnail image to the ViewController that opens up the camera and set an ImageView with 0.35 alpha transparency over the CameraView. Clicking on the ghost icon toggles the onion skinning. Check out the video of the feature above!
Comments (0)
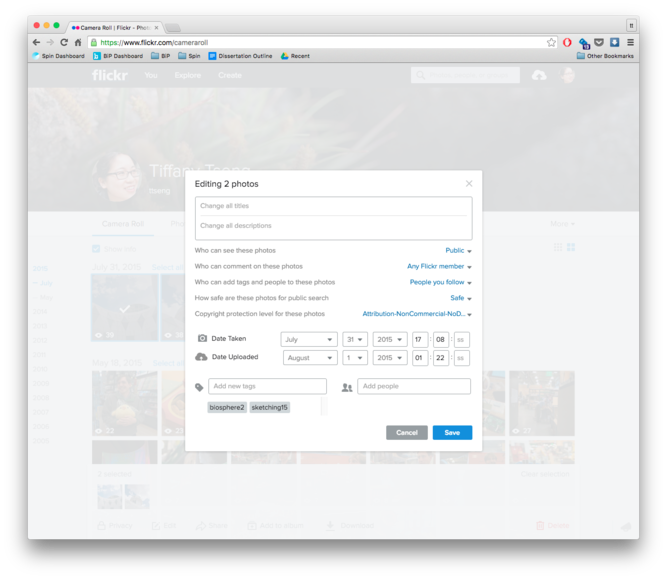
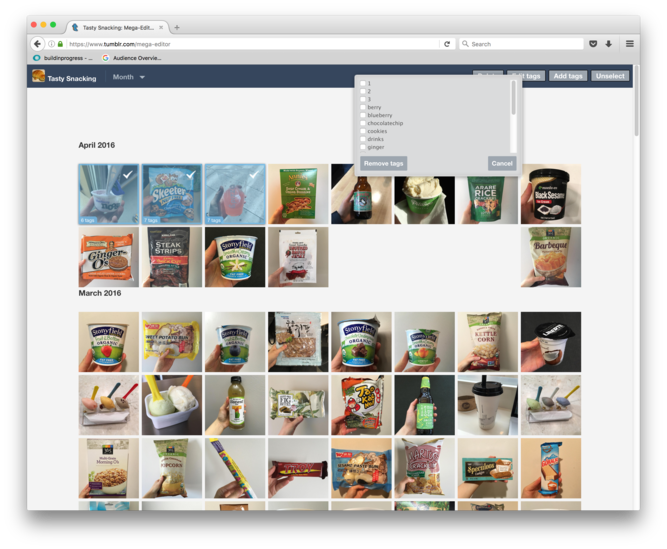

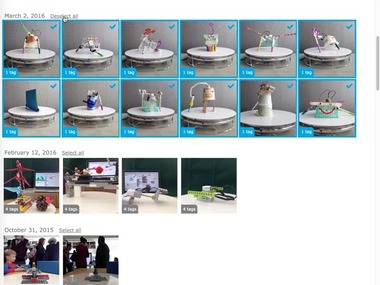
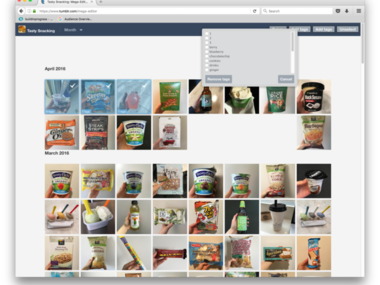
There is now a batch tag editor for easily adding tags to your set animations. Check it out by going to your profile page on the Spin website, clicking the tag icon, and clicking the "tag editor" button.
How this feature came to be:
I got inspired to work on a batch tag editor to make it easier for people to add tags to their sets. I started by looking at example tag editors for photo organization tools like Dropbox Camera Upload, Flickr, and Google Photos, as well as the Mega Editor for Tumblr. One commonality across the photo editors was making it easy to select all images from a particular date, which makes sense, since tags are usually added for events.
One aspect I appreciated about the Flickr interface is they made no distinction between adding tags and editing tags. With the Tumblr Mega Editor, you toggle between the two, which I think is a little confusing.
With the Spin tag editor, I organize all of a user's sets based on the date they were created and then allow people to add tags to multiple sets at once. The tool finds the common tags across sets and auto-suggests recently used tags, just like the current tagging interface for spins. The main challenges were making all the changes with AJAX to minimize page refreshes.
Questions
One question I have is whether I should still maintain a distinction between tags added to spins and tags added to sets. With the current interface, you add tags to sets, and they automatically get applied to all spins within the set. There are two reasons I've maintained tags for spins:
- I imagine that in the mobile interface, people would add tags right after the spins is created and wouldn't want to return to the set to add tags.
- I could imagine people have multiple spins in a set, where a tag may not apply to all spins in the set.
If any Spin users are reading this, I'd be interested in hearing if there are any preferences.
Comments (0)
I've had a longstanding issue with Twitter's media options, which I've written about pretty extensively in this documentation. While users have been able to add GIFs and Videos to tweets using the Twitter app, support for developers to add these features into their own apps is very limited. This is why when you tweet directly from the Spin app, a static image appears (more on the limitations of Twitter Cards in this post).
After taking a break from trying to battle with TWTRComposer (which still doesn't let you upload anything but an image), I decided to look into this again. Previously, I posted a question on whether you could upload a GIF to Twitter on StackOverflow, where someone suggested looking at the REST API for uploading video, and another person suggested using a UIActivityController (this is the share feature where it lists all the apps you have on your phone that you can share to).
My first thought was to explore the UIActivityController because I recently received a request to share to Google Drive. The problem, though, is that even with the UIActivityController, Twitter doesn't seem to support adding videos or GIFs. I ended up spending half a day going down this path, realizing that I could successfully attach a video to share directly to Facebook but could not get any farther with Twitter video / GIF sharing. Also, I find the UIActivityController to be kind of an overwhelming interface with too many choices, and I personally prefer direct social media buttons rather than being presented with a slew of options.
I then started looking into the second suggested method of using Twitter's REST API. Thankfully, this actually did work after much editing.
If you use the Twitter REST API, you basically need to create your own UI to enable people to customize their tweet message (the media/upload options is just for posting videos/GIFs). I did this by creating a UIAlertView, or a pop-up message where you can compose your tweet. Strangely, though, you can't add multi-line text views to UIAlertViews by default (they only allow for single-line text entry), which just doesn't work for a 140-character tweet. This led me to add a multi-line UITextView as an accessoryView:
 UIAlertView *tweetAlert = [[UIAlertView alloc] initWithTitle:@"Compose Tweet"
                                                             message:nil
                                                            delegate:self
                                                   cancelButtonTitle:@"Cancel"
                                                   otherButtonTitles:nil];
 tweetAlert.tag = TAG_TWEET;
 tweetTextView = [UITextView new];
 [tweetTextView setBackgroundColor:[UIColor clearColor]];
 CGRect frame = tweetTextView.frame;
 frame.size.height = 500;
 tweetTextView.frame = frame;

 [tweetTextView setFont:[UIFont systemFontOfSize:15]];

 tweetTextView.textContainerInset = UIEdgeInsetsMake(0, 10, 10, 10);

 [[NSNotificationCenter defaultCenter] addObserver:self selector:@selector(limitTextView:) name:@"UITextViewTextDidChangeNotification" object:tweetTextView];


 [tweetTextView setText:[NSString stringWithFormat:@"%@ %@", [[NSUserDefaults standardUserDefaults] valueForKey:@"tweetText"], self.setShareURL]];
 [tweetAlert setValue:tweetTextView forKey:@"accessoryView"];
 [tweetAlert addButtonWithTitle:@"Tweet"];
 [tweetAlert show];
Next, I had to actually post the tweets alongside a video or a GIF. Twitter has very specific file size limitations – GIFs cannot be larger than 3MB. Spin GIFs are designed to fit that size requirement for a single 360-degree spin. That means for sets with multiple spins, you can't tweet a GIF because it's too large. So what I needed to do was enable both tweeting videos and GIFs. GIFs are ideal because they auto-loop, but videos are certainly better than the static images that I have now.
This is what the final implementation looks like:
- (void)alertView:(UIAlertView *)alertView didDismissWithButtonIndex:(NSInteger)buttonIndex {
  if(alertView.tag == TAG_DELETE){
      if (buttonIndex == 1) {
          NSLog(@"deleting set");
          [self deleteSet];
      }
  }else if(alertView.tag == TAG_TWEET){
      if (buttonIndex == 1) {

          UIAlertView *tweetStartAlert = [[UIAlertView alloc] initWithTitle:nil
                                         message:@"Tweeting..."
                                         delegate:self
                                         cancelButtonTitle:nil
                                         otherButtonTitles:nil];
         [tweetStartAlert show];

         // get client
         __block TWTRAPIClient *client = [[Twitter sharedInstance] APIClient];
         __block NSString *mediaID;

         NSString *text = [tweetTextView text]; // get tweet text
         NSLog(@"text: %@", text);
         NSData *mediaData;
         NSString *mediaLength;
         NSString *mediaType;
         NSString* url = @"https://upload.twitter.com/1.1/media/upload.json";

         // if this is a single spin set, tweet the gif
         if([self.setSpins count] ==1){
             NSLog(@"tweeting GIF with url %@", self.gifURL);
             mediaData = [NSData dataWithContentsOfURL:[NSURL URLWithString:self.gifURL]];
             mediaLength = [NSString stringWithFormat:@"%lu", mediaData.length];
             mediaType = @"image/gif";
         }else if([self.setSpins count] > 1){
             // multi-spin set - tweet the video
             NSLog(@"tweeting video with url %@", self.videoURL);
             mediaData = [NSData dataWithContentsOfURL:[NSURL URLWithString:self.videoURL]];
             mediaLength = [NSString stringWithFormat:@"%lu", mediaData.length];
             mediaType = @"video/mp4";
         }

         NSError *error;
         // First call with command INIT
          __block NSDictionary *message =  @{ @"status":text,
                                           @"command":@"INIT",
                                           @"media_type":mediaType,
                                           @"total_bytes":mediaLength};

         NSURLRequest *preparedRequest = [client URLRequestWithMethod:@"POST" URL:url parameters:message error:&error];
         [client sendTwitterRequest:preparedRequest completion:^(NSURLResponse *urlResponse, NSData *responseData, NSError *error){

           if(!error){
                 NSError *jsonError;
                 NSDictionary *json = [NSJSONSerialization
                                      JSONObjectWithData:responseData
                                      options:0
                                      error:&jsonError];

                 mediaID = [json objectForKey:@"media_id_string"];
                 NSError *error;

                 NSString *mediaString = [mediaData base64EncodedStringWithOptions:0];

                 // Second call with command APPEND
                 message = @{@"command" : @"APPEND",
                           @"media_id" : mediaID,
                           @"segment_index" : @"0",
                           @"media" : mediaString};

                 NSURLRequest *preparedRequest = [client URLRequestWithMethod:@"POST" URL:url parameters:message error:&error];

                 [client sendTwitterRequest:preparedRequest completion:^(NSURLResponse *urlResponse, NSData *responseData, NSError *error){

                   if(!error){
                       client = [[Twitter sharedInstance] APIClient];
                       NSError *error;
                        // Third call with command FINALIZE
                       message = @{@"command" : @"FINALIZE",
                       @"media_id" : mediaID};

                       NSURLRequest *preparedRequest = [client URLRequestWithMethod:@"POST" URL:url parameters:message error:&error];

                       [client sendTwitterRequest:preparedRequest completion:^(NSURLResponse *urlResponse, NSData *responseData, NSError *error){

                           if(!error){
                               client = [[Twitter sharedInstance] APIClient];
                               NSError *error;
                               // publish video with status
                               NSLog(@"publish video!");
                               NSString *url = @"https://api.twitter.com/1.1/statuses/update.json";
                               NSMutableDictionary *message = [[NSMutableDictionary alloc] initWithObjectsAndKeys:text,@"status",@"true",@"wrap_links",mediaID, @"media_ids", nil];
                               NSURLRequest *preparedRequest = [client URLRequestWithMethod:@"POST" URL:url parameters:message error:&error];

                               [client sendTwitterRequest:preparedRequest completion:^(NSURLResponse *urlResponse, NSData *responseData, NSError *error){
                               if(!error){
                                   NSError *jsonError;
                                   NSDictionary *json = [NSJSONSerialization
                                                         JSONObjectWithData:responseData
                                                         options:0
                                                         error:&jsonError];
                                   NSLog(@"%@", json);

                                  [tweetStartAlert dismissWithClickedButtonIndex:0 animated:YES];

                                   UIAlertView *tweetFinishedAlert = [[UIAlertView alloc] initWithTitle:nil
                                                                     message:@"Tweeted!"
                                                                     delegate:self
                                                                     cancelButtonTitle:nil
                                                                     otherButtonTitles:nil];
                                  [tweetFinishedAlert show];
                                  double delayInSeconds = 1.5;
                                  dispatch_time_t popTime = dispatch_time(DISPATCH_TIME_NOW, (int64_t)(delayInSeconds * NSEC_PER_SEC));
                                  dispatch_after(popTime, dispatch_get_main_queue(), ^(void){
                                      [tweetFinishedAlert dismissWithClickedButtonIndex:0 animated:YES];
                                   });

                                  [self logShare:@"twitter"];

                                 }else{
                                     NSLog(@"Error: %@", error);
                                     [tweetStartAlert dismissWithClickedButtonIndex:0 animated:YES];
                                 }
                              }];
                           }else{
                              NSLog(@"Error command FINALIZE: %@", error);
                              [tweetStartAlert dismissWithClickedButtonIndex:0 animated:YES];
                           }
                       }];

                   }else{
                      NSLog(@"Error command APPEND: %@", error);
                     [tweetStartAlert dismissWithClickedButtonIndex:0 animated:YES];
                   }
               }];

           }else{
              NSLog(@"Error command INIT: %@", error);
             [tweetStartAlert dismissWithClickedButtonIndex:0 animated:YES];
          }

        }];
      }
    }
}
Sorry that the formatting doesn't quite fit well here, but you can read more about it here. A few things worth highlighting:
- I had to add tags to different UIAlertViews since I needed to distinguish between the message that pops up to confirm you want to delete a set and the one that pops up when you create a tweet.
- You'll see I have a condition to check how many spins are within the set before determining whether to upload a GIF or a video.
- The process of uploading to Twitter is not fast, unfortunately. It's definitely not as fast as it currently is now, where tweeting text is immediate. You can get a sense of the speed in the video above. Still, I think people will appreciate embedding the animations directly on Twitter.
And one last update – I added a feature to change the default text of a tweet. The current default is "Check out my Spin! @spinturntable" but now you can change it to whatever you want.
Which leads me to my last point, which is why I started working on this in the first place. This weekend is Scratch Day, and at MIT's event, Scratchers will be building LEGO Gondolas and capturing them with Spin! We wanted to make it easy to customize tweets with the #scratchday hashtag, and I also wanted the animations to appear directly on Twitter so people could easily find their creations after the event. Luckily, I'll be able to install this update directly on the iPad that will be used for the event, but for everyone else, look for this update in ~1 week!
Comments (0)
People really enjoy sharing their Spin animations within their makerspaces, and I wanted to make it even easier to do so by creating a slideshow feature to view your spins.
I first began by re-purposing the Blueimp Gallery library but ran into customization issues with video. I ended up switching to Slick slideshow, which was much easier to use and had nice default options for fading transitions.
You can now view a slideshow of all your spins, randomly ordered, by clicking the slideshow link on your profile page (here's my slideshow, for example: http://spin.media.mit.edu/users/spinturntable/slideshow).
You can also view a slideshow for a particular tag – here's a slideshow for all the animations created at Sketching in Hardware: http://spin.media.mit.edu/users/spinturntable/tagged/sketchinginhardware/slideshow
Enjoy! (:
Comments (0)
One of the main objectives of this project is to make it as seamless as possible for people to share what they're making with their peers. What I didn't anticipate at the start was that so many of the animations would be created on share devices rather than personal devices. For example, many schools and public makerspaces use a single organization device, like a school iPad, rather than each student using their own personal device. This makes it harder to share your animations directly because you first need to find it outside of the app.
While people can go to the profile page of an organization to find their spins, I wanted to make it easier for people to access their animations later. I'm also interested in tangible versions of digital artifacts more generally. The first idea that came to mind was printing a thumbnail of the animation and having a direct link back to the website that people can follow up with later – this is pretty common for any place where you pay for a photograph and can download a digital copy later. And it just so happened that I've been wanting to try out the Raspberry Pi platform for some time and came across Adafruit's IoT Printer Pack.
I purchased the pi-based thermal printer to play around with and immediately found how much more difficult it is to use the Raspberry Pi than an Arduino. Sure, some of it is the learning curve of using a new platform, but the mere fact that you need to hook it up to a display (new enough that it has an HDMI port) and an external keyboard to even start it up is not very user friendly. Over the past week, I've learned a lot about the command line interface and Linux, but I still feel that the learning curve is extremely steep, and adding an extra layer of network connectivity is even worse.
I've talked to numerous IT folk at MIT and Harvard to set up my Pi device on their respective networks, and the general consensus is that it's not straightforward at all to do. Even worse, Raspberry Pi has very few organized resources, and you quickly find yourself sifting through endless forum posts to find anything useful. I was able to successfully connect my Pi to my home network, but enterprise networks like MIT and Harvard have much more security loopholes, and I haven't quite resolved them after hours of work (I'm running it wired via ethernet for now from lab).
I thought if this worked well, it could be a fun project I could suggest others with Spins to make. Given the current challenges, and also the price of the printer pack at $180, I'm hesitant to make this recommendation at this time...though perhaps I will design a cheaper version specifically for Spin if there's enough interest.
Nonetheless, Adafruit's thermal printer python library is well documented and generally very easy to use. I haven't programmed in python in quite some time, but I found it pretty quick to pick up. Once I was able to connect my Pi to the internet, actually programming it to print animations from the Spin website was surprisingly quick.
The sample application that Adafruit provides continuously runs on the printer and checks Twitter every 30 seconds for new tweets using a given search query. I modified the code to pull the JSON from the spin website and print the latest animations. You can check out a demo in the video above, where I edited the app to take two photos rather than the usual 15 just for testing.
Next, I want to experiment with printing different frames of a video – maybe to make a flipbook. Who knows! Looking forward to testing this out during a making activity at the Exploratorium next week.
(I've attached the code below and you can find Adafruit's library here: https://github.com/adafruit/Python-Thermal-Printer)
Comments (0)
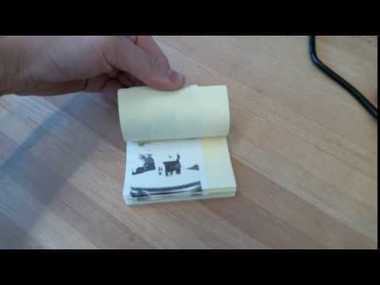
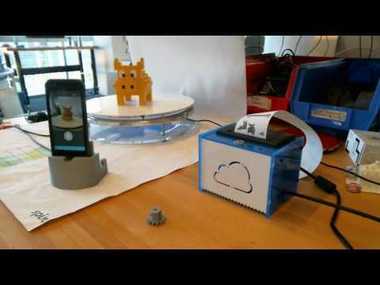
Today, I experimented with printing the frames of the animation in order to make a flipbook. Currently, after a new animation is created, the printer takes the created GIF file and prints each frame. After testing it out (which you can see in the video), I think ideally we could send the image to the printer as the spin is being captured so it doesn't take so long to print.
I reused a post-it pad to create the flipbook. The thermal printer isn't capable of super high resolution images as you can see, but it was fun to try this out nonetheless.
Comments (0)
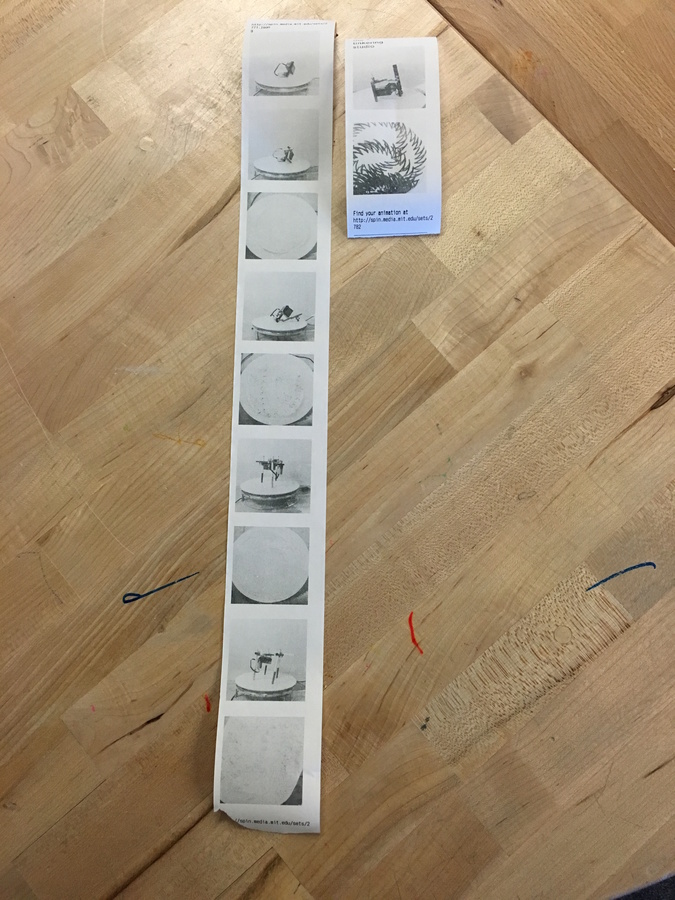
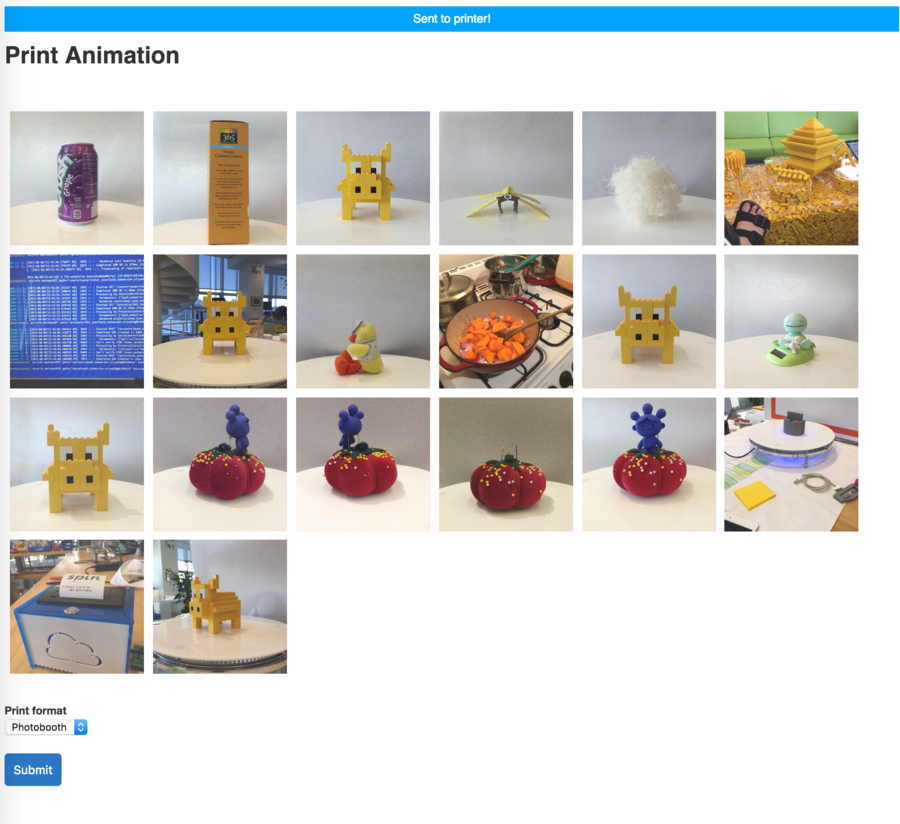
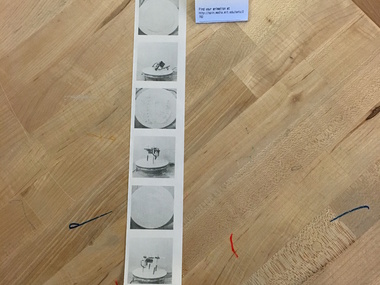
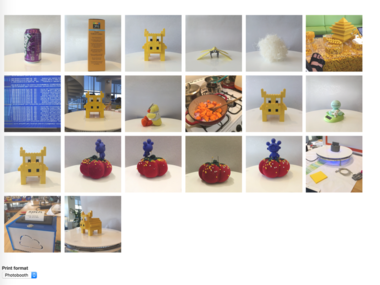
At the Exploratorium this week, I'm playing around with printing animations. Hopefully this will make it easier for people to access and download the animations they create when they leave the museum, and we're also thinking about how the print outs might help motivate documenting iterations.
I loved the suggestion from the Tinkering Studio folks about the printouts resembling photobooth printouts. We're playing off that idea to print the first frame of each spin in a set, which will show how individual projects are updated over the course of the workshop. Unfortunately, I realized I turned the printer off and left it at the museum, so I can't ssh into it to share the code, but I will do so tomorrow.
Some challenges we're running into is the limited resolution of the printer. The print outs don't work well for detailed or low-contrast images, as you can see from the lack of detail in images of the scribbling machine drawings. But, as you can see in the image above, it works well for dark, thicker markers. Of course, the iterations are visible more fully with the full color animation on the Spin website, e.g., http://spin.media.mit.edu/sets/2771
The second image you see above is a UI I'm building for the Spin website to print the animations. It shows the last 20 animations created on the platform so that you can select which one you want to print. You can also select whether you want it to print in a photobooth or flipbook format. It then updates a JSON page on the site that gets polled every 20 seconds with the printer. One challenge I ran into with doing this was developing a site-wide variable in a Rails app. What I ended up doing is updating a session variable to store parameters of the animation that is to be printed.
I'll also be experimenting with what the feed looks like on the digital display in the Tinkering Studio to highlight iterations. Stay tuned for an update tomorrow!
Comments (0)
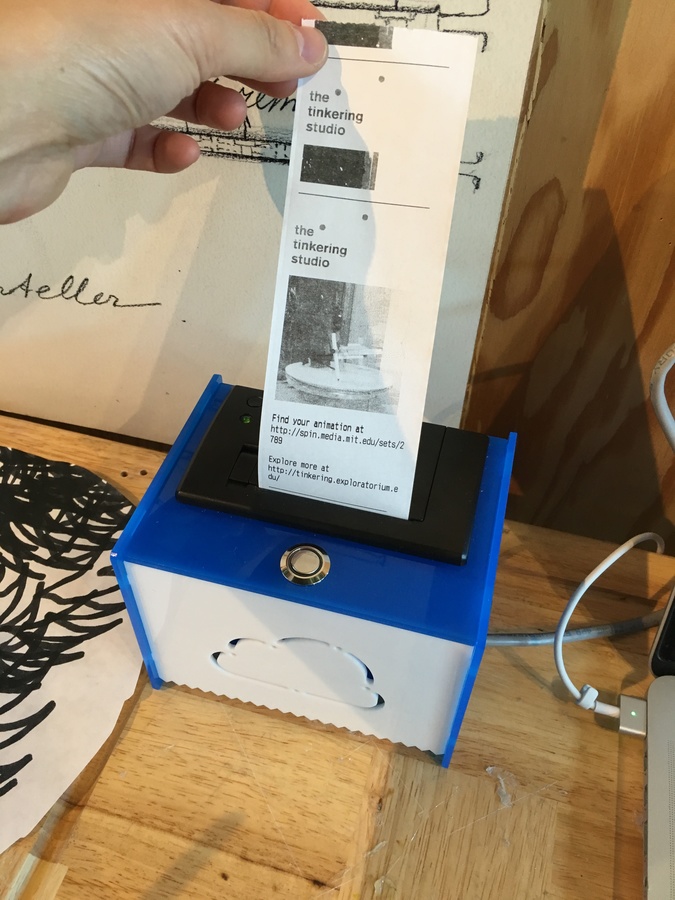
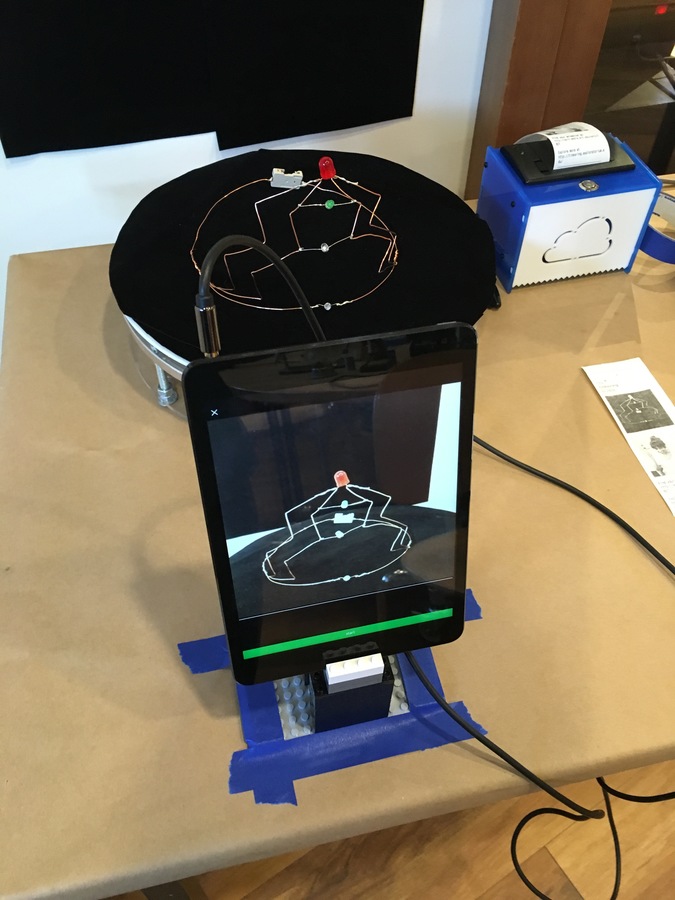
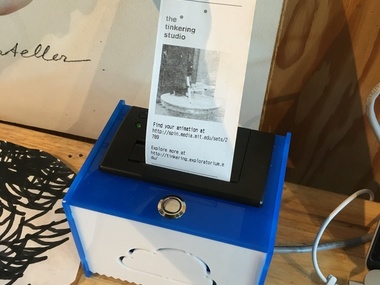
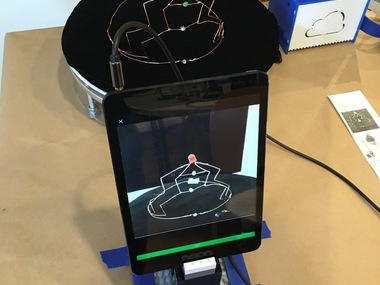
I wrapped up with my experiments with printing animations at the Tinkering Studio, which was a great way to quickly learn about the limitations of thermal printing.
My main takeaways as far as receipt printing goes are,
1) Thermal printing does not quite have the resolution for printing photographs at a quality that people are used to, especially given that everyone has a nice camera in their own pocket. I think it's both a limitation of the specific printer I used, but also of black and white printing; the objects we were capturing would be much nicer in color.
I described in the last post that in tests of printing iterations in multiple frames, the changes across iterations were not visible because of the resolution of the printer. For artbots, we were able to print sketches, but only when dark sharpies were used - regular, pastel colored markers were not visible. Ideally we wouldn't adjust an activity to make it more documentable.
2) In thinking about the audience for the print out, I had focused largely on the child who created the project, but another potential audience to think about is their parents, who may be interested in finding their child's animation outside of the workshop. Ryoko had a great example of a certificate she received from her son's school; there is definitely room to experiment with what types of information to provide on the printout.
3) In the future, it would be fun to play more with the environment - for example, if we had a more elaborate photobooth setup, the connection to the receipt printer would be stronger.
Ultimately, though, in reflecting on the print outs together with the Tinkering Studio team, we came to the conclusion that there are two different directions for Spin – to make it more visible, or to make it more invisible. Making it more visible could involve using a special lighting rig or backdrop so that people are aware of the tool and are excited to capture their projects on it. The downside, though, is that it may be seen as a space more for polished work than for iteration. Thus, a tool that's more invisible could potentially be more integrated into the process, helping people capture throughout and reducing the friction between making and documenting.
Beyond the printing, we also played around with Spin selfies, which was a fun way for people to proudly show off their creations. Telling people when to turn around or strike a pose was fun and made me think about how this could be more integrated in the app – perhaps a count-down sound?
I also reduced the number of frames in the animation to make capturing faster. I do think that the 6-frame animation is able to capture a similar amount of detail and works well for environments where the capturing must be very fast. Ultimately, I may add a setting in the app so users can toggle the number of frames, although this does affect certain things like the web interface (http://spin.media.mit.edu/projects/2846). Relatedly, I did adjust the printer so pressing the button printed the last animation – it took too much time to identify which set to print through the web interface.
Thanks again to everyone in the Tinkering Studio – it's wonderful to share ideas and get feedback from such a creative group.
Comments (0)
This summer, I'm working on helping people discover what other people are working on using digital documentation. To help consolidate animations created as part of a particular organization, I want to make it as easy as possible for people to tag the animations they create.
Along with this goal, I've seen Spin used in workshops / events, where it would be useful to tag all animations created during the event with a particular tag, such as the name of the class, or the name of the workshop.
To do this, I've developed a feature in the iOS app called "Session Tags." With Session Tags, users can specify tags they want to be automatically added to animations they create. They can set the tag to expire as well, so only animations created within the next 24 hours will be auto-tagged.
In the video above, you can see how you can set Session Tags within the settings portion of the application. You can toggle the tags to expire or not from this menu.
Then, when you create spins, you'll see what autotags will be added, and you can also tap the tags to edit Session Tags directly. Then, once the animations is created, you an edit tags just as you could before.
Hopefully with these changes, it will also be easier to see which animations have been tagged, since the tags will be visible below the animation (and not hidden within the tag icon in the top right).
Comments (0)
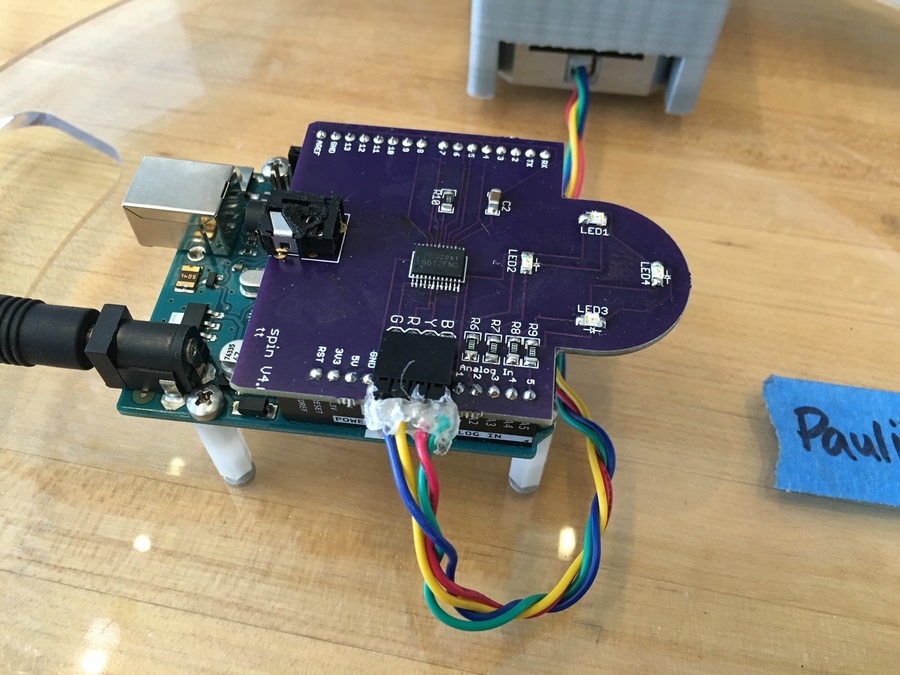


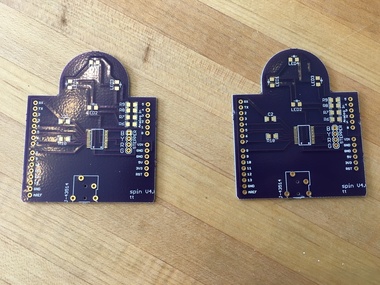
In an effort to make Spin more accessible, I wanted to consider how to remove any additional hardware. I initially thought of designing a board with an integrated Arduino (so you wouldn't have to use an Uno), but I quickly found that this would require many extra components and also including a process for burning a bootloader, which would make it inaccessible to most. Instead, I decided to begin by replacing the $15 EasyDriver board with a cheaper one.
I began by purchasing the Adafruit Motor Driver board and found that this did work with driving the Spin stepper motor. Next, I used the shared schematic to include the design onto the Spin board itself (check out the attached Eagle files for more info).
This week, I received a small test run of this board from OSHPark, as seen in the image above. However, when I connected it to Spin, I found that it makes the turntable significantly louder – it now makes a very noticeable groan each time it rotates, as compared to the cell-phone-vibration-level noise I've become accustomed to.
After some research, I learned that this is because the Allegro motor driver used with the EasyDriver utilizing microstepping, which affects how loud the motor is when it's turning. I've been pointed to this guide for integrating microstepping with my new motor driver, but I have yet to test it out.
Comments (0)
After a few months hiatus from working on the Spin Android app, I decided to give it another go and see how far I could get with building an app in a week. The last time I did any Android development, it was all in Eclipse, and I've learned that Android Studio is now the recommended IDE. So my work this week involved both remembering how to write in Java but also learning how to use Gradle, Android Studio, and other Android-related things.
In case you are wondering, I've resisted writing an Android application up to this point because I wanted to have an iOS application I felt confident about, and developing and maintaining apps across multiple platforms requires resources I realistically don't have, even now. But I had some time this week to devote to the project, and after I get a quick scaffold up for the app, I'd like to open source it to get help with additional development. Certain features, like audio recording, won't be integrated in this initial version, but hopefully someone will be able to help with building it if they're interested!
In the video above, you can see how far I've gotten this week. Basically, almost all of the basic activities are there except the most fundamental – creating a new spin. I've left out communicating with the turntable for now because I wanted to have everything else in place before beginning to work on the camera features, which is where I am now.
You can currently download GIFs and videos of Spins and Sets (I didn't show all of this in the video for the sake of time), and you can also delete Spins and Sets. Now, on to integrating the camera!
Comments (0)
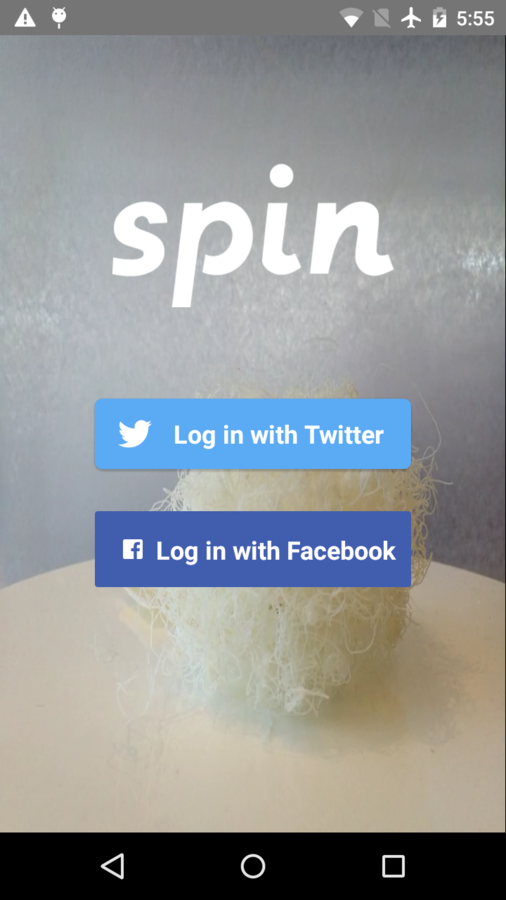
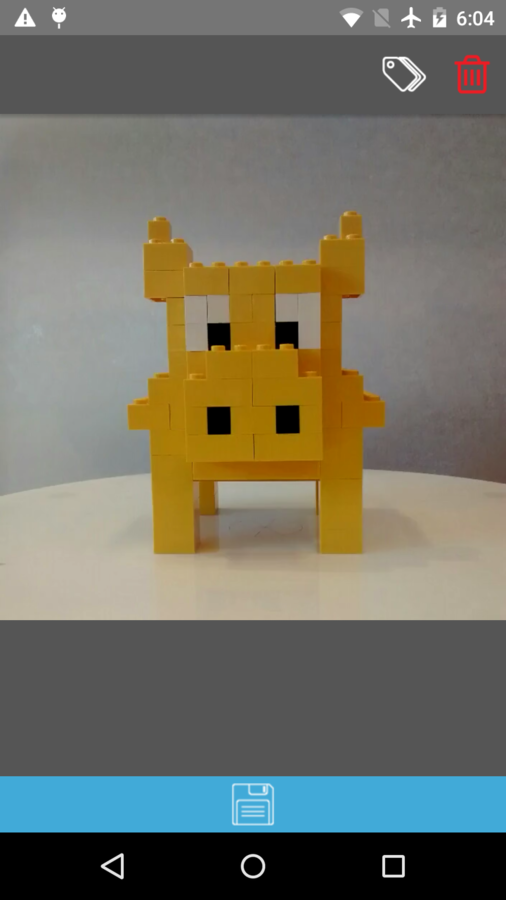
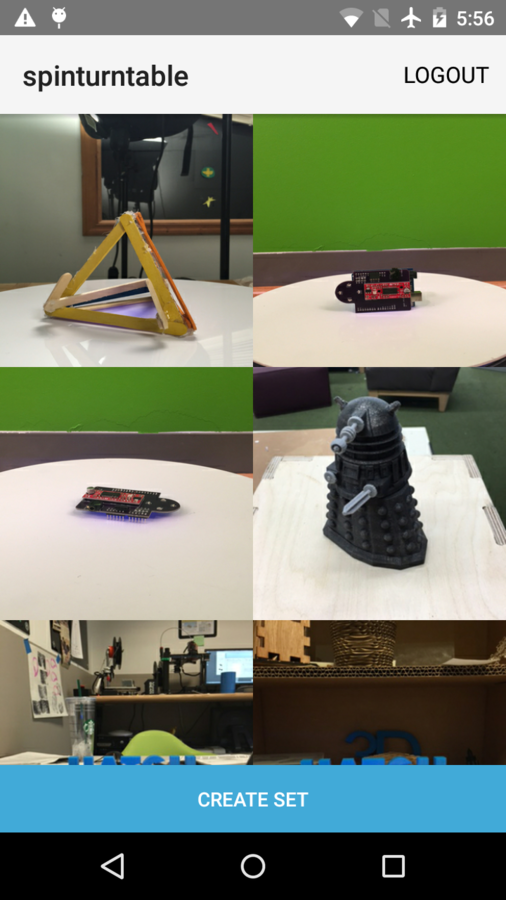
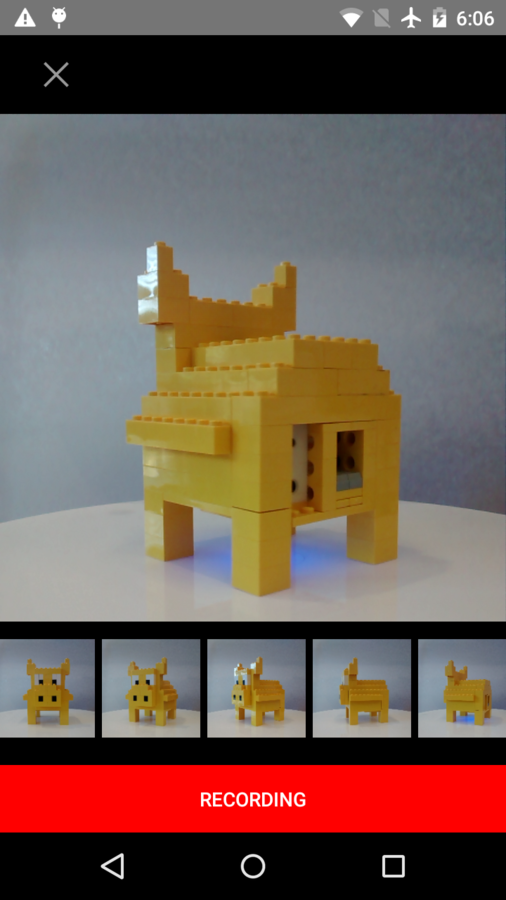

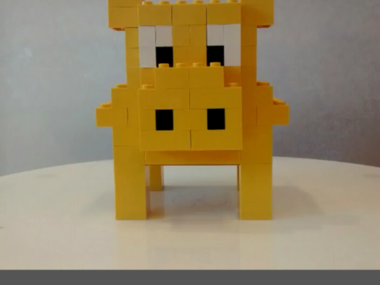
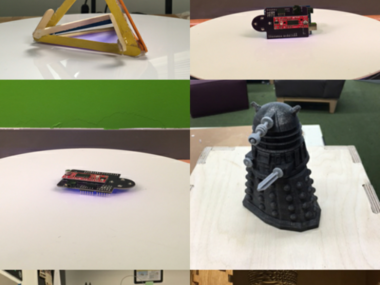
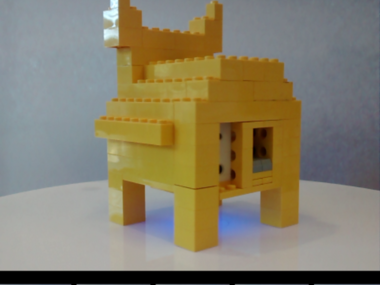
After 2.5 weeks of development, I have a version of the Spin Android app to share!
Here are the features I prioritized that will be available in this version:
- Twitter and Facebook login
- Creating new spins and sets
- Downloading videos and gifs to the device
And these are the features that are left for "future development":
- Sharing directly to Twitter or Facebook through the app
- Audio annotations
- Session tags
Notably, to use the Android app, you need to upload an updated Arduino sketch to your turntable. This is because of differences between the FSKModem libraries others have developed for Android and iOS, which is how the app communicates with the turntable.
One of the biggest differences between the Android app and the iOS app is the way that the videos and GIFs are created. I found an FFMPEG library for Android, which enables reusing some of the same FFMPEG functionality I have on the Spin website to create the animations. (On the iOS app, the video and GIF generation is more custom.)
I did most of my development on a Moto G phone, but I also used an HP Slate 8 Pro and Kindle Fire for testing. The most challenging aspect of developing for Android is accounting for differences across devices. Knowing that it would be impossible for me to try to test for every device, I decided that having tested it on three different manufacturer's devices gave me enough confidence to know that I had something that works...for some things. Once others test the app, I'll have a better sense of what will need to be fixed for other devices. I definitely prioritized having something out there over making sure it's perfect.
One known issue is that videos created on Android and iOS seem to be encoded differently, which leads to problems stitching together videos created across both Android and iOS. This is only a problem if you have a spin animation that was originally created on iOS and then you choose to add to it using an Android device. I'm sure this is a problem I should resolve but it is currently beyond my capacity, and I'm guessing it will affect very few users, if at all.
Finally, I am thinking about open-sourcing the Android app to encourage others to contribute to adding some of the "future development" features I mentioned. Stay tuned for this...
Comments (0)

Now that the Android app is available, I've been able to test with a wider range of devices as people try it out on their own devices. There are two scenarios that I've run into: 1) the app doesn't seem to transmit sound, and 2) the app transmits sound, but the phone does not receive signals properly from the Arduino. I should say that on the ~10 devices I've tested so far, the app works, but one of the challenges with Android is that there are many different types of device manufacturers, so it's difficult to cover all of your bases.
To debug what the audio signals actually look like, I've been using an oscilloscope and analyzing the wave pattern both from the app and from the Arduino. After testing a variety of devices, I found that for some Android devices, the output signal is low enough that the Arduino isn't detecting it.
I reported the issue on the Github page for the FSKModem library I'm using: https://github.com/cytecbg/android-fskmodem/issues/3 And then using the suggestion provided by the library author, I swapped out one of the resistors on the board for a larger one. This ended up amplifying the signal so that the turntable could detect the audio coming from devices like the Nexus 7.
This solves one problem, but there are still several more to debug. More to come soon...
Comments (0)
After finally getting back into working on microstepping with the Toshiba motor driver, I was able to get a successfully turning Spin that is not as scarily loud as before! (and is a lot cheaper).
The motion doesn't look any different than the original turntable, so I won't bother uploading a video, but there seems to be a problem with detecting audio signals consistently. I didn't make any changes to the audio circuitry, so I'm not sure what would have caused the issue. Hopefully it will not take too long to debug, but I'm excited about having a new, cheaper Spin board!
scientiffic commented on Prototyping conti...: "Excited to hear that you pl..."
pzingg commented on Prototyping conti...: "I'm about to build your tur..."
scientiffic commented on Phone stand design : "You can use any iOS device ..."
pzingg commented on Phone stand design : "Any thoughts on using an iP..."