
Elucidator-Kirito's blade-SAO
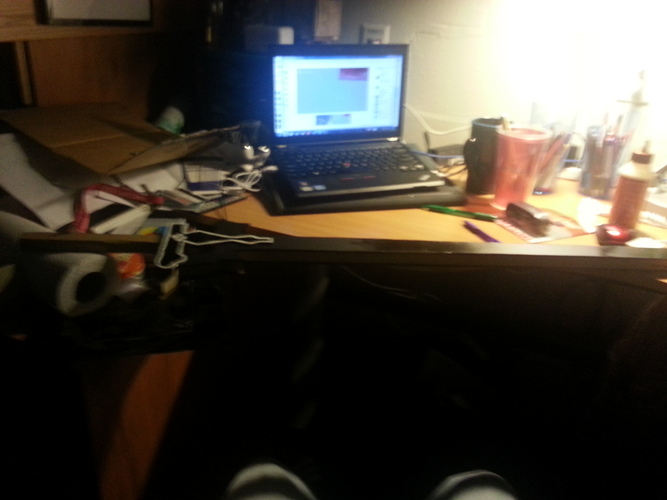
So I've been itching to make something from one of my favorite animes, Sword Art Online, lately. I don't know why but something about it make me wish i were there. I've been lucky enough to be able to have this count as my art final as well! Personal project turning useful! I decided on the Elucidator because it has the most info on dimensions and it should be easier. The difficulty comes with the fact that in the anime, the swords light up when they use sword skills, and it would be difficult to get a BLACK sword to suddenly light up into multicolors, So I talked with a friend, Bryan Manguson, and we decided the best thing was to just put the lights around the sword, since there's already a clearish silver edge, so that's the plan!
So I've been itching to make something from one of my favorite animes, Sword Art Online, lately. I don't know why but something about it make me wish i were there. I've been lucky enough to be able to have this count as my art final as well! Personal project turning useful! I decided on the Elucidator because it has the most info on dimensions and it should be easier. The difficulty comes with the fact that in the anime, the swords light up when they use sword skills, and it would be difficult to get a BLACK sword to suddenly light up into multicolors, So I talked with a friend, Bryan Manguson, and we decided the best thing was to just put the lights around the sword, since there's already a clearish silver edge, so that's the plan!
Comments (2)


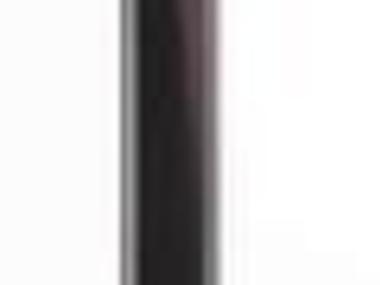
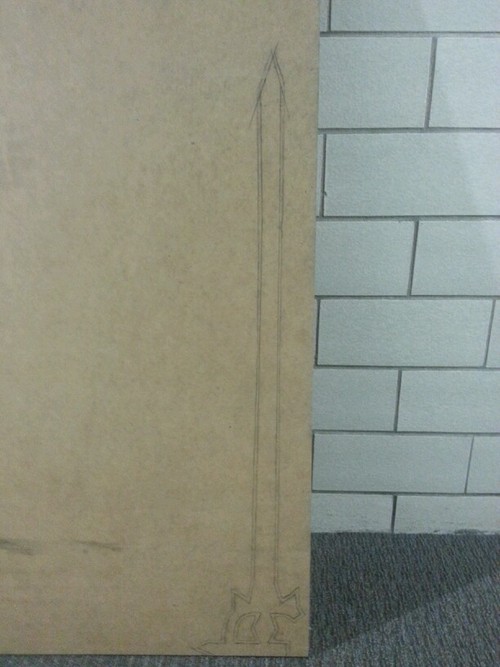
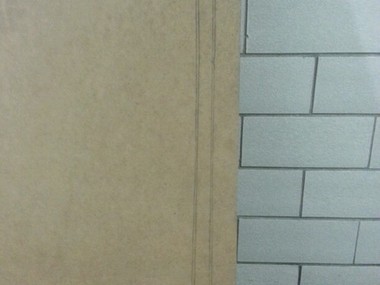
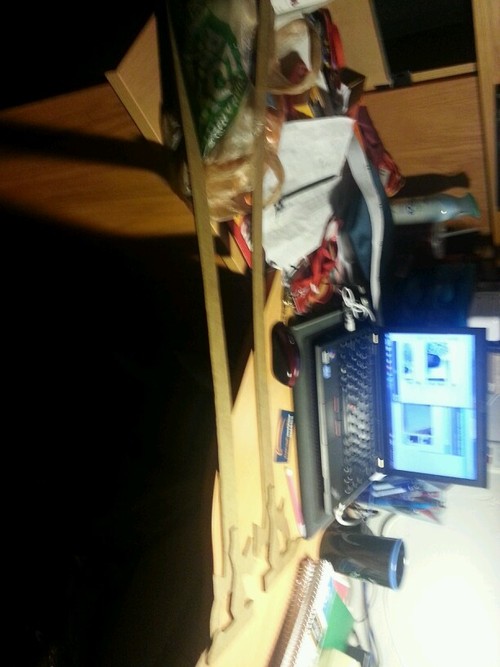
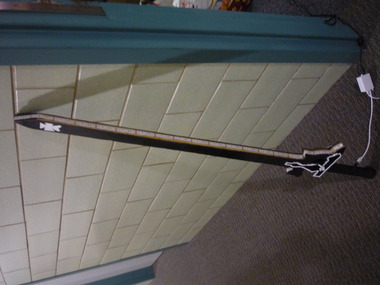
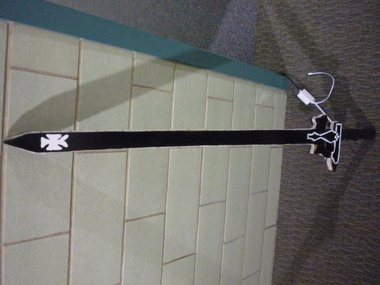
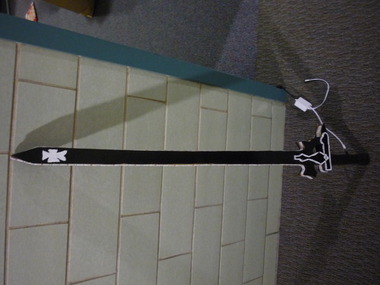
This is a picture of the sword being recreated.
We, my rommates and friends, went to Home Depo to get some,
Medium Density Fiberboard
thinner wood
Plexiglas
glitter paint
gorilla wood glue
and a metal rod.
And on Amazon I ordered;
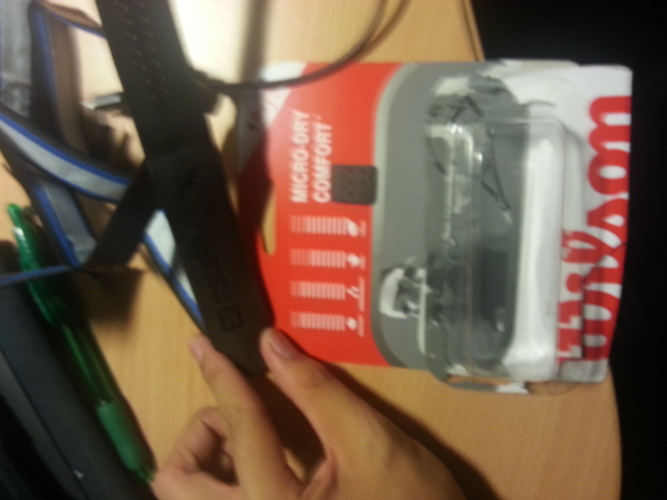
a replacement tennis grip
and some LED light strips that change colors
10/5/13
got a plexiglass cutter
some super glue (for wood,metal, glass)
and some painter's tape :D
Comments (0)
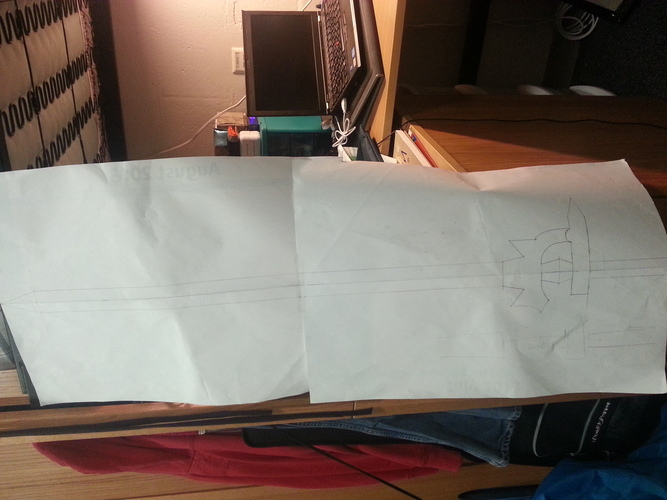


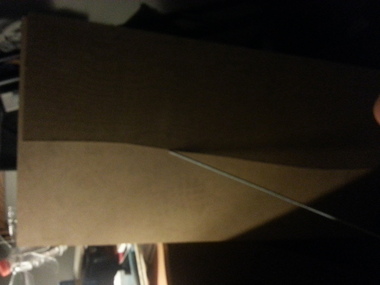
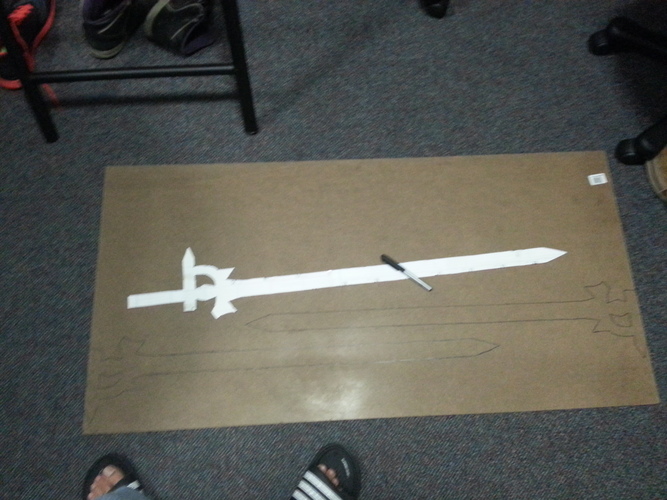
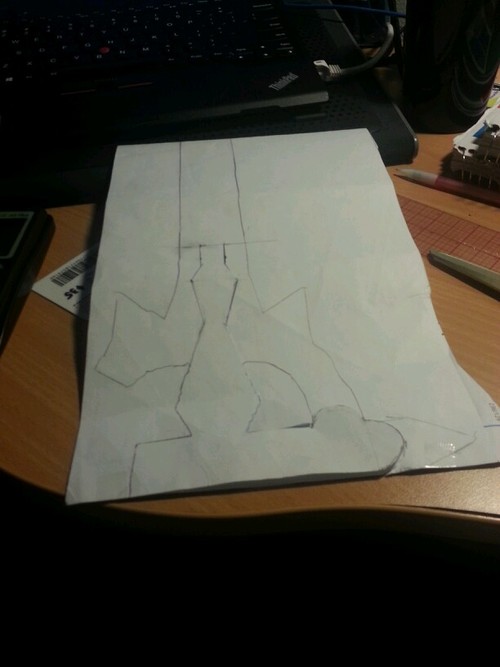
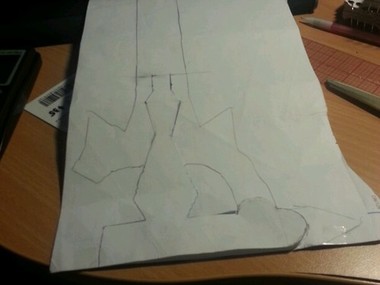
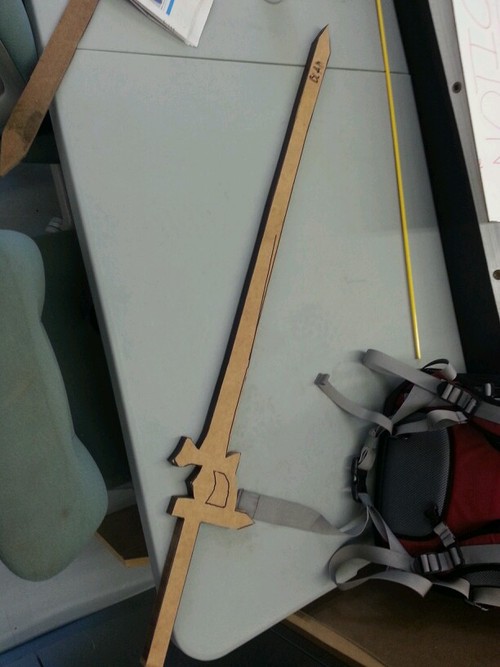
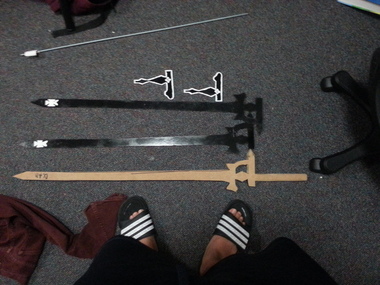
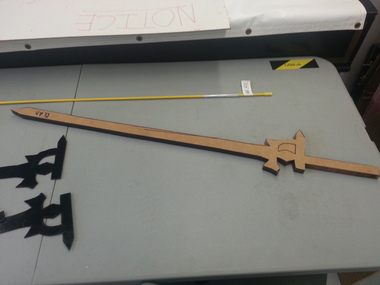
So I found a picture of the sword online, enlarged it. then took a ton of measurements based on the scaling and the dimensions of the sword found on the internet. It was kind of a pain but it came out alright.
Comments (0)
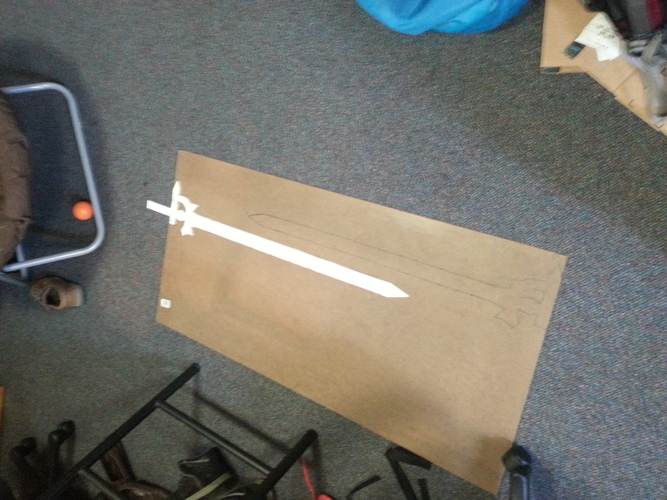

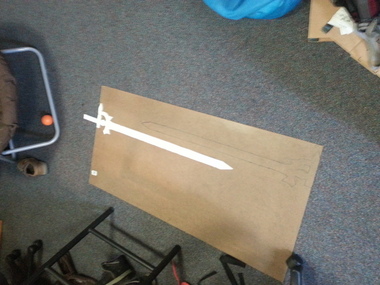
Going to trace the scaled paper sword onto a piece of the thinner wood so that it can be cut with the band saw at WPI's collablab. Once that is traced out and cut, I can make a thinner version and cut the MDF to be a smaller core with a shape close to that of the sword.
Comments (0)
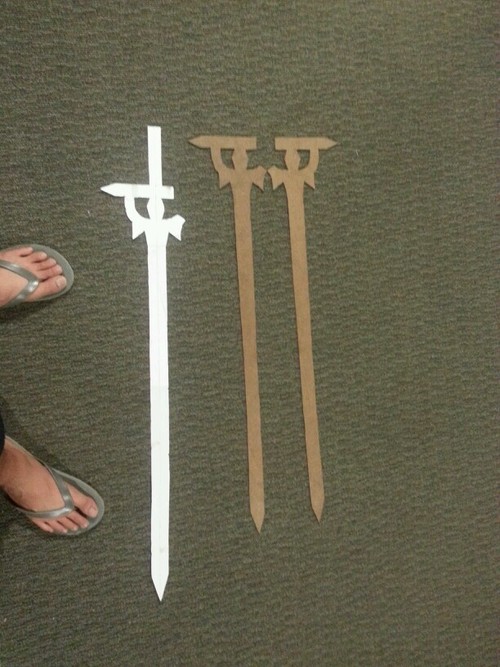
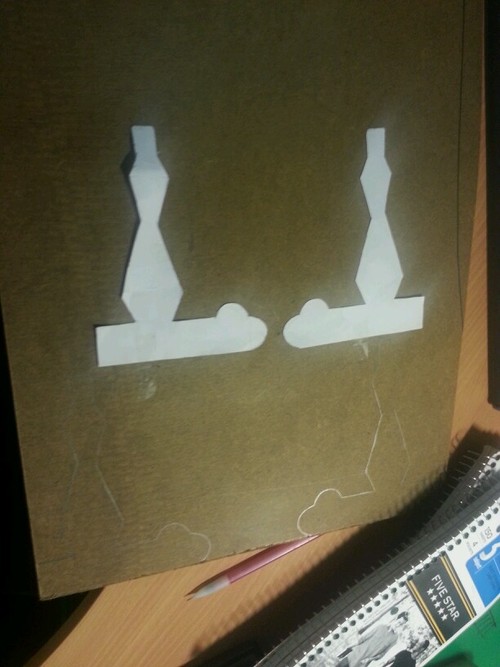
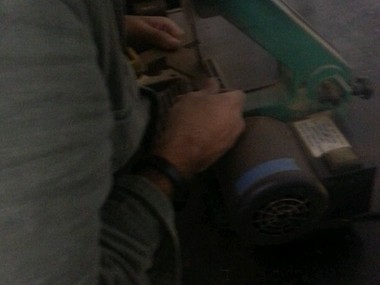
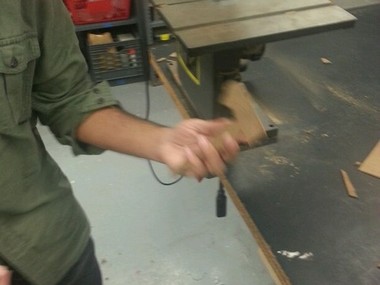
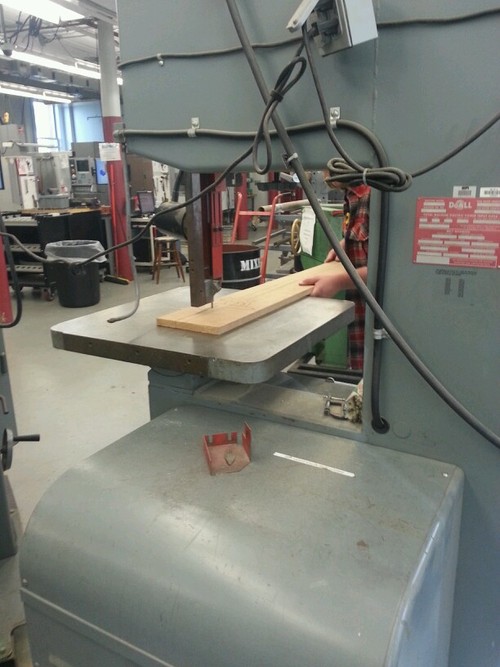
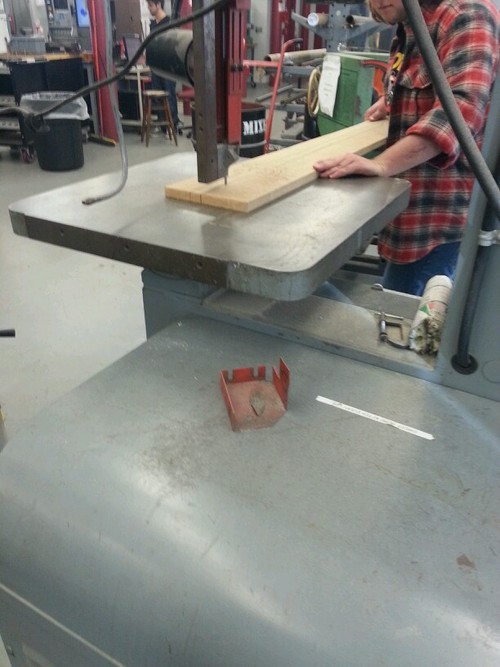
Was able to take the boards that I had traced the sword on and got them cut and sanded at the Collablab. Learned how to use a band saw, drill press, and a power sander. The blades came out thinner than the paper version, but it's alright, they don't need to be perfect, and i can adjust the rest of the build to compensate. But overall I'm not too worried about the blades, they came out alright.
Comments (3)

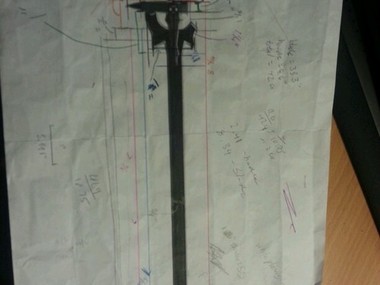
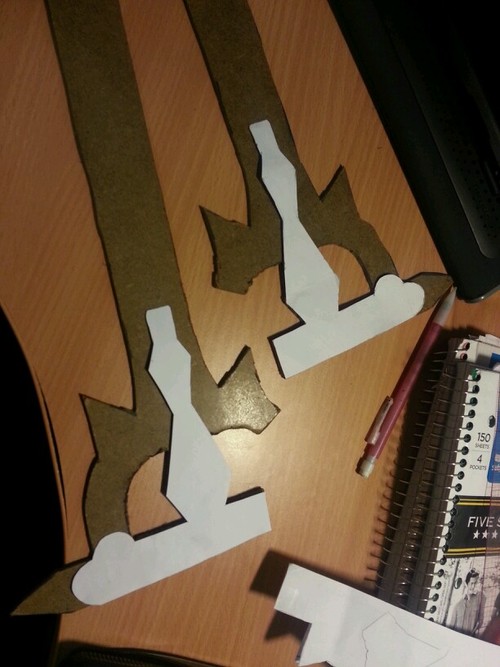
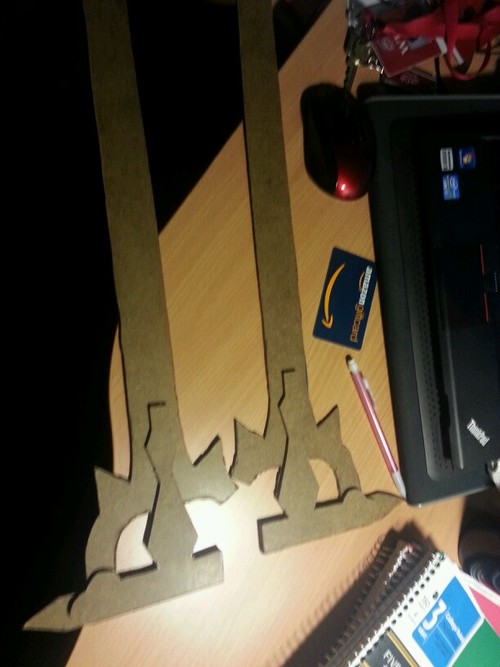
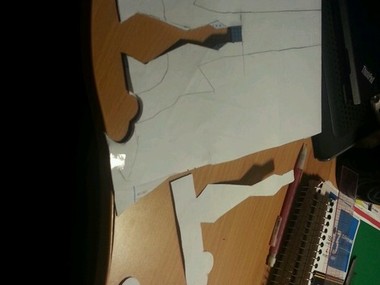
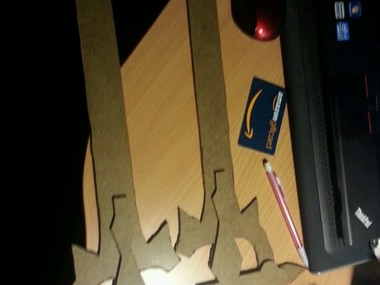
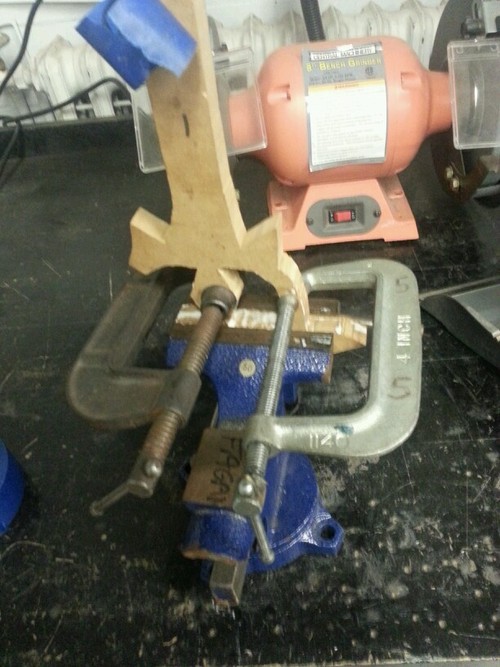
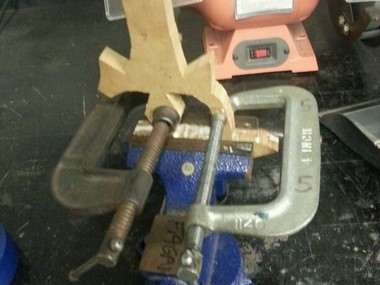
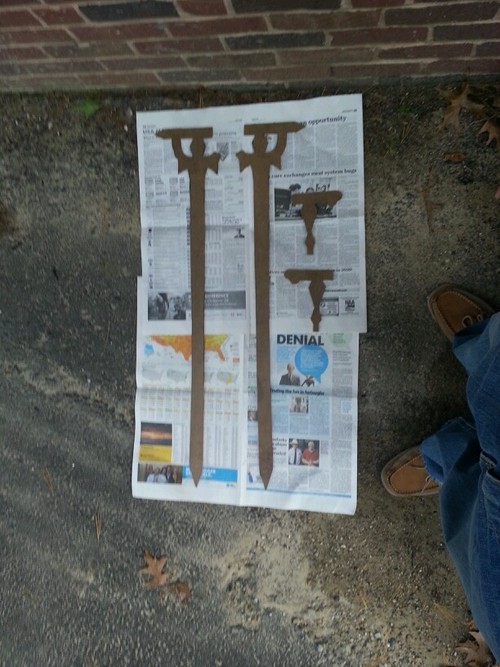
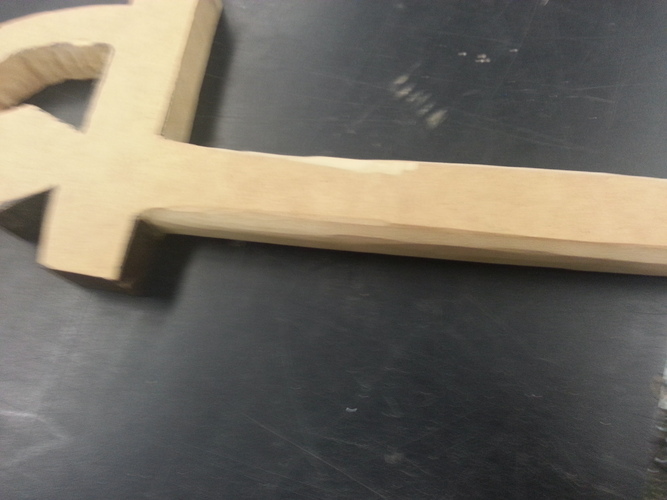
So, I traced out the larger sword from the previously cut one and measured 3/16th inward all around the sword. This allows for the thinner piece to be more accurate according to the larger blade faces, This piece is going to be the "core" of the sword and be sandwiched by the other two blade faces. I left the bottoms part untouched so tat it'll match up with the sword faces later on. I also marked the mid point of the blade where I will want to drill a hole so that I can stick the metal rod through it. Just need to get that part cut, might need to have this be cut into multiple sections so that I can drill the hole deep enough for the rod.
Comments (0)
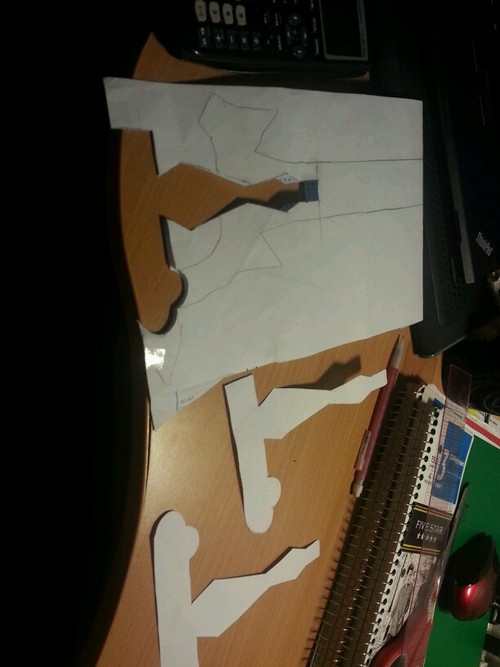

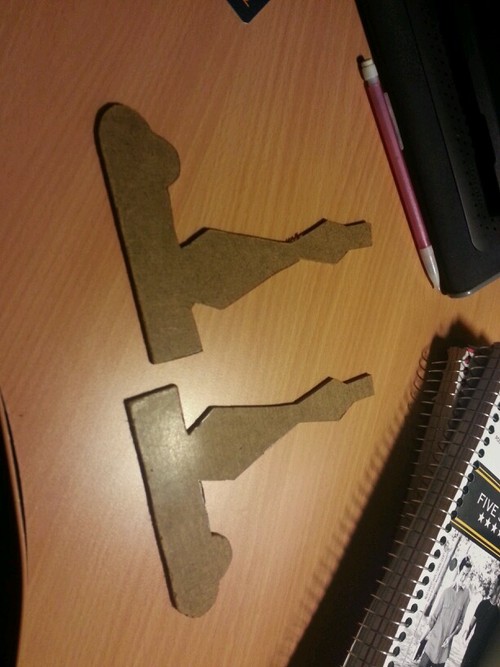
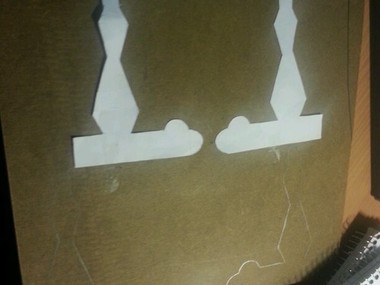
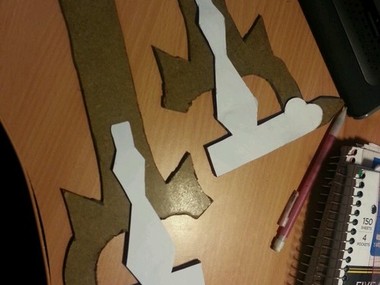
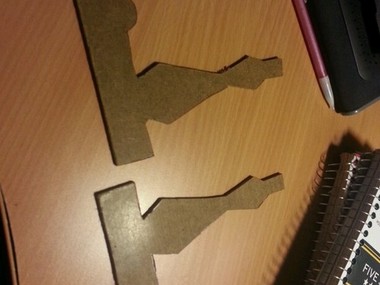
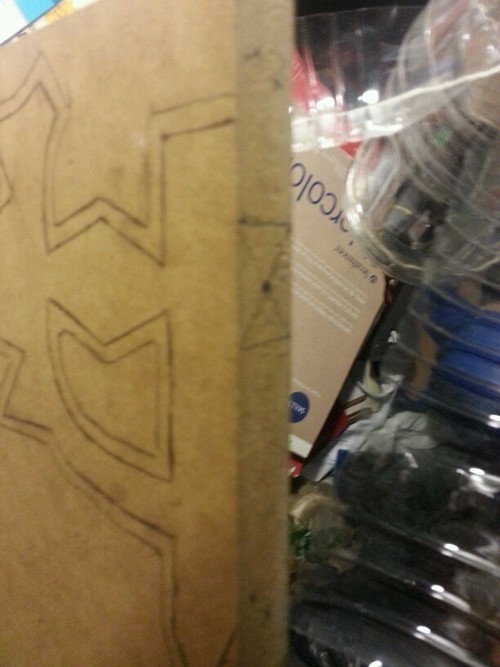
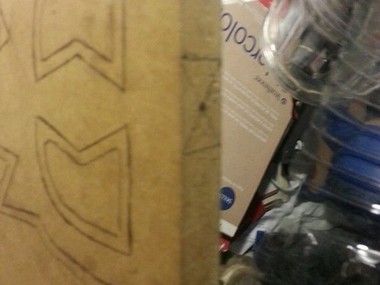
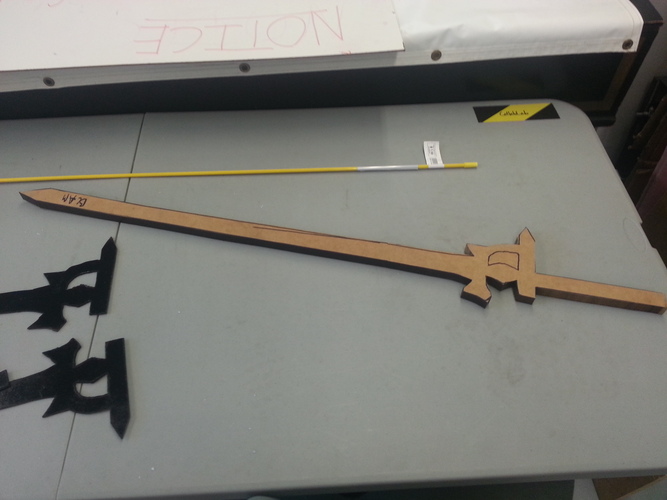
Scaled the smaller hilt design onto another sheet of paper, which then got transferred onto another sheet of wood.
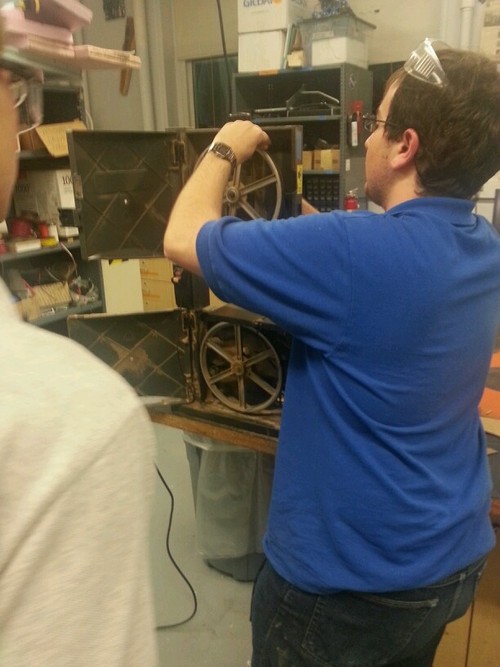
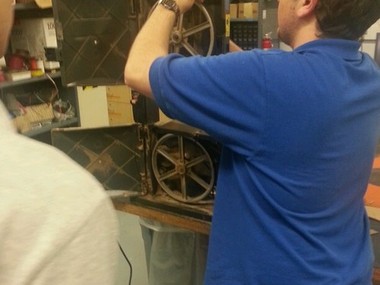
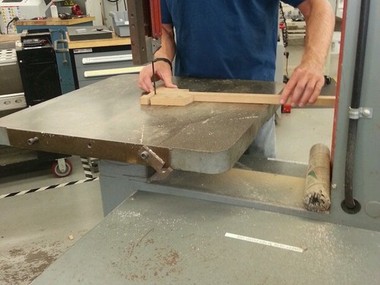
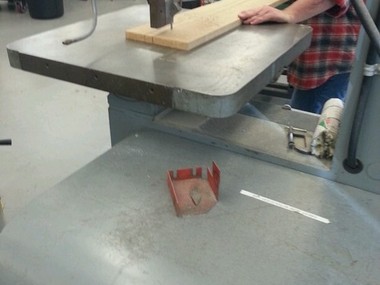
I then went to the Collablab with my friend Sultan. We had tried to cut out the sword but the band saw wasn't working, as could be seen the pictures of one of lab monitors checking the bandsaw's inner mechanics.
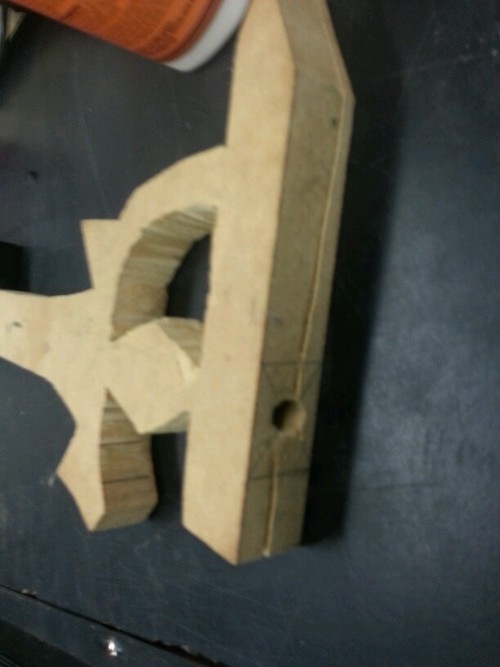
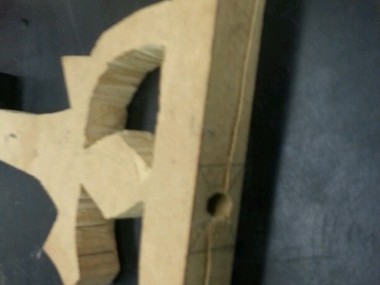
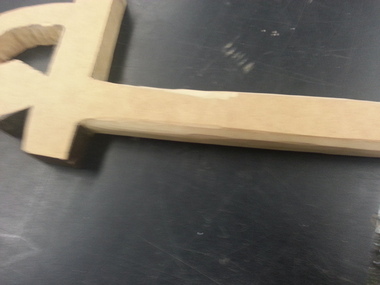
We were able to get the hilt bits cut out. You can see the final parts, and how they fit onto the larger blade face.
Comments (0)
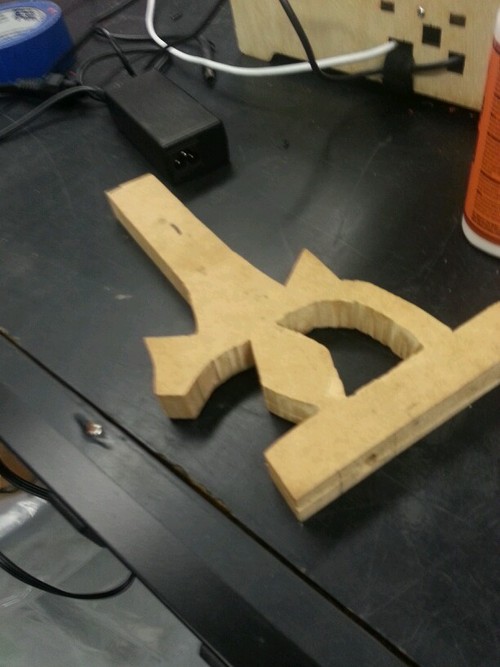
So I had gotten the hole in the handle out b y using a drill press and drilling the outline of the shape with drill holes. and then pushing it out a mallet.
The trouble came when I tried to make a hole for the metal rod. The drill press was not long enough to make it all the way down the sword so i thought it was a good idea to cut the sword into parts and drill holes down through each section of the cut blade and then place all the pieces together on the rod. In hindsight this was not the best idea and it led to the wood cracking and me trying to fix it with wood glue.
Comments (0)
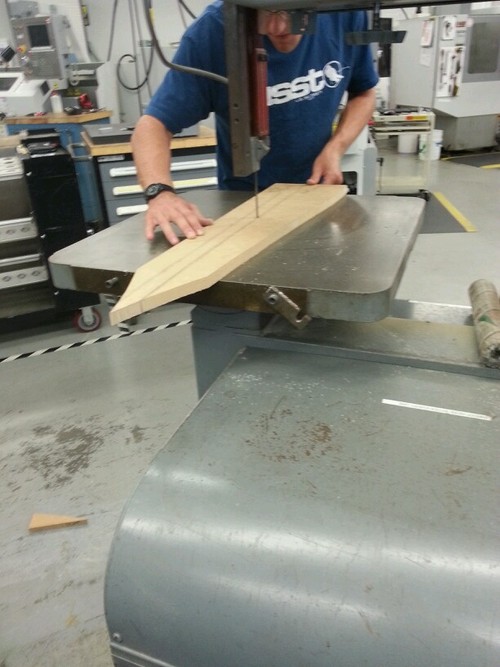

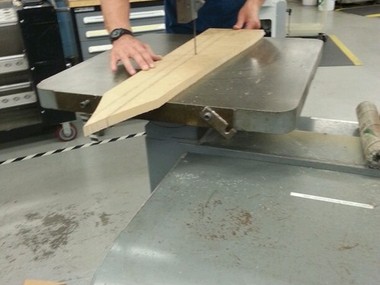

Was going with the plan to stick a metal rod in the middle of the sword to keep it extra sturdy.
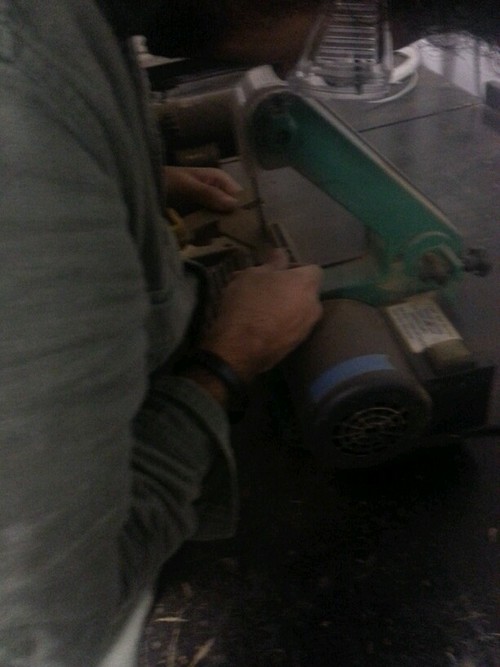
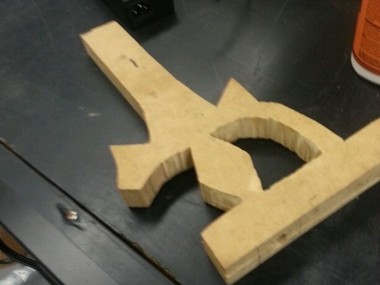
I was able to get the sword cut with a stronger bandsaw and it was awesome after. Still needed to get the hole out of the sword though.
Comments (0)

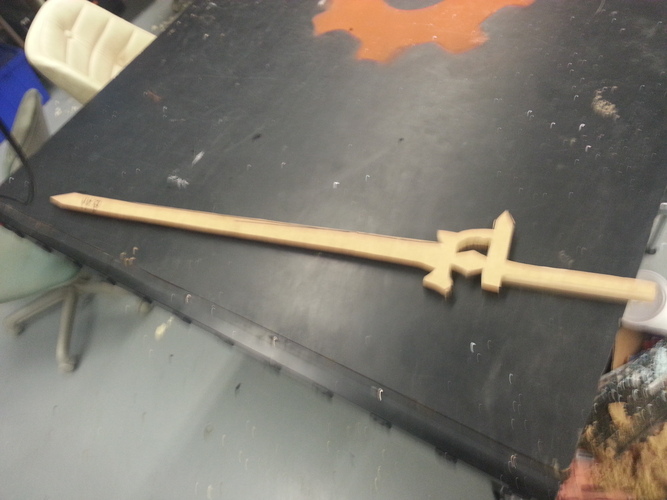
Was able to quickly trace the messed up sword core onto another piece of MDF, this time WITH a handle, and i was able to have that cut out as well.
The cut wasn't super accurate so I'll just have to cut/sand it down myself as well as getting the hole out of the sword hilt..
Comments (0)
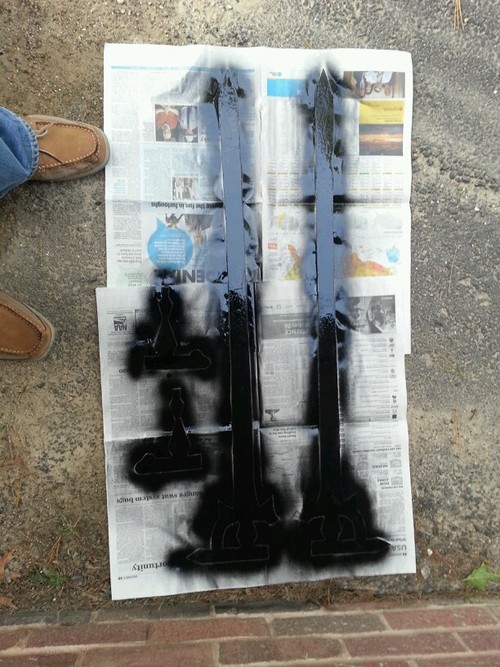
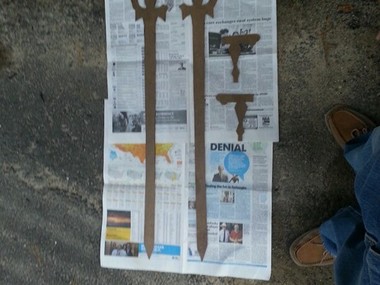
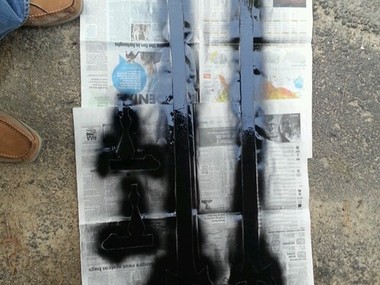
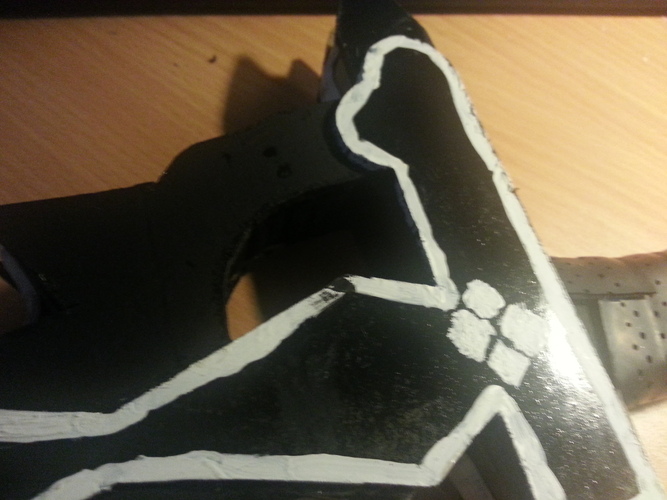
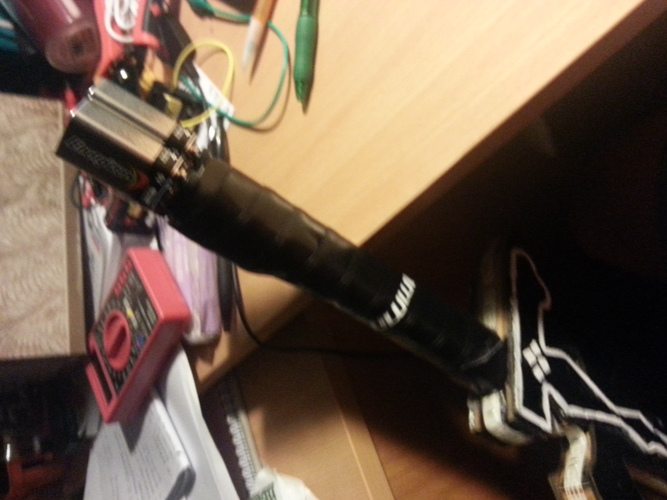
Took the blade faces and hilt designs and got them spray painted black to match the color of kirito's.
Comments (0)
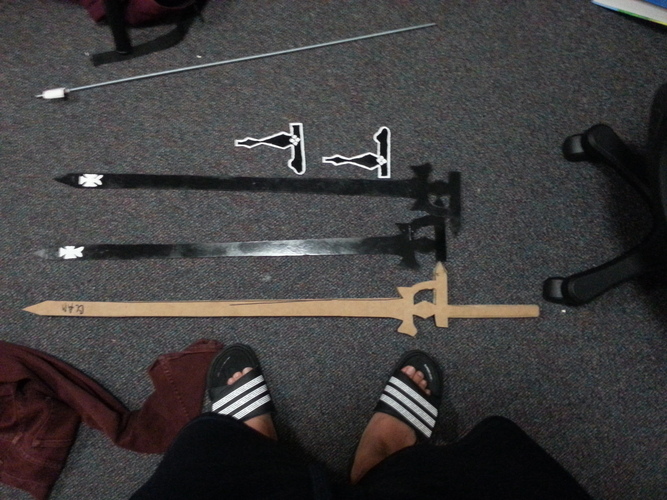
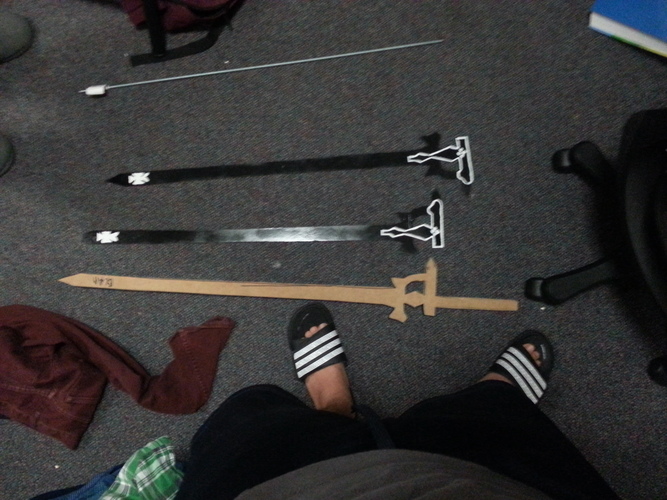


Looked at the picture of the sword and tried to mimic the designs on the blade and hilt faces. They didn't come out perfect but what can i say, I'm not an expert painter
Comments (1)

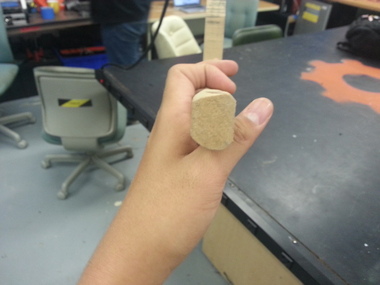

Was able to get the hole out of the sword, again with the drill press and I was also able to smooth the corners of the handle to make it fit better in someone's hand
Comments (0)


Used wood glue to get the blade faces and the hilt designs onto the MDF sword. Came out pretty well in my opinion.
Comments (0)
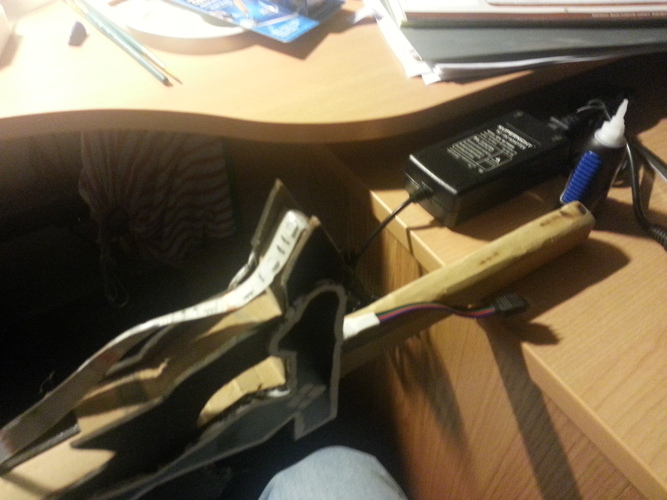
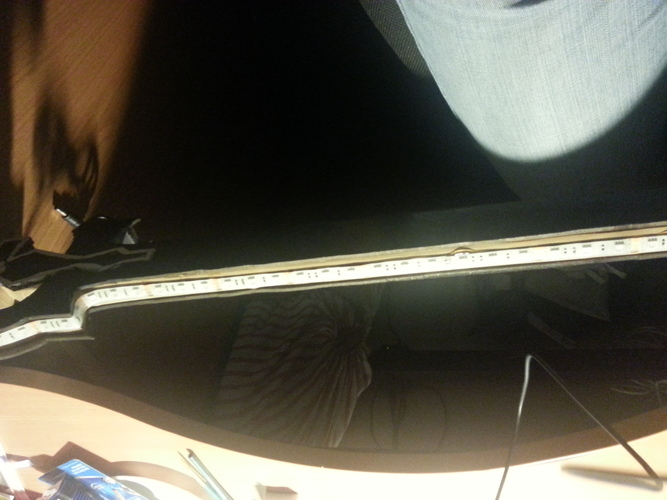
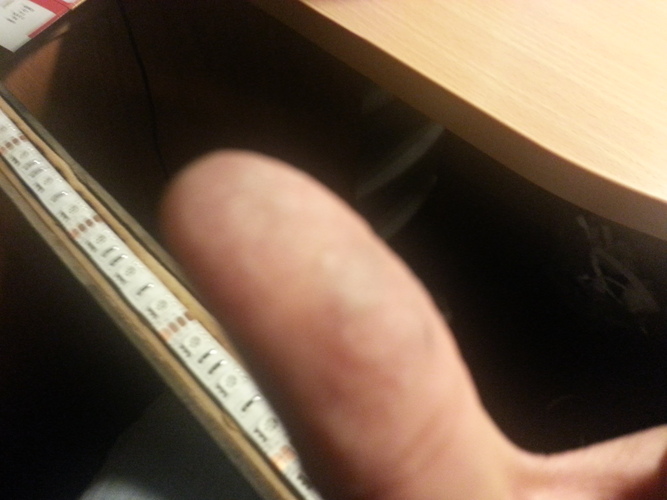


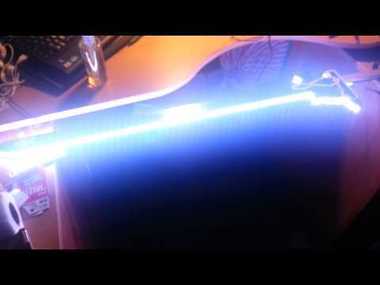
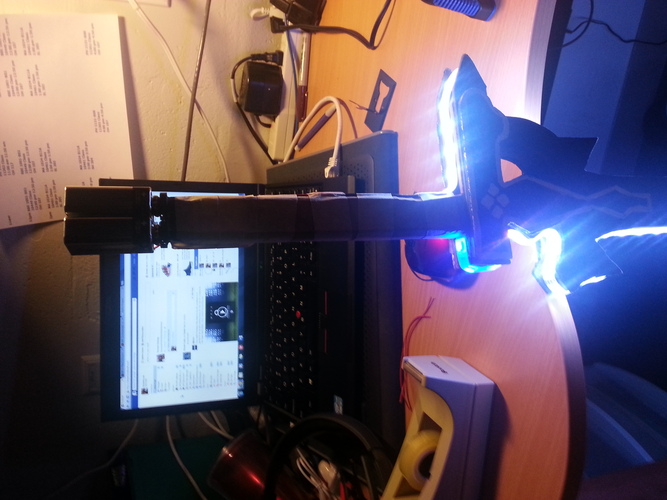
Took the LED strips that i bought off amazon, The sticky adhesive wasn't strong enough for them to stay on the MDF through the turns and corners so I used super glue :P.
The problem I always have with super glue is that It always magically get all over my fingers and gives me a hard time. Thankfully one of my floor mates, April, had some nail polish remover and I was able to get most of it off,
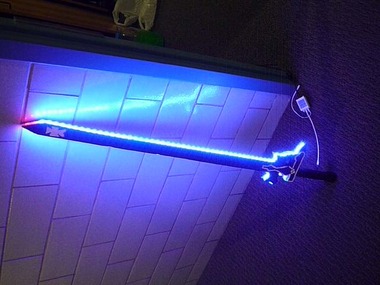
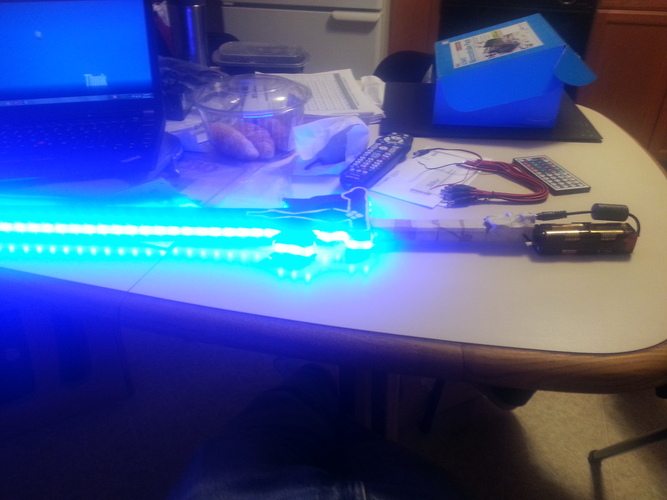
I tested the the blade and its lights and it's turning out pretty cool. On video it has more of the "solid line" kind of light around the blade, that I was hoping to be in real life. In real life though the LEDs can be seen and you see more of colorful lit up dots instead of a straight solid line of light,
I left the LED plug in near the handle so that I could attach the controller part more easily,
Comments (1)
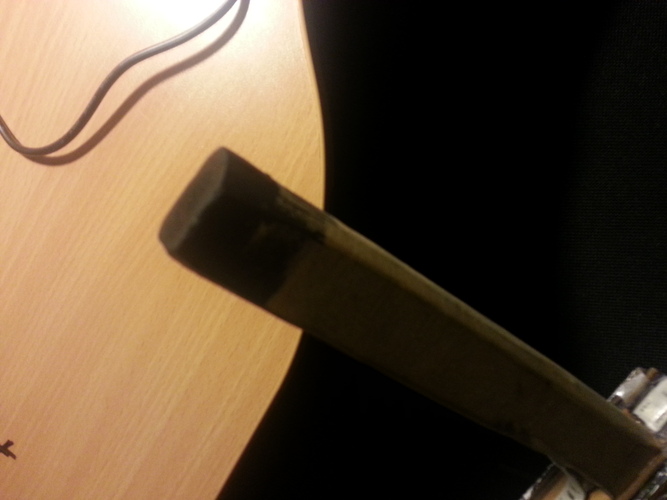


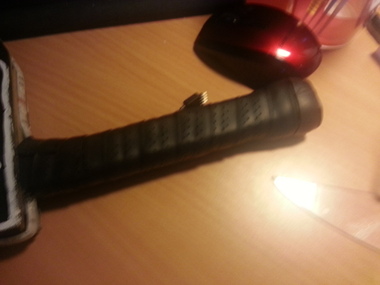
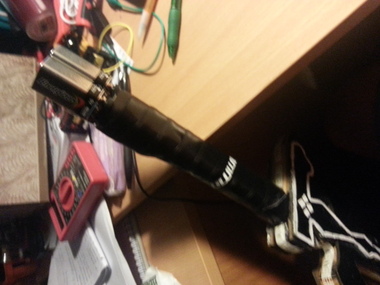
Painted the end of the handle black to keep with the black Elucidator look, because I knew i wouldn't be able to get the grip to extend to the very bottom butt of the sword. Also got the hold in the hilt painted black since wouldn't have anything covering it and to stick with the black sword look.
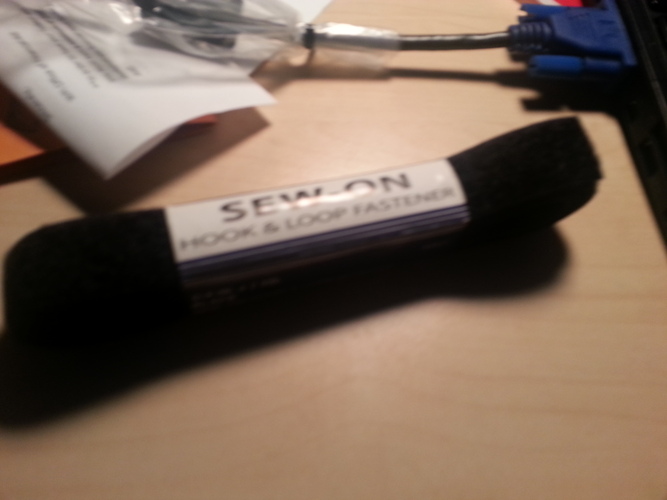
I used the wrap that I had gotten off amazon, measured out the amount needed to wrap the whole handle and cut the rest off. The extra grip was then wrapped around the bottom of the handle so that we could create a pommel for the sword. Then we wrapped the rest of the grip around the handle making it so that most of the connecting wire would be hidden underneath the grip and that only the connector was sticking out. The grip has a nice feel to it.
Comments (0)


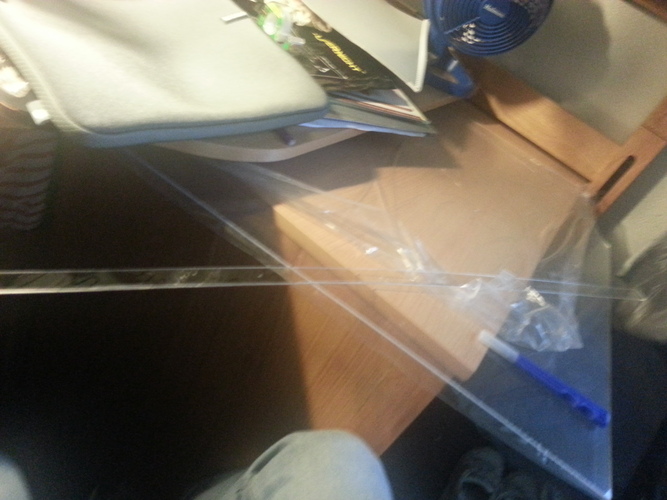

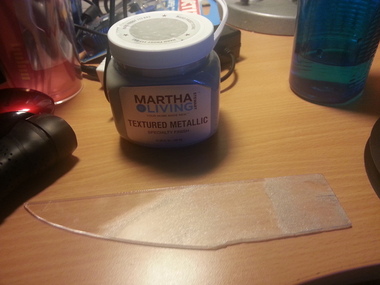
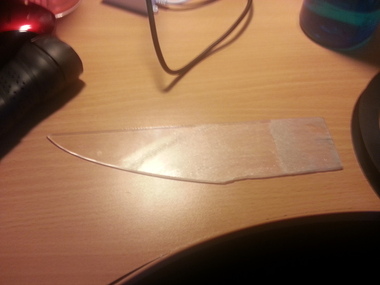
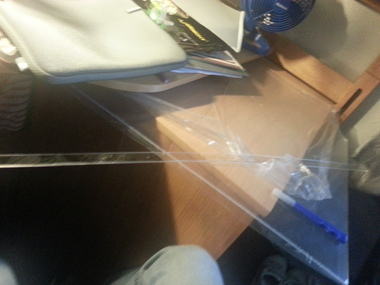
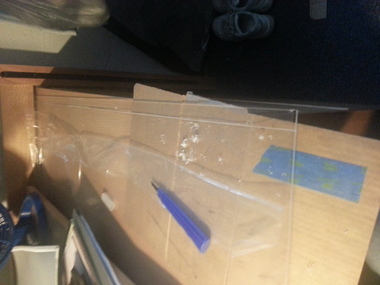
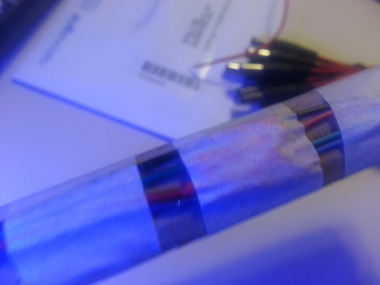
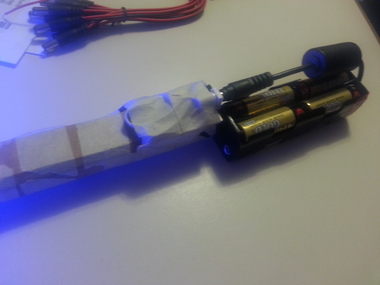
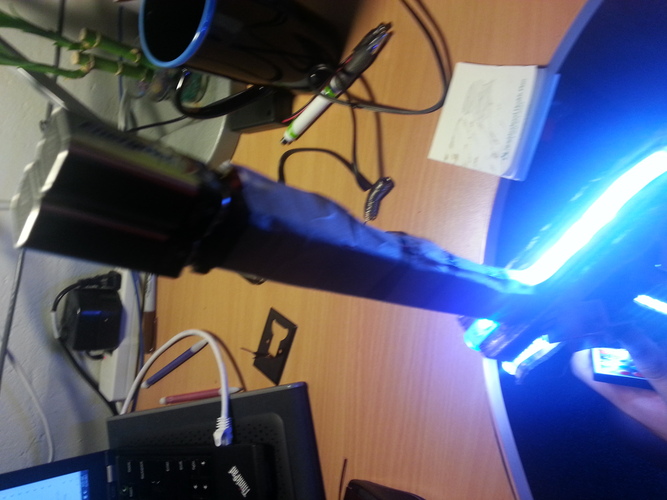
To get the "solid light up blade" look I was told to coat the plexiglass with some greyish paint and that metallic glitter paint would work.We had gotten some at home depo and now it's testing time. I painted onto a part of the plexiglass that had broken off and put it in front of the LEDs to see how much of the light would be diffused. The right thickness of paint was found and all that was left to do was to cut the plexiglass into useable parts.
Man it's tough to cut this plexiglass t.t. Although It would make the sword better i don't think it's necessary for the sword. It took forever to get that one strip of plexiglass cut so I think i'm going to hold off on putting that on the sword until at least after finals if I'm going to add it on at all.
Comments (2)
.jpg)
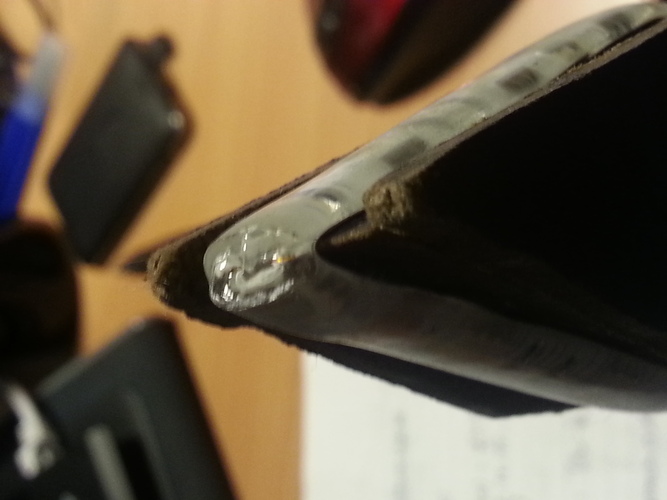
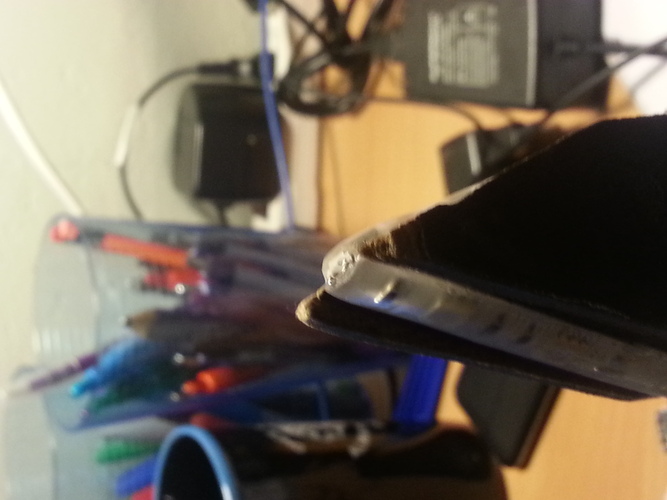


The top part of the tip of the sword was starting to break, NO need to fear though, Super glue should fix it right up!
Comments (0)


.jpg)
.jpg)
.jpg)
.jpg)
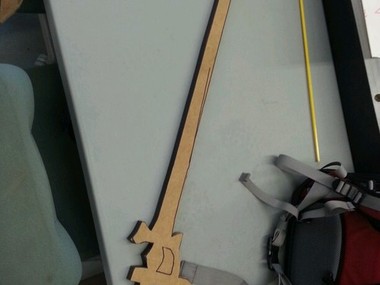
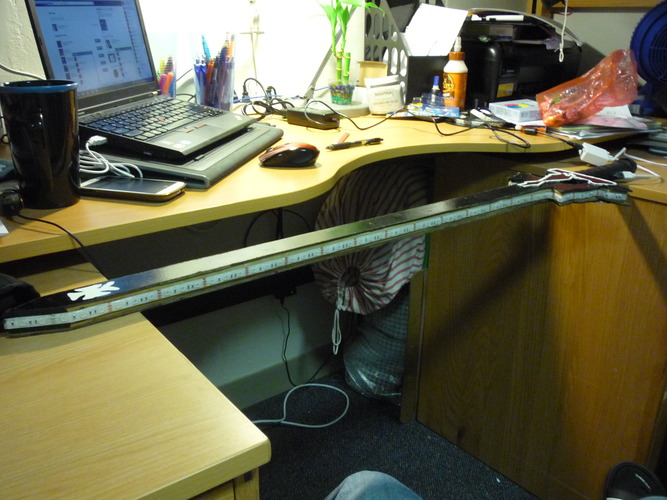
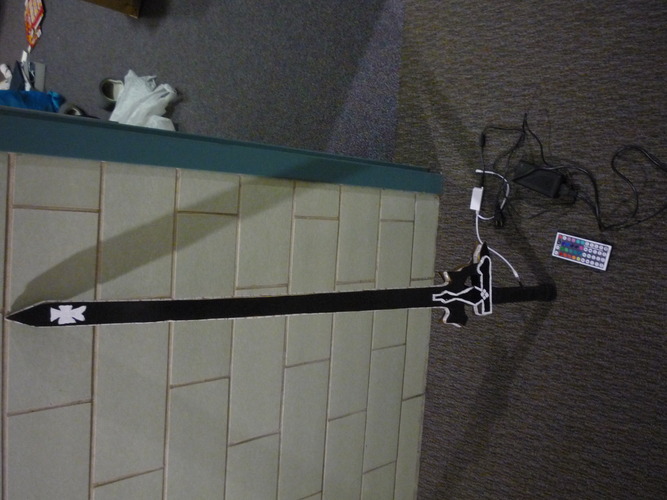
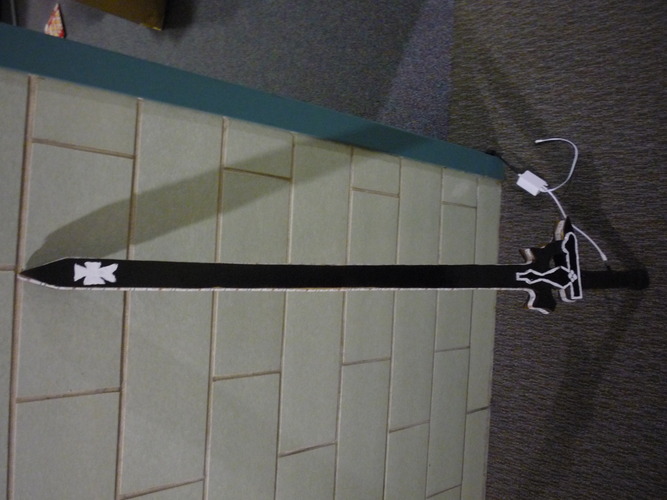
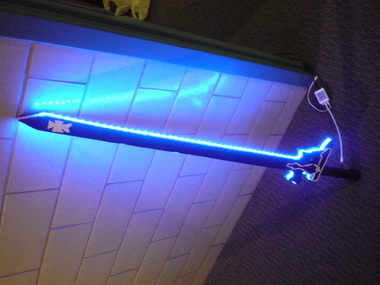
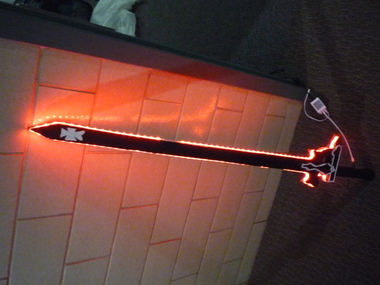
Here are some pictures and videos of the "final" product! The LEDs still have to be plugged in but that's fine for now, until i can find a way for it to be battery powered.
Comments (3)
.jpg)


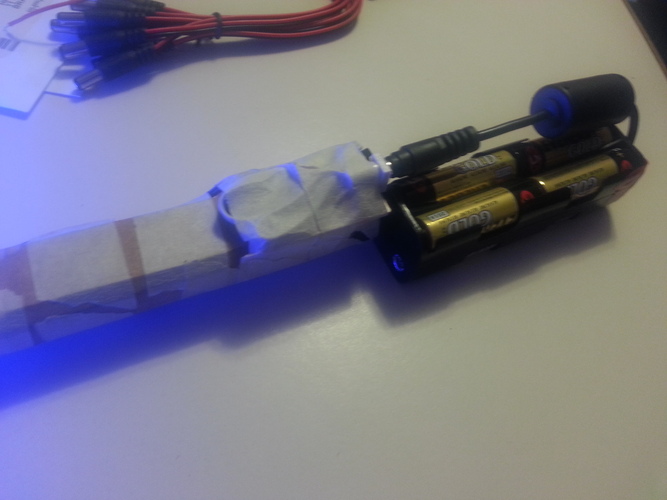
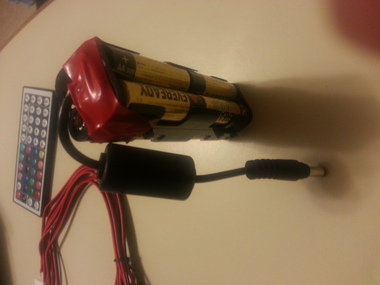

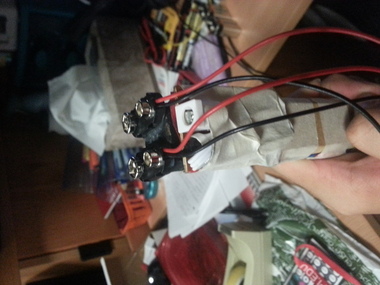
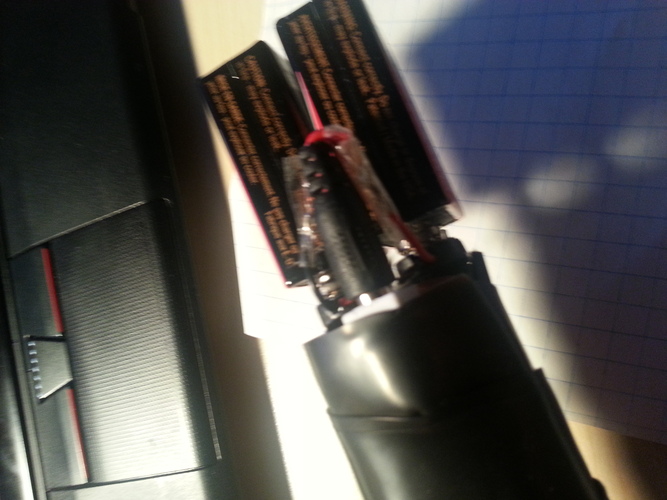
Went to the Artisan's Asylum and was told that the sword could be battery powered! So we soldered a plug onto the battery pack and when tested it worked! It took a while since the batteries were being uncooperative.
Brought it to the computer clubhouse where I was able to take apart the white "control box" and have just the circuit, I stripped the wires, (after taking off the grip t.t) and soldered the wires from the LEDs directly to circuit board's wires, eliminating the need of the connector pins, that were unreliable at times. The sad thing when soldering was that the LED wires and the wires from the box didn't have their green and red wires correct and so I had to adjust and resolder, after soldering all the wires once. Then took the circuit board and the IR sensor and put them at the bottom of the sword end and taped it all to the sword handle.
Tested the sword at home and found that it requires a minimum of 6 AA batteries to power the sword.
All that remains now is to decide:
whether to use 6 or 8 batteries,
how to orientate and attach the battery pack,
and to put another grip on.
Comments (7)
.jpg)
I dunno if you've heard of Volpin Props, but he did a similar thing for the Mass Effect M8 Assault Rifle http://www.volpinprops.com/mass-effect-m8-avenger-assault-rifle-2/
I just tried with a 9V battery, it lights up but not as bright and it can' run colors like white and such
Yeah I've seen some of his works, they're awesome, I don't think I can put the battery inside the handle though cuz i still need to put the grip on it and I would want the battery to be replaceable for when it runs out of juice
My Infinite Mirror project demands a similar voltage potential (18V) but it's actually possible to acquire this voltage W/OUT using multiple batteries! Also, if you're considering to use rechargeable batteries, I'd really recommend only one - it gets dangerous trying to recharge too many batteries at once.
Surprisingly, I'm only using one 3.7V 2000mAh LiPoly battery. I talked to my EE professor and he mentioned using a Voltage "Boost" Converter to increase the potential from 3.7 to 18. Crazy, right? Actually, these boosters are extremely common in electrical appliances, and are available online in many varieties. Feel free to check my page out to find the links I used!


I tried the 2 9-volt batteries as was suggested and it worked! they were able to power the sword AND they're space efficient.
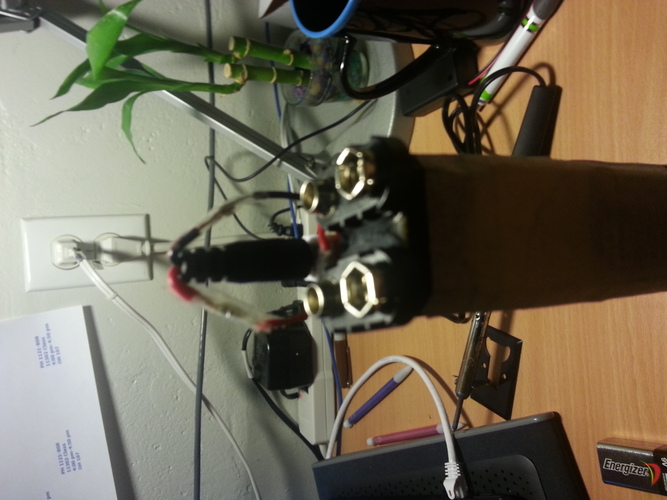
After testing to make sure the batteries would work. I took 2 9 volt battery connectors and super glued them onto the end of the sword handle. I then soldered the wired so that the circuit would have 2 batteries in series connected to the circuit board. This way you can just attach batteries on the end of the sword and you're good to go!
I then put on another black tennis grip so that it goes well with the whole black theme AND it would be easier and more comfortable to hold.
Now you just need to hide the controller somewhere and then you can be on your sword color
changing way :P.
potential video of the final product incoming.
Comments (1)
.jpg)


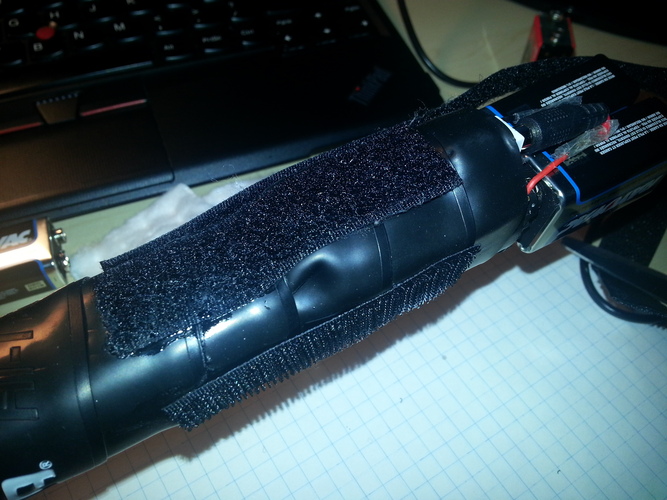
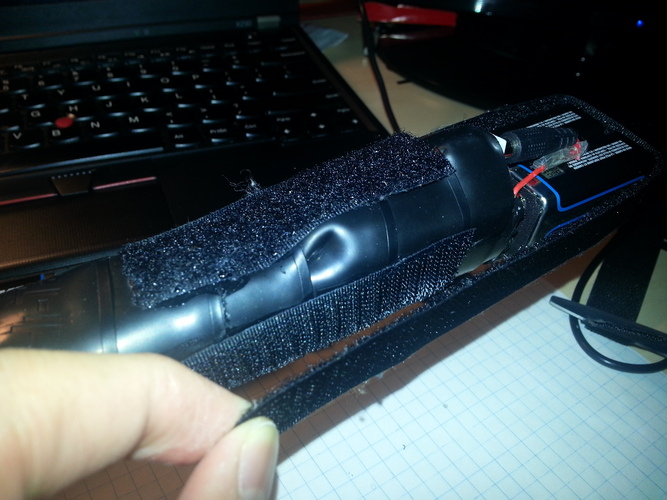
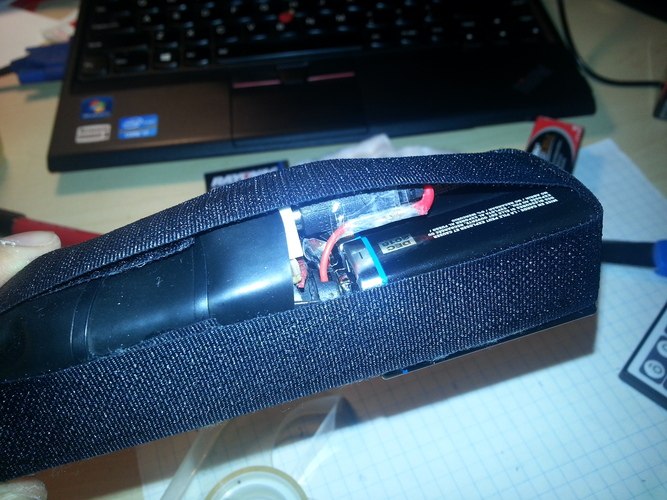
I had been determined to bring my sword to Anime Boston. But I was concerned about the batteries being battered around. So I wanted to bound the batteries to the sword.
I decided to that I could do this simply with a few strips of velcro. Using this method I super-glued velco to the angle so that I could wrap the velcro around the batteries two-ways (in a sort of x formation). This way it couldn't be knocked down using one degree of freedom. This also allows for the batteries to be easily replaced.
scientiffic commented on Securing the 9V B...: "creative use of velcro!"
goodtimes commented on The "final" product: "wow this is really well don..."
scientiffic commented on THE FINAL wireles...: "glad to hear that the 2 9V ..."
srodan commented on Going Wireless!: "I believe I have your answe..."
aniketosen commented on Going Wireless!: "I have poked a few of my EE..."
scientiffic commented on Going Wireless!: "how about 2 9V batteries in..."
blamb commented on Going Wireless!: "Do you guys know of any alt..."
blamb commented on Going Wireless!: "The problem with powering i..."
aniketosen commented on Going Wireless!: "*And if you are able to use..."
scientiffic commented on Going Wireless!: "nice! I was wondering if y..."
srodan commented on The "final" product: "Does this even run on batte..."
scientiffic commented on The "final" product: "congrats on finishing! thi..."
blamb commented on Testing and cutti...: "haha yea, was taking with s..."
scientiffic commented on Testing and cutti...: "this is an instance where a..."
scientiffic commented on Painting the whit...: "if you had access to a viny..."
scientiffic commented on Getting the LEDs ...: "wow the LEDs looks great! ..."
aniketosen commented on Project Overview: "Nice! Also, excellent choic..."
scientiffic commented on Cutting out the b...: "ah ok, that makes sense. i..."
blamb commented on Cutting out the b...: "well, we were able to cut m..."
scientiffic commented on Cutting out the b...: "wow, you cut the detail in ..."
scientiffic commented on Project Overview: "cool! I wonder if aniketos..."