
Designing and 3D Printing Chess Pieces
My Technology, Engineering, and Design class project to design and 3D print custom chess pieces.


- 123D Design aka CAD
- 3D modelling application for 3D Printing. The program is rather simple and not very restrictive; though, some mechaics regarding text and specific designs can be a tad finicky.
- Chess Board
- Suprisingly enough, there are guidelines and general regulations for chess piece sizes which are based on the size of the board and the individual squares.
- 3D Printer
- This is, of course, needed to actually print out your designs.
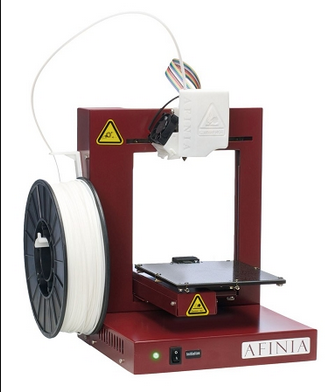
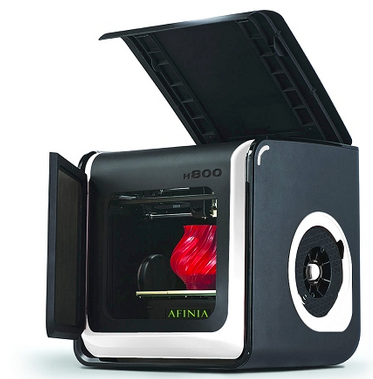
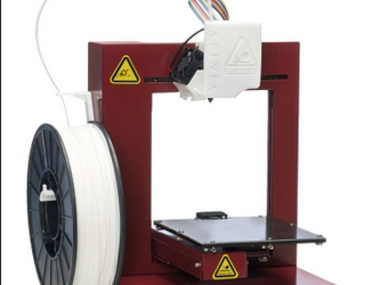
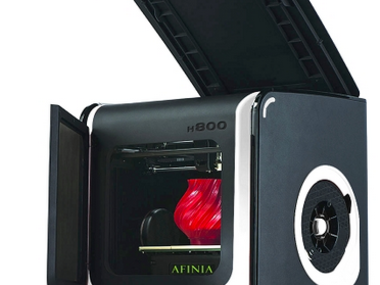
- Currently I have access to the three Afinia 3D printers at my school. Two of them are the 480 models and the third is the 800 model.
- Afinia 3D Application
- This is used to load the 3D models' STL files exported from CAD. After the app loads the models, you connect your computer to the printer and print, managing all the specific printer maintenance and specifics along the way.
Comments (0)


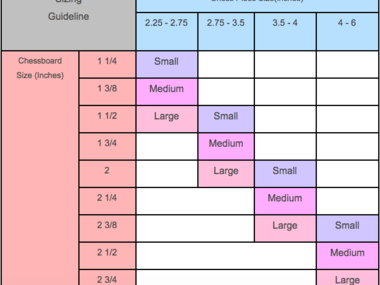
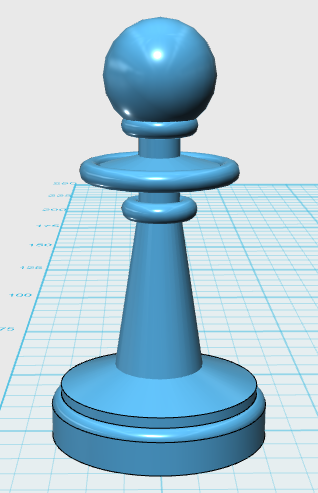
As I mentioned previously, each chess piece is based on the size of the individual squares on the board. Firstly is the base of the piece. For all back row pieces, the base must fill 75% of the square, while all of the pawns must fill 50% of their squares. From there the height is calculated using the base. The base must be a certain percentage of the height, the King, for example, has a base that is 40 - 50% of it's height. I will have a list below of the general percentages for each piece and above I will have a chart displaying the general numbers for the square to piece ratio.
- King - Base: 75% of square; Height: 2 - 2.5 times the base.
- Queen - Base: 75% of square; Height: 2 - 2.5 times the base.
- Bishop - Base: 75% of square; Height: 1.5 - 2 times the base.
- Knight - Base: 75% of square; Height: 1.5 - 2 times the base.
- Rook - Base: 75% of square; Height: 1.75 - 2.25 times the base.
- Pawn - Base 50% of square; Height: 1.25 - 1.5 times the height.
- The heights are very general and as long as you stay within these guidelines and have the pieces remain in their general balnce of height, you should be fine.
Comments (1)


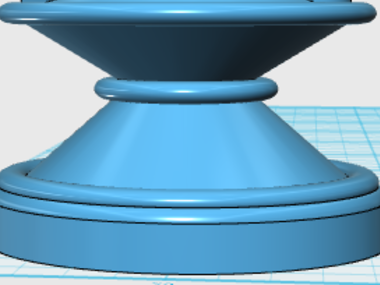
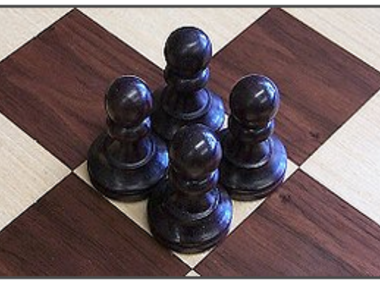
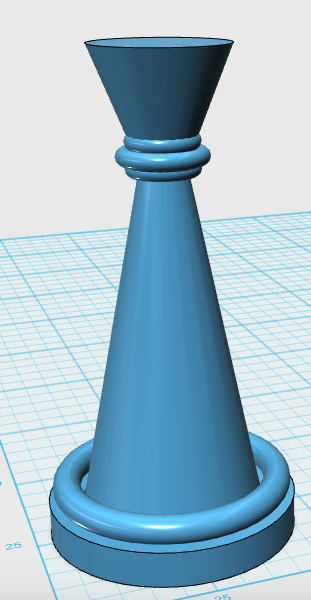
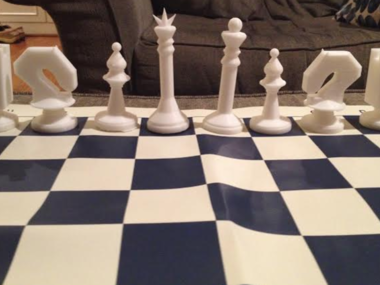
The design process was actually very enjoyable, and after experimenting with 123D Design to get a feel for it, the process of design became quick and methodical. Generally using the same shapes for a majority of the pieces below their "head," just at different heights. I'll go into the individual builds of each piece on their respective steps; though, I will place pictures of the base design and building above.
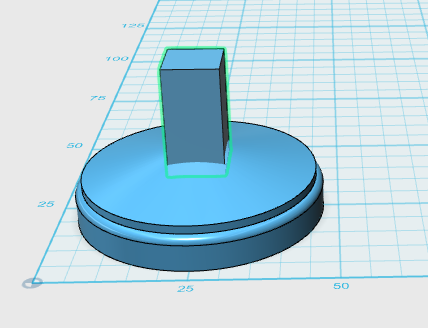
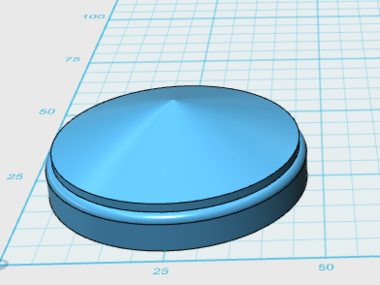
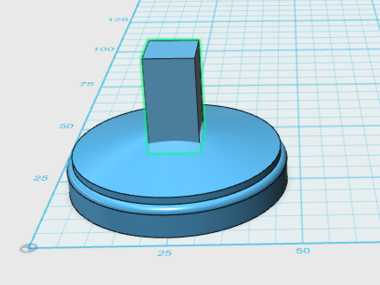
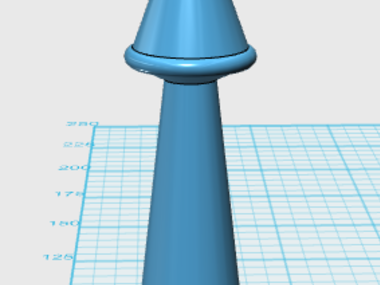
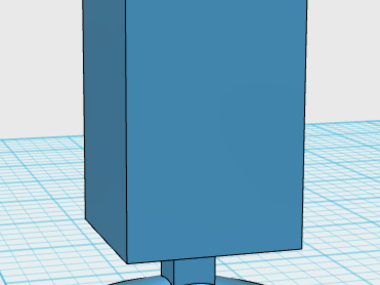
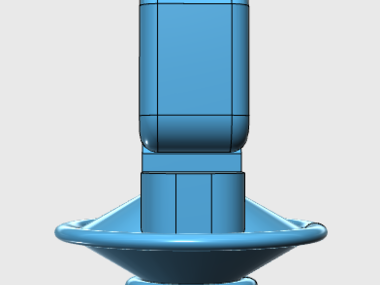
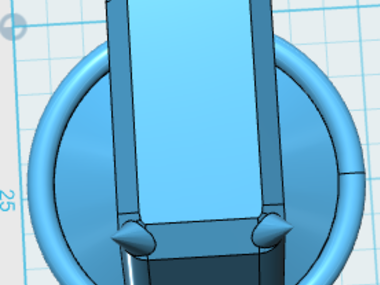
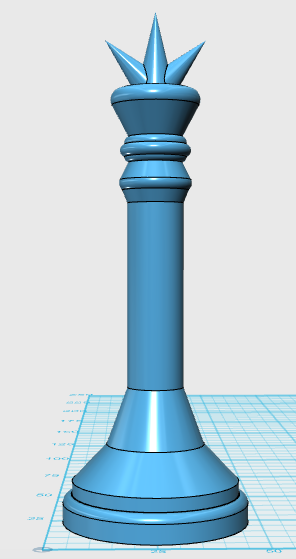
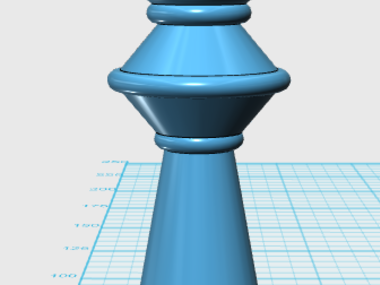
As for my bases, it was designed around a 2 1/2 inch square. The radius was 22.225 mm (123D Design uses millimeters) and was 6.35 mm tall (These measurements are for the back row pieces, not the pawns). The top edge was fileted 1.5 mm, then another cylidner was placed on that with a 21 mm radius and 1.5 mm height. A cone was then placed on that, with a radius of 21 mm and a 5 mm height. In the middle of tis cone I placed either a tall thin cone (all pieces except the rook and the knight), a cube for the rook, and a unique hourglass shaped base for the knight (different sizes for different pieces).
Comments (0)
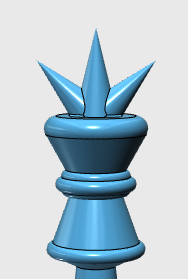

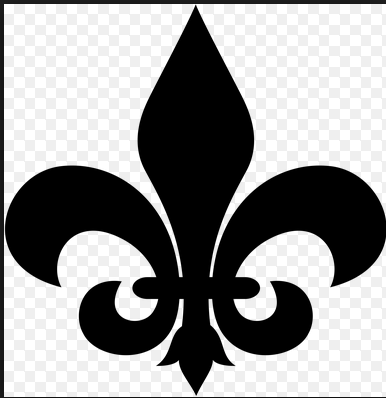
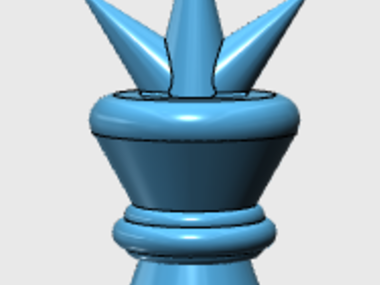
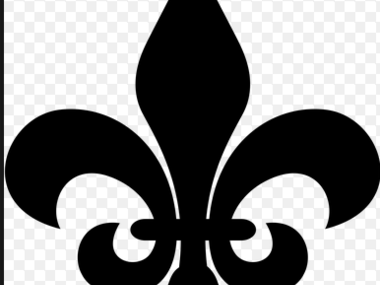
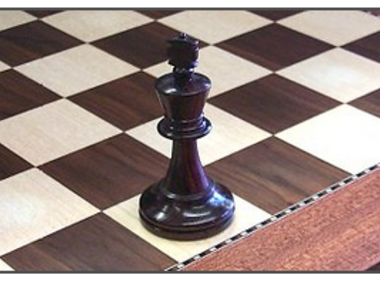
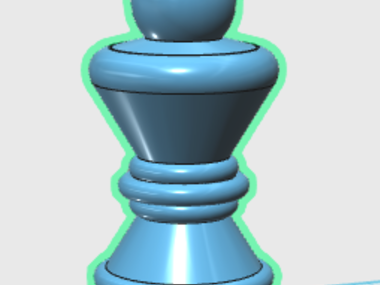
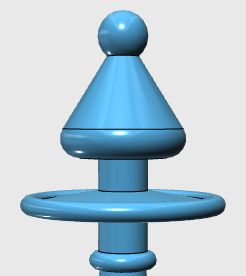
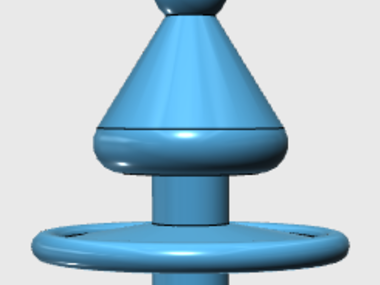
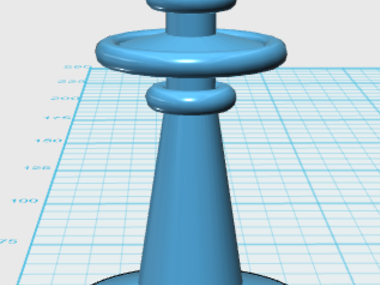
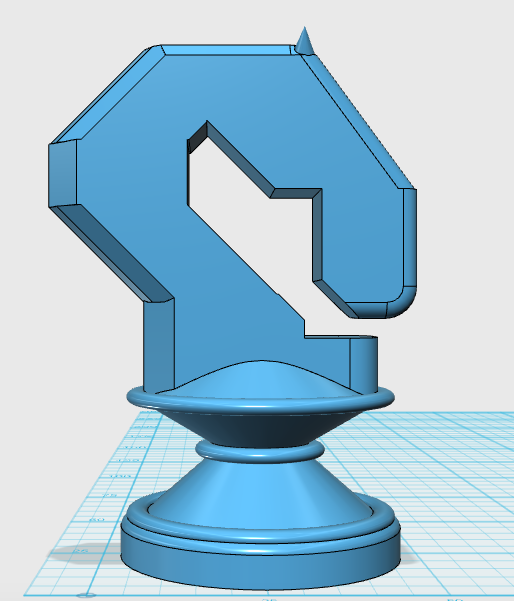
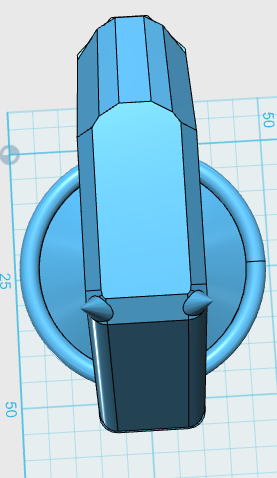
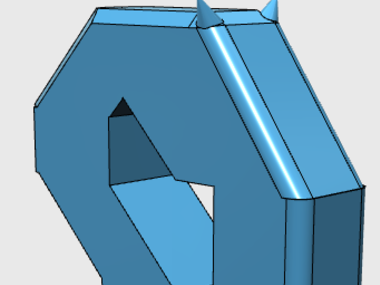
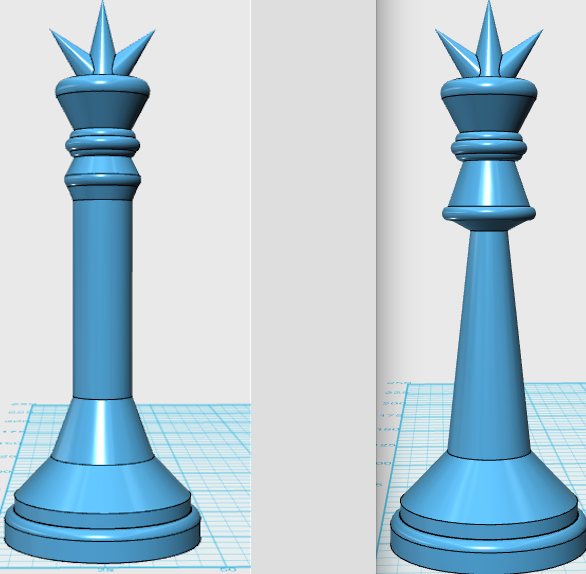
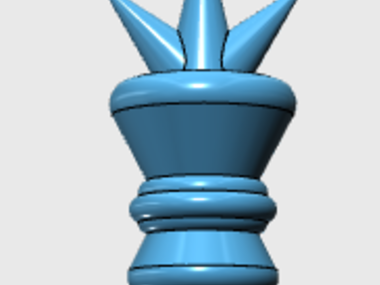
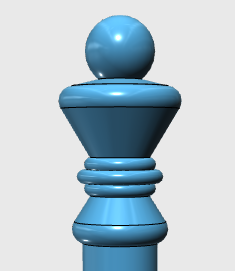
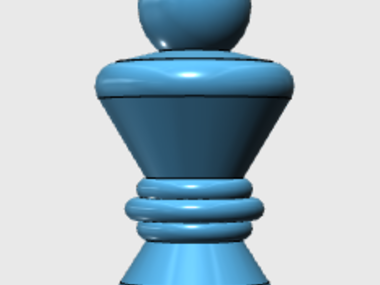
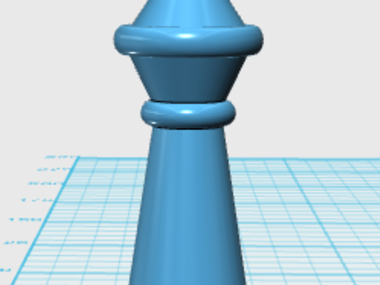
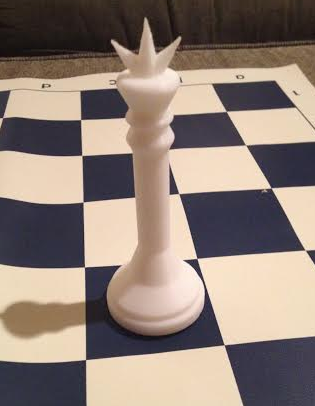
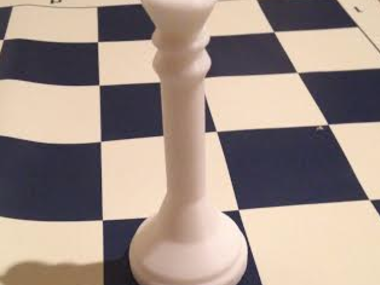
The King was the first piece I designed and also the piece I was most creative and original with. Being the first also made it take the longest, with experimentation, learning the software, etc. The original design was a bit simplistic, later advancing the piece a bit. I didn't want something to flash for the fact of limited space and the printer's limitations, but I also wanted it to recognizeable as the king. As for the final design, I wanted to avoid the typical king with a cross design, the king being the most important piece I really wanted it to be original, so I decided to design the crown based on the Fleur de Lis. The three spikes, and the wrap around its "neck" are where it really shines. I didn't make it exact, simply, once again, for origianlity. Personally, its my favorite piece, and I really enjoyed making it.
Comments (0)


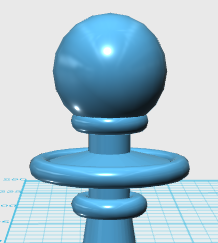
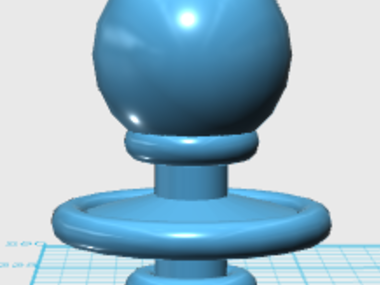
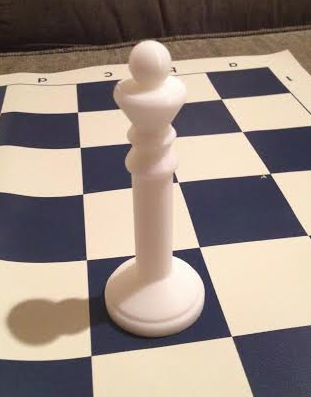
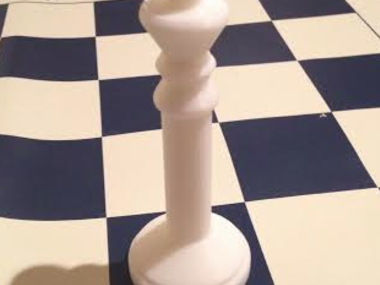
The Queen was the second piece I designed, and, because of its similarity in design to the king, I am placing it under the King step. The process of designing and making the queen was far mor expediant than designing the King. Having learned a number of things, stopping experimentation, and the pieces heavy base on its corresponding king piece was what increased the effeciency. As for its differences from the King, the Queen has a overall rounder structure, the ball on top of its head, and it is slightly shorter.
Comments (0)

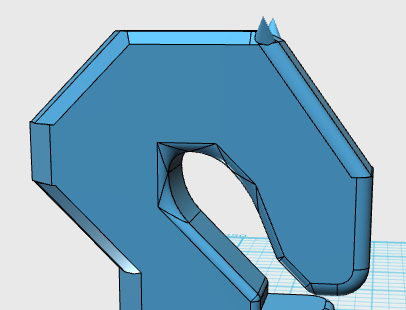
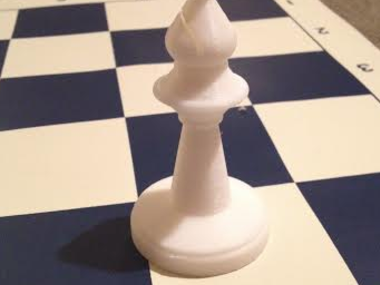
The Bishop was the third piece I designed. The Bishop was slightly based on the Queen, being fairly rounded in structure and the ball on its head. However its cone shaped head is inverted from the queens and it has the larger, single neck piece. The only real problem I encountered in the bishop's design was the little "mouth" most Bishops have. Unfortunately, I have no idea how to make this "mouth," but I will be looking for a way to make it before I send it off to print.
Comments (0)
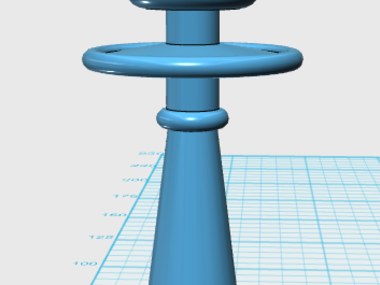
The Pawn was the 4th piece I designed, simply because of it similarity to the Bishop. This is also the reason it is placed beneathe the Bishop. As for its design, its tied with the Rook as simplest in design. As for its actual design, it was the exact same as the Bishop excluding the cone and height.
Comments (0)


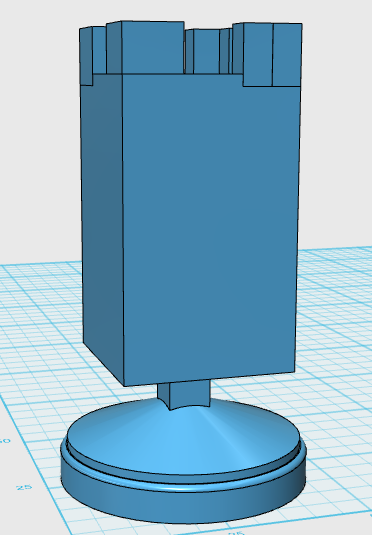
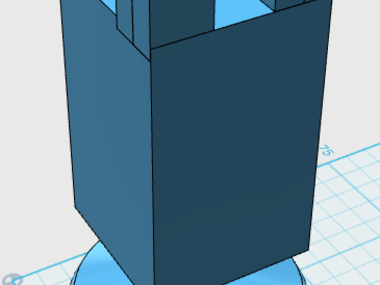
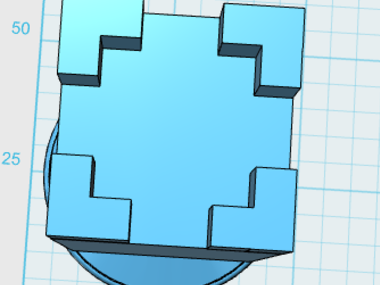
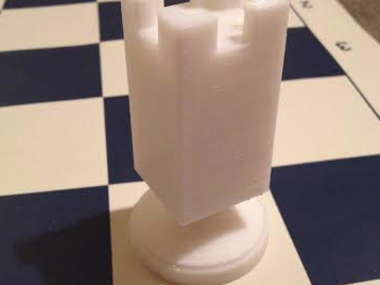
The Rook, as I stated in the Pawn step, is tied with the pawn as the ost basic piece. The Rook was just a bunch of different shaped cubes put together on the generic base. I wanted it to be simple like this, its cube like structure giving it a more "fortress" and "defensive" appearance. While it may simple, I actually really like its design.
Comments (0)


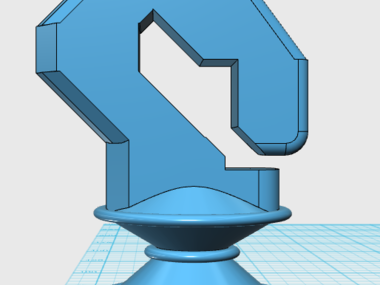
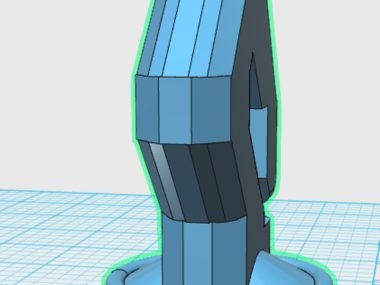
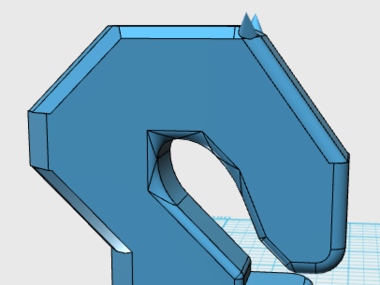
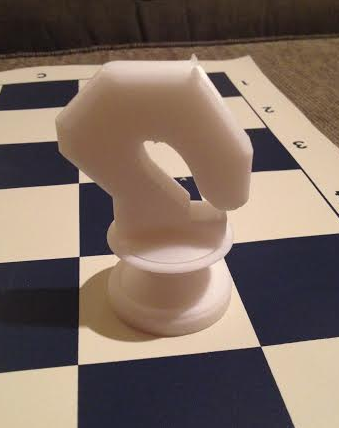
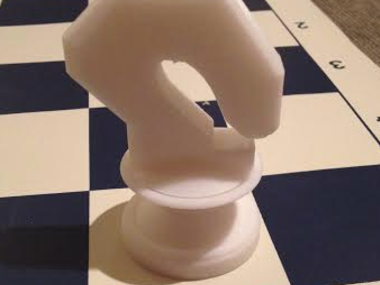
The Knight was, without a doubt, the most difficult and time consuming piece to design. While the King's design time was long, a moajority of it was spent testing 123D Design and what it can do. The knight piece design, on the other hand, was entirely spent figuring out good dimensions, putting together the shapes, designing the nose and the mane. It was exceedingly difficult and ended up consuming about 2 and a half hours of design time. Each part of the piece had to be angled in such a way that the snout would fit, and the entire piece wouldn't stick too far over the sides of the base. I also had to make the sure the piece wasnt too tall. Overall, though it may have been time consuming and difficult, I think the piece came out nicely.
Comments (2)

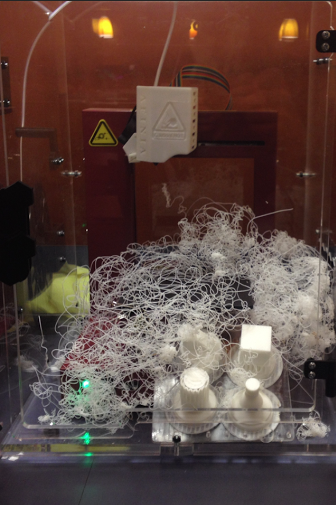
3D printing the pieces themselves ended up being a bit tricky, at least compared to the design process. While not necessarily a difficult task, I faced a large amount troubles with the printer. The first try was, unfortunately, ruined by an electrical surge. Something I believe may have caused all the issues following. As for the second try, the electrical surge seemed to have caused an issue with the 3D printers spout, the part that lays down the material, which stopped the material from coming out. The third try ended in the same, as this try was what made us realize the spout was the problem and not the material. The fourth try ended due to a shift in the plate where the pieces were being printed, causing the pieces to be a bit misalligned. As of writing this, the 3D printer is on its 5th try and has yet to face any problems, hopefully this is also the final try; though, the pieces will not be done for another 22 hours, and that is only the first set. Hopefully the next step will be the end to the saga of 3D printing errors.
Above is a picture of the first set of failed pieces. The rest of the failures did not make it so far into the printing process, so there wasn't much to actually take a picture of.
Comments (0)

Unfortunately, the 3D printing has, once again, ended in failure; though, this time, due to a design error as opposed to the previous printer problems. Due to most of my designs having some sort of over-hang and the 3D printer being restricted to printing from a single angle, the printer attempted to print parts in mid-air or made support beams of a sort that were unable to hold up parts of the pieces. Along with this, some pieces' necks were not large enough to support their "heads," leaving the "heads" to fall off. With all of this in mind, I'm going to go back and attempt to rectify these design flaws.
Above is a picture of the failed pieces, with only one of the rooks coming out alright among the ten pieces I printed. (The rook is at the bottom left of the picture.)
Comments (0)

With the first set of pieces having been lost due to my designs either not being printable or needing more "neck" support, I have to go back and deisgn the pieces with the past failures in mind.
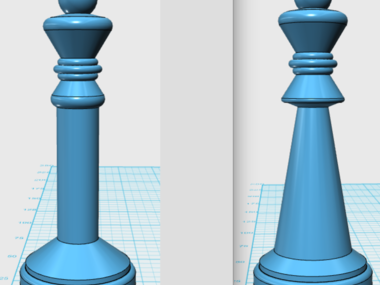
Edit: All pictures comparing the new and old designs in the below steps have the new design pictured on the left and the old design pictured on the right.
Comments (0)

Along the side of me designing the new pieces, we decided to print some of the pieces at a lower quality in hopes that the pieces wouldn't break and lowering printing time (a 16 hour process at the high quality taken down to just 7 hours at the lower quality.) While the pieces turned out well appearance-wise, the quality and durability both being noticably lower. At the moment, I'm still debating whether to go with the lower quality or to use the higher quality for the next print. Either way, however, I will be re-printing the new pieces with their updated designs.
The picture above shows the new, lower quality pieces. While they look nice, they are definitely lower quality. Unfortunately, though, these drops in quality are mostly tactile and difficult to display with an image.
Comments (0)

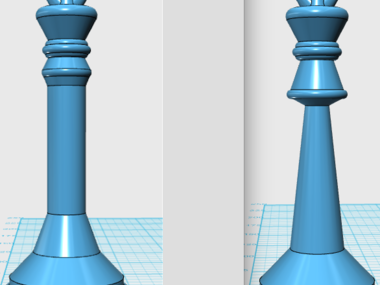
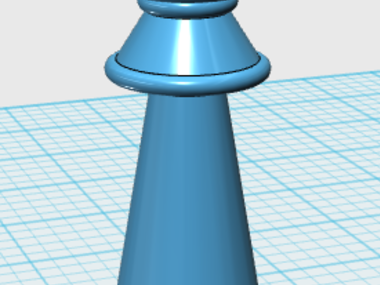
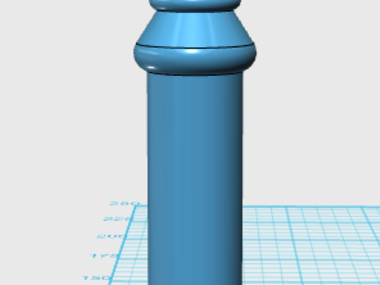
The updated King isn't to drastically changed, though, I will admit I had a hard time changing the design I liked so much, but I think the new design looks really nice, if not better! The new piece now has a column neck instead of the conical shape from before. Getting this just right was what I really struggled with, as a lot of the redesigns were not that great, but I really like the new column design. The head wasn't to different, the bottom half of the head that connects to the neck was made a bit smaller, but nothing else.
Comments (0)

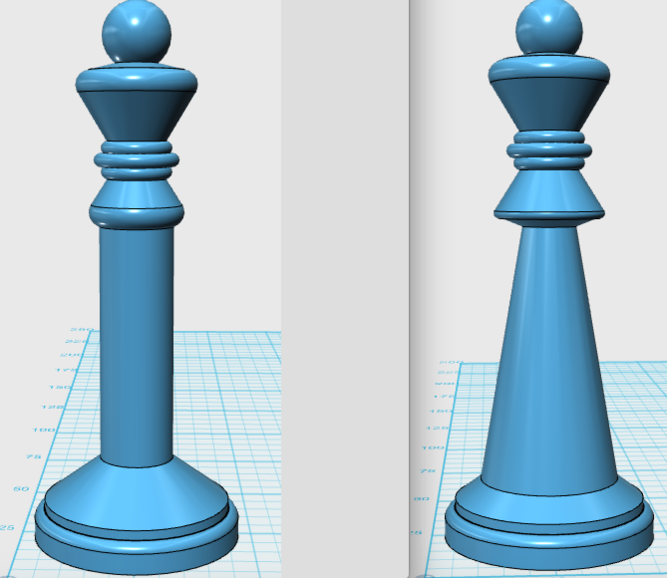
The new Queen design wasn't too drastically different as, like the king, it only needed better support for the head. So, also like the king, I just made the head a bit smaller and gave it a columnal body rather than the conical one.
Comments (0)
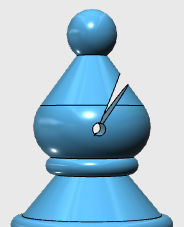


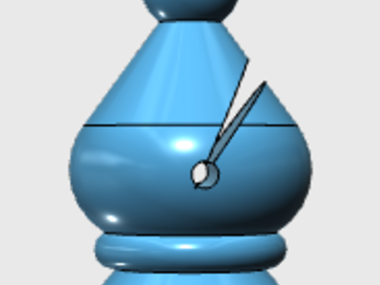
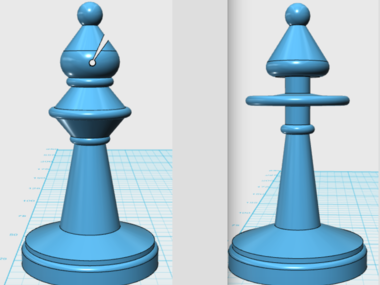
The Bishop was, without a doubt, the most changed piece. I actually made it look more like the generic Bishop, something I had not previously done because of a lack of knowledge of the many CAD functions. Now, it has a slightly bulkier neck and more stable neck ring thing. Also, it has a rounder, less conical head which actually has the little slit, frowny face thing on its head. I really like the new design and think it looks far better than the original.
Comments (0)


The new Pawn design was similiar to the new Bishop design; with the neck part expanded just a bit. Honestly its not too different. As for how I like it, I think it looks pretty nice; though, unlike the other redesigns, I don't think its vastly better than the original, just about equal, actually.
Comments (0)


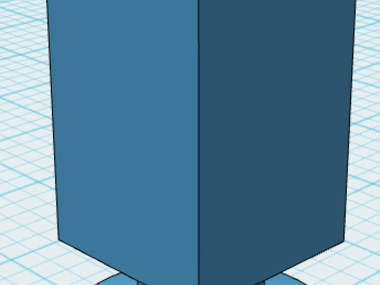
The Rook, being the only piece that consistently made it out of the printer unbroken, didn't recive much of a change, just a slightly bigger base that really wasn't worth taking a comparison picture of.
Comments (0)

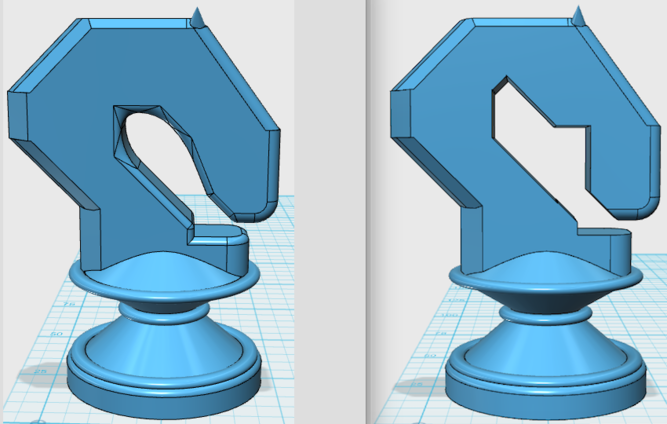

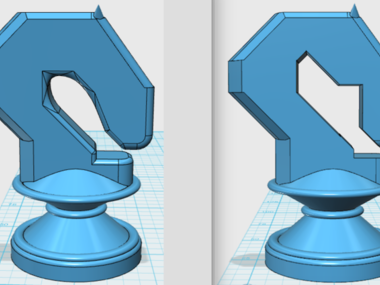
The improved Knight, is, in my opinion, vastly better than the original. Not because of the quantity of changes, as I only really edited a little of the design, but rather the quality of the edit. Its no longer super block looking, having a slightly thicker neck and overall much rounder appearance. Looking a little more like an actual horse as opposed to some blocky steed from an old 16-bit video game.
Comments (0)


Chess is a pretty big hobby of mine and my family's. With my dad, grandpa, and my two cousins being fans as well. Because of my desire for custom chess pieces and the opportunity for gifting these pieces to my family, the idea had a starting point. And, with our Technology, Engineering, and Design Class offering the opportunity to learn about and use a 3D printer, the two desires coalesced into this project.
Comments (0)
I don't know what went wrong yet, but it looks as though the 3D printer exploded last night. I was trying to print at the higher quality from the original set, this is why I updated all of the models and designs: so they would work with the higher quality print. Apparently, the printers don't like chess pieces...
I'm going to assume this is another printer problem and not an issue with the designs and I'll retry printing the pieces... again...
Comments (1)


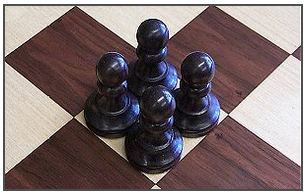
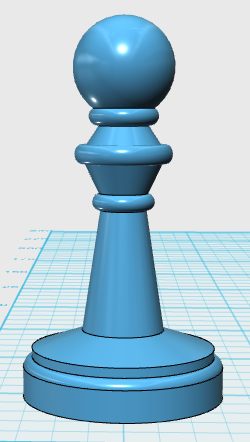
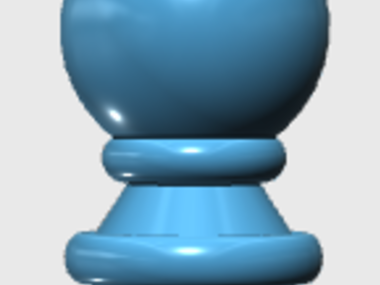
The first 8 pieces printed and came out perfectly! The pictures are above.
My next pieces are printing now and the pawns will start after that. I'm hoping all the issues are over with and that the next pieces will also print out well.
Now, about a month later, all of the peices have printed for both the black and white sides. I feel all the pieces have turned out really well and I'm glad to finally have a complete set.
(Sorry for the current lack of pictures of the complete set, I have been very busy with school as of late; however, I hope to be able to take and put up the pictures ass soon as I can.)
scientiffic commented on Printing in a Hig...: "These look fantastic - cong..."
scientiffic commented on Printing in a Hig...: "I feel you! This has happe..."
gnickell2017 commented on Designing the Knight: "Oh, I completely forgot to ..."
scientiffic commented on Designing the Knight: "What type of 3D printer wer..."
scientiffic commented on Specific Piece Sizes: "I never thought about it, b..."